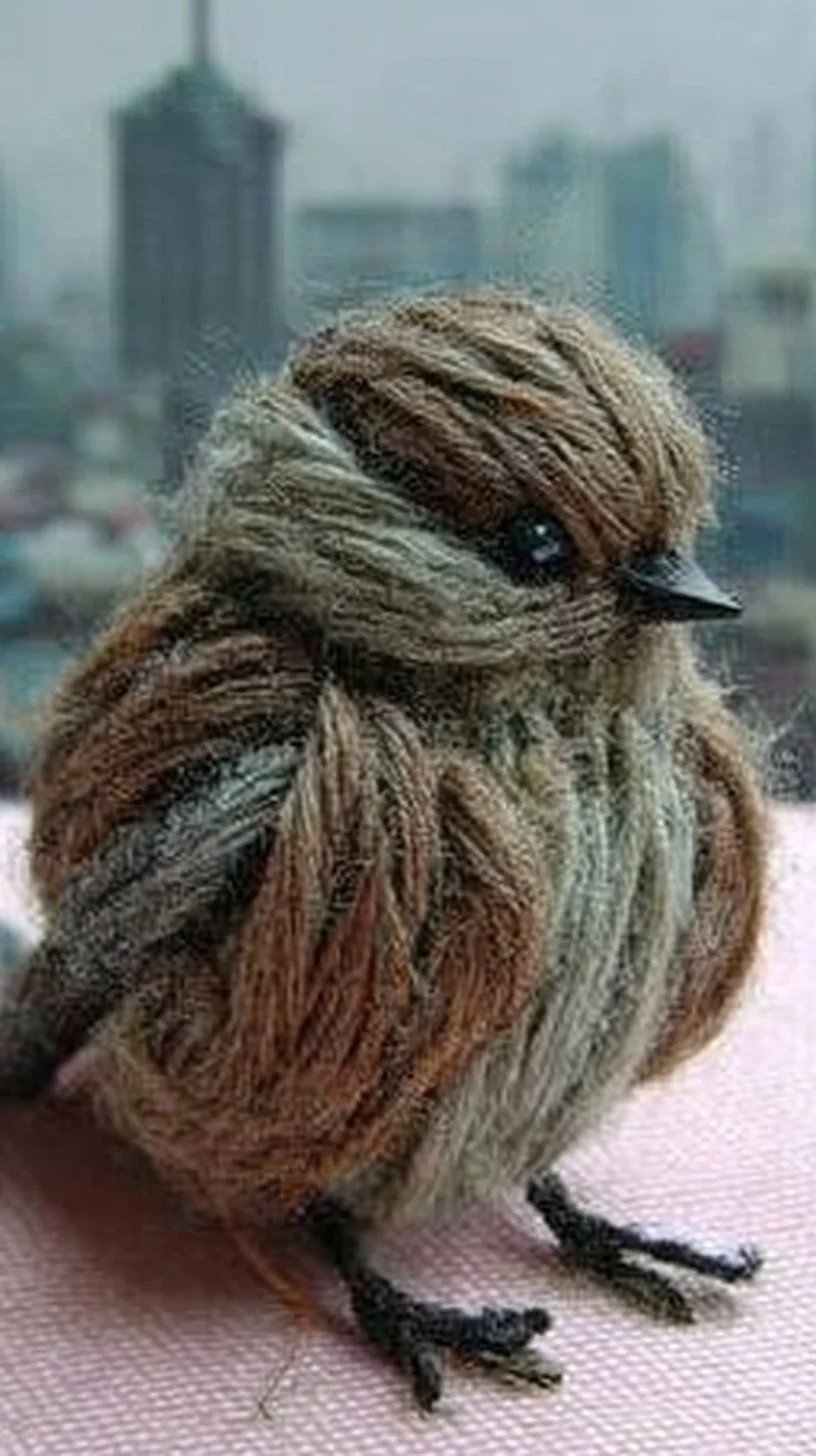
DIY Cute Yarn Birdies You Can Make in Minutes
I still remember sitting at my kitchen table while my kids did their homework and my mother called to ask about Sunday dinner. As a proud forty-something American mom, I love filling our home with small handmade touches that tell a story. My son, who is ten, and my daughter, who is nine, love to add their doodles to my projects, and sometimes my husband and I will sip tea and string yarn together after the kids are in bed. These little birdies started as a rainy-day craft, inspired by the crocheted ornaments my grandmother kept on her mantle. Sharing them with neighbors and giving them as tiny gifts to schoolteachers has become a weekend ritual. If you like cozy, approachable decorating ideas that blend family memories with modern home décor, this is a perfect, quick craft to add warmth to any room.
Quick supplies and simple techniques for busy households
Creating yarn birdies does not require a closet full of craft supplies. Start with basic materials: yarn in a few favorite colors, scissors, a glue gun or fabric glue, small styrofoam or yarn-wrapped cores if you want a round body, and a few beads or tiny felt scraps for eyes and beaks. For interior styling on a budget, choose a neutral palette with one accent color that matches your living room or bedroom. The technique is forgiving: wrap yarn around a small cardboard ring or balloon, tie it off, and shape it with scissors. If your children are between 8 and 12, they can safely help with wrapping and gluing while you handle hot glue. Practical tip: set up a craft tray to contain stray yarn and make clean-up quick. This approach keeps decorating tips realistic for busy families and supports collaborative projects with kids and neighbors.
Styling birdies as shelf and mantel accents
Once you have a handful of birdies, think about placement. Group them on a mantel with a mix of books and potted plants to create layered texture. Use odd numbers, like three or five birdies, for a more natural arrangement. Try varying heights by placing some on small wooden blocks or cake stands to add dimension. For interior styling that feels curated, pick one shelf in your living room and build the display around a family photo or a favorite ceramic piece. A small anecdote: my daughter loves to set the birds near her science books; she says they keep her company during study time. Practical tip: secure tiny birdies with museum putty if pets or little siblings are active in the home. These small touches bring decorating inspiration into everyday spaces.
Creating playful garlands and mobiles for cozy corners
Stringing multiple birdies into a garland is an instant update for a reading nook or entryway. Use thin twine or sturdy ribbon and space the birds about 6 to 8 inches apart. For mobiles, suspend three to five birdies from a wooden hoop and hang near a window where they can gently sway. This adds movement to a room without overwhelming the decor. If you are aiming for a cohesive look, coordinate the yarn colors with throw pillows or curtains in the same room. A practical tip: attach birds with small clothespins so you can rearrange or wash the garland easily. I once made a mobile for my son’s homework corner and he said it made studying feel more fun. These ideas are easy to implement and give immediate decorative payoff.
Tabletop arrangements and center-of-attention displays
Yarn birdies make charming tabletop decor for coffee tables, bedside tables, or kitchen islands. Create a simple centerpiece by placing a cluster of birdies in a shallow tray with smooth stones or faux moss for texture. For a more elevated look, perch a bird on the rim of a decorative bowl or drape one over a stack of hardcover books as a playful accent. Use them to punctuate a vignette of candles and ceramic vessels to introduce softness and color. Practical tip: mix materials like wood, glass, and fabric to maintain balance in your interior styling. My neighbor loved this idea and brought a trio of birdies to our last book club meeting to decorate the snack table; everyone ended up asking how to make them. These small decorative pieces become conversation starters.
Customization, gift ideas, and family craft nights
One of the best parts of yarn birdies is how customizable they are. Add tiny stitched initials for teacher gifts, glue on little beaded eyes for sparkle, or use patterned yarn for a vintage look. Host a family craft night where each person personalizes a birdie; my siblings and I once made a dozen in an evening and labeled each with a memory from our childhood. For practical gift packaging inspired by decorating tips, tuck a birdie into a simple kraft box with shredded paper and a handwritten note. If you plan to sell or gift these at community fairs, attach a little card with care instructions for long-lasting home décor. These projects teach kids crafting skills and create keepsakes that reflect personal stories and interior styling preferences.
Conclusion
Handmade accents like yarn birdies are an easy and affordable way to refresh your home décor and spark creativity in the whole family. If you want a step-by-step visual guide to making similar pieces, check out this helpful tutorial: DIY Cute Yarn Bird : 5 Steps (with Pictures) – Instructables. Try a few techniques, involve your kids or neighbors, and let these little birdies bring new warmth and inspiration to your decorating routine.