Kid-Made Christmas Ornaments: Fun and Easy DIY Holiday Crafts
As winter settles in and the enchanting aroma of cinnamon and pine fills our home, I find myself transfixed by the twinkling lights outside. The excitement about the upcoming holidays is palpable — the warmth of family traditions, the heartwarming stories from my parents about their childhood Christmases, and the laughter that erupts between my two kids, ages 8 and 12, as we embark on our festive projects. Each year, we gather around our kitchen table, clad in our comfiest holiday sweaters, ready to create magical decorations. This is not just about adorning the tree; it’s a cherished time for us to bond, showing them the joys of creativity while passing on traditions that have meant so much to me.
Let’s dive into some festive and fun crafting ideas to make your home feel extra special this holiday season. These kid-made Christmas ornaments not only add that personal touch to your decorations but also create wonderful memories you’ll treasure forever.
1. Salt Dough Ornaments: Timeless Treasures
One of the first crafts we always create as a family is salt dough ornaments. Simple and straightforward, this timeless activity has a way of bringing out everyone’s creativity. With just three ingredients – flour, salt, and water – you can create dough that’s moldable and easy for kids to shape into their favorite holiday designs.
Recipe and Tips
To make the salt dough, mix 2 cups of flour, 1 cup of salt, and 1 cup of water in a bowl until it forms a clay-like consistency. Knead until smooth. Roll out the dough to about 1/4 inch thick, and let your kids use cookie cutters to create shapes like stars, Christmas trees, or gingerbread men. Don’t forget to make a small hole at the top for hanging!
Once baked at 200°F (about 1-2 hours), the possibilities are endless. Let the kids paint their creations, adding glitter, sequins, or even pressed leaves for a touch of nature! These ornaments can become cherished keepsakes, and each year as you hang them up, you’ll be reminded of the laughter shared during their creation.
2. Upcycled Ornaments: Eco-Friendly Festivity
As a family who appreciates the beauty of being sustainable, we often look for creative ways to upcycle items around the house. This holiday season, turn ordinary items into extraordinary decorations that make an eco-friendly statement.
How-To Guide
Empty toilet paper rolls, bottle caps, and fabric scraps can become delightful ornaments with just a bit of imagination. For instance, toilet paper rolls can be painted and cut into rings, which you can then glue together to form festive shapes like wreaths.
Another favorite is to create “Pinecone Friends.” Use collected pinecones as a base, attaching googly eyes, pipe cleaners, and acorns to create charming characters. We’ve had a blast giving these little creatures names and stories about their adventures.
By involving the kids in research and materials gathering locally, you instill in them an appreciation for the environment while making beautiful decorations that are meaningful and unique.
3. Photo Ornaments: Memories in the Making
One of the sweetest crafts we’ve done involves turning our cherished family photographs into ornaments. It’s a beautiful way to share fond memories with friends and family during festive gatherings.
Craft Steps
To create these ornaments, print photos of your family from past Christmases. You can choose to mount the photos on cardboard circles or cut them into fun shapes. To add flair, we like to embellish them with some glitter or ribbon around the edges.
Use a glue stick to stick the photo on a piece of cardboard and seal it with a layer of decoupage glue to give it a glossy finish. Finally, attach a string for hanging, and voila! As you adorn the tree with these little snapshots, you can’t help but smile at the memories each ornament evokes.
4. Painted Wooden Ornaments: A Splash of Color
If you’re looking for a craft that combines fun and fine motor skills, painted wooden ornaments might just be the answer. These can be found at craft stores or even online, and their versatility makes them perfect for customization.
Crafty Ideas
Let your kids unleash their artistic side: use acrylic paint, markers, or even stamp sets featuring festive designs. While painting, my children often come up with funny names for each ornament, inspired by their designs. For example, an adorable snowman might get dubbed “Chilly Charlie,” bringing even more customization to our decor.
Once painted, sprinkle a bit of glitter for that holiday sparkle and finish with a protective topcoat. The beauty of this project is that they double as gifts for relatives, making it a win-win for a beautiful holiday season.
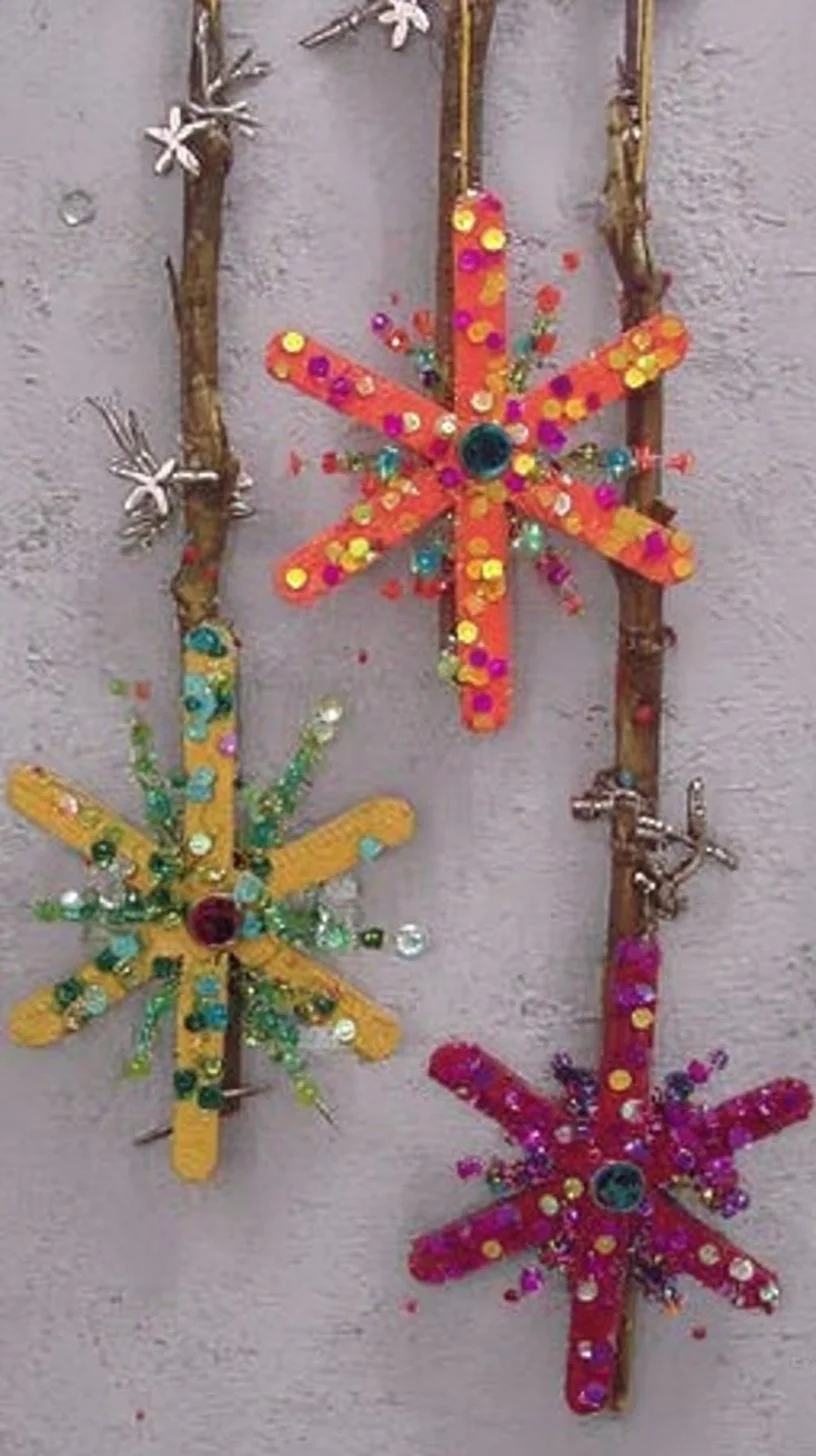
5. Beaded Ornaments: Sparkling Creations
Beaded crafts have always been a delight in our household, bringing hours of focused activity filled with giggles and stories. Creating beaded ornaments can be both a tactile and colorful experience as your children design their creations.
Instructions and Inspiration
Provide a variety of beads in seasonal colors – think reds, greens, blues, and golds. Pipe cleaners work wonderfully as a base; simply let your child string the beads in various patterns. Twisting and bending the pipe cleaners into shapes such as candy canes, stars, or simple wreaths adds another level to this craft.
We often turn this into a lesson in colors and patterns, and it’s amazing to see the creativity and skill my kids show each year. Handing these ornaments out lets them feel proud about their handcrafted gifts — a wonderful way to spread holiday cheer.
Conclusion
So there you have it — a collection of joyous crafts to fill your home with laughter and love this holiday season. Take these ideas and let your children’s creativity shine, creating memories that will last a lifetime.
Remember, the beauty of these kid-made ornaments lies not just in their charm, but in the stories they tell and the memories they evoke. As you hang these heartfelt creations, transport yourself back to the moments spent crafting together. Embrace the warmth of your home styled with festive inspiration that truly reflects your family’s story. Happy crafting!