Categories
St Patricks Day

Charming Clover Crafts for a Welcoming Home

I still remember the first time my neighbor handed me a tiny hand-painted clover she’d made with her daughter. It was one of those ordinary Tuesday afternoons: school drop-offs, after-school snack negotiations, and a sink full of dishes that never seems to disappear. With two kids aged 8 and 11, our house is a steady hum of homework, soccer practices, and cozy movie nights. Little seasonal touches have become our family’s quiet rituals—something small to make the hallway look happy for the kids as they come home. Those tiny crafts turned into weekend projects we all shared, and suddenly the house felt more like a lived-in scrapbook than a showroom. If you love warm, approachable decorating inspiration that works around school schedules and family routines, these ideas will be perfect for adding charm and personality to your home.

Clover Front Door Wreath That Greets Guests

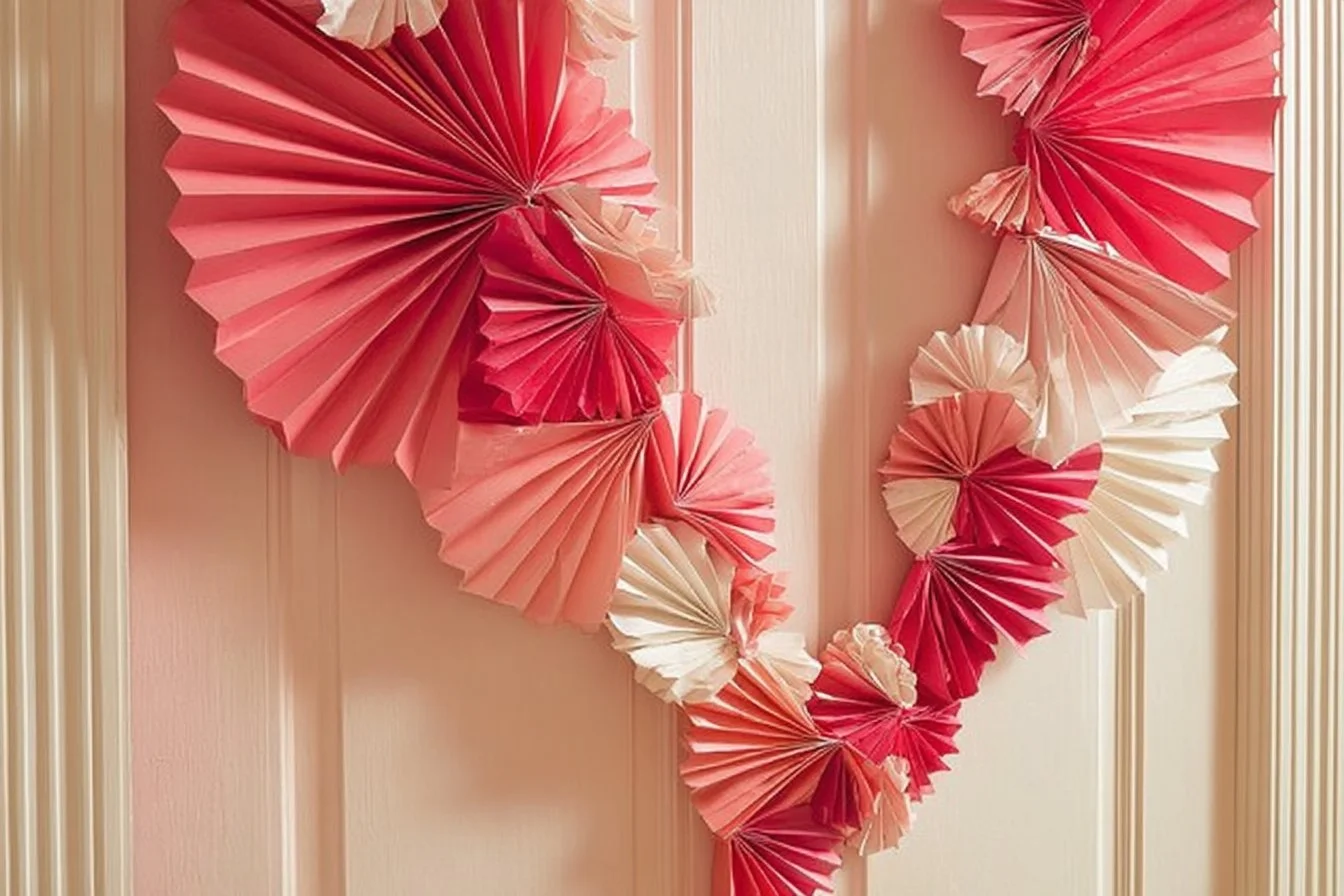
A handmade clover wreath creates an immediate smile for neighbors and visiting grandparents. Visually it works because the round shape draws the eye and a pop of green adds freshness without being over the top. Emotionally, wreaths say welcome; they make the porch feel intentional and cared for. For a quick version, use a foam wreath form, faux clover stems, and ribbon from a craft store—your kids can help tuck pieces in or glue a tiny bow. For a more rustic look, swap ribbon for twine and tuck in sprigs of eucalyptus or dried wheat you already have at home. Hang it at eye level so little hands can reach it for an easy family photo-op. This is one of those home décor ideas that feels like hospitality and is simple enough to become an annual tradition.

Mason Jar Centerpieces with Painted Clovers

Mason jars are an effortless canvas for seasonal charm and a favorite for busy households. A simple coat of chalk paint and a hand-painted clover turns everyday jars into charming centerpieces for the kitchen table or entry console. This works visually because the jars create repeated vertical lines that add rhythm to a table setting, and the soft green tones bring calm. Let the kids join by stamping clover shapes with sponge brushes or cutting small paper clovers to tie onto twine. Fill the jars with fresh cut greenery, battery-run fairy lights, or even leftover ribbon scraps for texture. These jars are practical too—store crayons or flower snippers inside when the centerpiece comes down. As an interior styling tip, cluster three jars in different heights to create a layered vignette that feels thoughtfully arranged without much fuss.

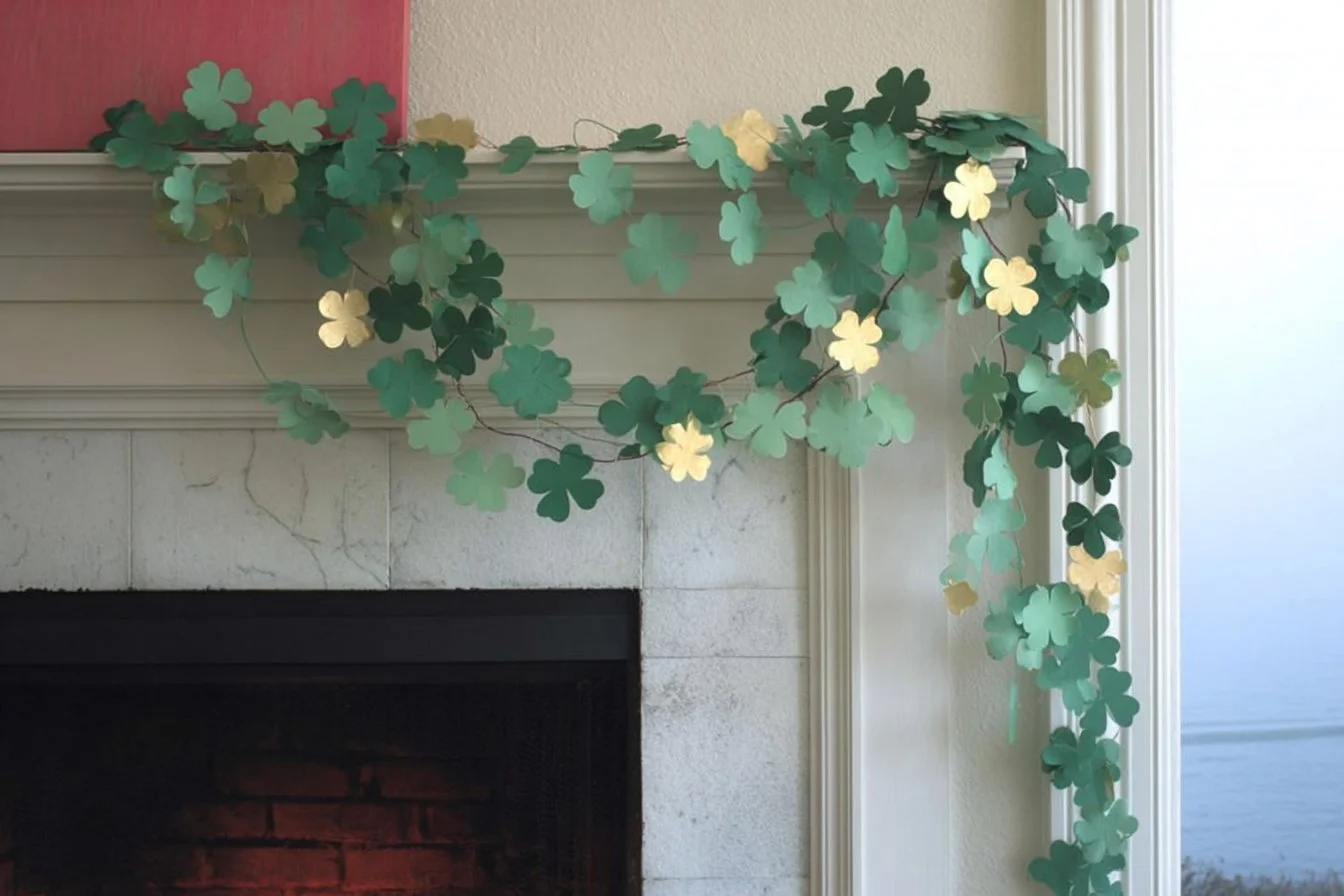
Cozy Mantel Vignette with Subtle Clover Accents

A mantel offers the perfect stage for subtle seasonal swaps that don’t require a full overhaul. Place a small framed print, a couple of tapered candles, and a clover garland draped across to keep things warm and understated. The balance between neutral items and small green accents keeps the look sophisticated while still being playful for kids to notice. Emotionally this anchors a room, making the family area feel settled and festive at the same time. For a quick refresh, swap out one framed photo for a clover-themed print your child draws, then rotate it back later. Use odd-numbered groupings—three objects or five—to create visual interest. This kind of decorating inspiration fits into a busy week: a five-minute swap elevates the space and gives your living room a cozy, curated vibe.

DIY Shamrock Throw Pillows for Family Movie Nights

Soft textiles instantly change the mood of a room, and throw pillows are one of the easiest ways to introduce seasonal color. Sew or iron-on clover shapes to affordable pillow covers to create an inviting couch setup the kids will love snuggling into. Visually they soften hard lines and add layers that read comfortably on camera when you’re taking family photos. Practically, pillow covers are washable—perfect for a home with energetic kids and snack spills. Invite your children to cut shapes or choose the fabric pattern; their involvement makes the pillows feel personal and memorable. As an interior styling tip, mix patterns and solids in complementary tones so the clover pillow blends seamlessly into your existing décor without feeling like a costume change for the sofa.

Tiered Tray Styling with Mini Clover Finds

Tiered trays are tiny stages for seasonal storytelling—perfect for showcasing small trinkets, tiny clover stems, and family keepsakes. They work visually because their vertical layers keep clutter contained while offering lots of small vignettes to explore up close. Emotionally, they create a sense of discovery for little hands who love to rearrange elements. Start with a base of natural items like pinecones or small pebbles, add a mini sign or ceramic clover, and finish with a tiny candle or figurine. Rotate items weekly so the tray always feels fresh and your kids stay engaged with gently curated décor. This decorating inspiration doubles as a quiet display of family treasures and a neat way to add seasonal color to shelves, coffee tables, or kitchen islands.

Welcoming Porch Signs and Potted Greenery

A simple wooden sign and a pot of bright greenery makes the entry feel alive and intentional. Signs add personality without taking much effort, and potted plants bring texture and a touch of nature that children notice on their way in from school. Visually, a low grouping of planters and a sign gives dimension to the porch, creating a layered entrance that reads welcoming from the curb. Use weatherproof chalkboard paint for a sign you can update with doodles, kid-written notes, or a family welcome message. Choose easy-care plants like faux boxwoods or hardy mums if you want low maintenance. This approach to home décor ideas balances style and function, offering a welcoming scene that’s durable enough for active family comings and goings.

Conclusion

If you liked these approachable decorating inspiration ideas, try mixing one or two into your weekend routine and see how small changes lift the whole house. For quick, ready-made accents that match these projects, consider a curated set of seasonal pieces like a St. Patrick’s Day tiered decorations set to jump-start your styling and keep projects kid-friendly and fun. Save your favorite ideas, try them with the family, and come back often for more interior styling tips that fit real life.

Categories
DIY

5 Rainbow Craft Ideas for Kids To Spark Creativity!

Bright Rainbow Crafts to Transform Kids’ Rooms

I remember standing at the kitchen counter, coffee gone cold, watching my two—an energetic eight-year-old and a thoughtful twelve-year-old—race cereal boxes and giggle with the neighbors’ kids out front. Evenings in our cul-de-sac are full of pickup basketball, impromptu chalk art on the driveway, and the ritual of unpacking backpacks that always leave a colorful trail through the house. Those small, ordinary moments have me reaching for simple ways to brighten our living spaces without fuss. Little hands that love to create deserve spots where their art feels celebrated, not just stored. That instinct to turn their crafts into décor transformed our home, blending practical interior styling tips with play. Below are creative, kid-friendly projects that bring color and warmth to everyday rooms while fitting into busy family routines.

Rainbow Wall Gallery with Washable Frames

Turning kids’ artwork into a gallery adds instant charm and keeps memories alive. Start by creating a palette of washable frames in rainbow hues—tempera paint or removable vinyl work great—and hang them at kid-eye level in a hallway or above a reading nook. Visually, the repeated color blocks make a cohesive statement even when pieces change, giving a polished interior styling tip any parent can use. Emotionally, seeing their masterpieces framed validates creativity and boosts confidence for both an eight-year-old who doodles daily and a preteen who’s discovering a more refined style. To apply this at home, set a weekly swap routine: the kids choose a piece to display while older siblings help level the frames. Over time the gallery becomes a living timeline, echoing family rhythms and neighborhood playdates shared over the fence.

Rainbow String Light Canopy

A soft canopy of string lights wrapped with rainbow yarn turns a plain corner into a cozy retreat. The warm glow balances the bright colors, making a calming space for homework or storytime. From a practical perspective, this is one of the easiest home décor ideas to install: anchor three ceiling hooks, drape fairy lights, and weave colored yarn or tulle to create gentle bands of color. Emotionally, the canopy becomes a mini hideaway after a long day of soccer practice or piano lessons, a place where kids tell secrets or read beside a parent. For families with limited space, this trick creates vertical interest and helps define a spot without heavy furniture. It’s simple to adapt as tastes change—swap yarn for fabric strips or replace colors to match new bedding—so the canopy grows with your children.

Rainbow Chalkboard Wall for Ever-Changing Displays

A section of chalkboard-painted wall invites constant creativity and doubles as practical message space. Use a smooth, matte finish and frame the area with painted molding in rainbow shades to tie it into the room’s palette. Visually, the contrast between blackboard and bright framing creates striking focal points while letting kids express seasonal art, daily schedules, or neighborhood scavenger hunts. Emotionally, it’s collaborative: siblings leave notes for each other and neighbors’ kids contribute drawings when they stop by. To implement this, pick a low-traffic wall in the playroom or kitchen and set ground rules for who erases when—this keeps routines smooth and prevents disagreements. Chalk holders and a small shelf for supplies make it tidy and encourage independent creativity.

Rainbow Mobile with Recycled Materials

A lightweight mobile crafted from recycled cardboard, colorful tissue paper, and wooden beads brings motion and personality to a corner or over a bed. Cut simple arched shapes or raindrop silhouettes, paint or decoupage them in rainbow gradients, and hang on clear thread from a wooden hoop. The visual rhythm of the mobile draws the eye up, making ceilings feel higher and rooms more whimsical. Emotionally, mobiles are calming to younger kids and nostalgic for parents who remember making similar pieces in school. In real life, we hang one above our playmat and find it soothes our eight-year-old during quiet time while giving our twelve-year-old a display spot for miniature projects. To keep it tidy, balance the pieces so it rotates freely and swap colors seasonally or as kids grow.

Rainbow Fabric Bunting and Pillows for Cozy Corners

Soft textiles add immediate warmth and are easy to change as kids’ tastes evolve. Sew or tie a rainbow fabric bunting to drape along a bookshelf or window frame and layer small rainbow-themed throw pillows on a reading chair. Textiles play into tactile comfort and create inviting nooks for sibling reading sessions or neighborhood sleepovers. From a practical standpoint, pillow covers can be machine-washed and bunting can be rearranged, making this a durable decorating inspiration for busy households. To apply at home, involve the kids in choosing fabric scraps during a weekend sewing session; even simple no-sew tied bunting teaches hand-eye coordination and pride of ownership. The result is a soft, personalized corner that blends functional comfort with playful color.

Conclusion

If you want to save these decorating inspiration ideas, pin the projects that match your home flow and try one small change this weekend—kids love seeing their work turned into real décor. For easy snack ideas to enjoy during craft sessions, this fun family snack idea is always a hit with little helpers. And if you need tools for building imaginative structures while decorating, consider a sturdy magnetic building tiles set that doubles as playtime and room styling material. Come back anytime for more home décor ideas and interior styling tips to keep your home colorful, cozy, and truly yours.

Categories
Valentine’s Day

DIY Paper Heart Wreath

Title: Paper Heart Wreaths That Spark Joy at Home

I still remember the afternoon my youngest learned to ride a bike without training wheels, cheeks flushed, neighbors clapping from their lawns as if we had raised a superstar. As a mom in my forties with two kids between eight and twelve, our days are a collage of packed lunches, homework check-ins, and the little rituals that make a house feel like ours. Weekend mornings smell like cinnamon toast while the kids build blanket forts, and sometimes a simple craft night follows a chaotic week, when everyone needs something warm and handmade to hold onto. Those quiet, ordinary moments are what inspired me to add affordable, cheerful touches around the house that remind us of family. Small, heart-filled projects have a way of making the entryway smile back at me, and they blend perfectly with everyday routines and the kind of decorating inspiration that invites guests to stay a little longer.

Classic Layered Paper Hearts

A stacked hearts design gives immediate visual warmth because of its depth and rhythm. Start with a lightweight wreath base, then cut paper hearts in graduated sizes and colors, layering them so the edges peek out like petals. This works visually by creating shadow and movement, making a flat surface feel alive. Emotionally, those repeated heart shapes speak to comfort and gratitude, a subtle nod to family moments that guests can feel. To make it at home, use double-sided patterned paper for interest, secure the hearts with a stapler or glue, and attach them around the form in overlapping rows. Tuck a few smaller hearts behind larger ones to hide seams. It is the kind of project you can do while the kids snack at the table, and those little helpers can fold or punch hearts for a sense of ownership. These home décor ideas fit easily on an entry hook or above a kitchen shelf.

Ombre Paper Heart Hoop

An ombre approach brings sophistication to a playful concept. Choose paper in a single color family, from pale to deep, and arrange hearts so the gradient moves around the hoop. Visually, ombre guides the eye and creates a calm, cohesive look that elevates a simple craft into interior styling tips worthy of a magazine. Emotionally, it feels curated and peaceful, the same way a tidy family routine brings relief. To apply this at home, cut hundreds of hearts in four sizes, sort them by shade, and attach them in bands with hot glue or staples. Use a thin metal or embroidery hoop for a delicate silhouette that hangs well in hallways or above a console table. My kids loved choosing which shades looked best together, turning a regular afternoon into a mindful mix-and-match session that doubles as quality time and decorating inspiration.

Mini Heart Garland Wreath

Tiny hearts strung into a garland and looped around a ring make a casual, cottage-chic accent. The small scale keeps the look light and versatile, perfect for a door that gets lots of traffic. Visually, the repetition of minis creates texture and movement, while the open spaces let the underlying wreath base show through for contrast. This is emotionally tender, like the notes we leave in lunchboxes that say “I love you” in a pinch. To build one, fold small squares of paper to make hearts, thread them on thin twine, and then wrap the garland around a grapevine or foam ring, securing with a dab of glue at intervals. It’s a craft that children can help assemble on a rainy afternoon, and it pairs nicely with other home décor ideas to create a layered entry vignette that feels lived in and loved.

Mixed-Media Heart Wreath

Mixing paper hearts with fabric scraps, ribbon, and a few faux florals adds tactile contrast and personal flair. Combining textures grabs attention, offering an elevated take on simple materials. Visually, the mixture of matte paper and soft fabric creates depth and variety, so the wreath reads as intentional rather than homemade alone. Emotionally, homemade fabric bits may include cuttings from an old favorite shirt or a baby blanket remnant, anchoring memories into your decor. To do this at home, cut hearts from cardstock, lightweight cotton, and ribbon loops, then alternate materials around a sturdy base. Pin or hot glue heavier elements, and let the kids pick one sentimental scrap to include. This concept is great for interior styling tips aimed at balancing handcrafted charm with a polished final look.

Kids’ Craft Night Heart Wreath

Turn a family evening into a decorating session with a wreath designed by everyone. Assign little jobs: one child can cut hearts, another paints edges, and an adult assembles the base. This yields a piece that is visually eclectic and emotionally priceless because every imperfection tells a story. It works in any home because it celebrates process over perfection, aligning with easy home décor ideas that welcome everyday life. Keep materials simple—construction paper, glue sticks, a wire wreath form—and set a relaxed playlist to make it feel like an event. When hung in the hallway, this wreath becomes a conversation starter for neighbors who walk by and a proud reminder for the kids. Practical tips include pre-cutting tricky shapes for younger hands and using washable paint to keep cleanup manageable.

Framed Paper Heart Wreath for a Gallery Wall

A wreath enclosed in a shallow frame turns a craft into an artful statement, perfect for creating a curated gallery wall. The frame contains the composition, giving it a refined presence while still keeping the warmth of hand-cut hearts. Visually, the contrast between the crisp frame and soft paper shapes elevates the piece, making it suitable for living rooms or staircases where you already display family photos. Emotionally, framing a wreath preserves a seasonal project—maybe the year your eldest lost a tooth or the summer your neighbor helped teach the dog a new trick. To make one, assemble a small wreath, mount it on foam or mat board, and secure it inside a shadow box frame. This approach ties into interior styling tips that blend personal artifacts with decorative elements, creating a cohesive home story that evolves with your family.

Conclusion

If you try one of these paper heart projects, you might find it becomes more than a decoration—it becomes a small chapter in your family story. Save a favorite idea to a board, try it with the kids one evening, or mix techniques to make a unique piece that fits your entryway or gallery wall. For a simple, stapled method that’s easy enough for a craft night, explore the detailed tutorial at Stapled Paper Heart Wreath – One Little Project. Come back and share what you made; I love hearing how these ideas become part of someone else’s daily life and decorating inspiration.

Categories
DIY

Here’s How You Make Those Viral Plastic Cup Ornaments

Here’s How You Make Those Viral Plastic Cup Ornaments

I remember the late afternoon light in our kitchen, when my two kids were sprawled across the table, markers and glue in little piles, and I was trying to carve out a quiet creative hour between pizza practice and homework. As an American mom in my forties, raised by parents who loved weekend craft fairs, I find joy in turning ordinary things into something special. My son, who is ten, and my daughter, who is nine, love making projects that end up on display, not shoved in a drawer. My husband cheers us on, and sometimes our neighbor drops by with a cup of coffee and a compliment. Those simple, joyful sessions inspired me to try plastic cup ornaments for our home décor. They are budget-friendly, kid-approved, and surprisingly chic when styled right.

Why plastic cup ornaments are a fresh home décor trend

Plastic cup ornaments are part of a tiny revolution in accessible interior styling. People are looking for inexpensive, sustainable ways to refresh a room without buying mass-produced objects. These ornaments take disposable cups and transform them into sculptural accents that add personality to shelves, mantels, and window nooks. They fit perfectly into current home décor trends that value upcycling and handmade details. Use them as grouped vignettes, hanging mobiles, or shelf-sized sculptures. Practical tip: keep a small bin for clear and colored cups so you can mix transparencies. Example: I grouped three translucent ornaments on a bookshelf next to my favorite coffee table book; the light caught them and suddenly a plain shelf looked curated. This is the kind of decorating tip that reads expensive but costs next to nothing.

Materials and the basic technique anyone can follow

You do not need fancy supplies to start. Basic materials include clear or lightly tinted plastic cups, scissors, a hole punch or heated needle for hanging holes, acrylic paints or permanent markers, glue for embellishments, and twine or ribbon for hanging or display. Start by deciding on a shape: cut petal shapes to create a floral orb, or stack rim-to-rim to build layered spheres. A practical tip: warm the scissors under hot water before cutting the plastic for smoother edges. Safety note: supervise kids and handle hot tools yourself. Anecdote: my daughter loved choosing the color palette, while my son got obsessed with counting the number of petals for symmetry. For durability, coat painted areas with a matte clear sealer so the finish withstands handling and dust. This is a simple DIY that gives immediate decorating inspiration.

Color, texture, and finishing touches for professional results

Color and texture will elevate these ornaments from craft to design. Choose a cohesive palette that matches your room’s tones: soft neutrals for a Scandinavian look, jewel tones for a boho edge, or metallics for a modern vibe. Try sanding cup rims lightly to create frosted edges, or use alcohol ink to achieve marbled effects. Tip: use a sponge brush for translucent washes of paint so light still passes through. For texture, glue thin strips of lace, yarn, or even natural fibers like jute to the outer edges. Example: I painted a set of cups in a warm sage and applied a gold leaf highlight to the rim; they became the focal point on my mantel. These finishing touches are the decorating tips that make upcycled items look intentional and styled.

Styling ideas for everyday rooms and unexpected places

Think beyond the tree. Plastic cup ornaments work in the entryway above a console, clustered in a pendant-style mobile over a reading chair, or grouped on a coffee table tray as a sculptural set. Try hanging a small trio at varying heights in a narrow hallway to add vertical interest. For kitchen styling, use them as lightweight hanging planters for air plants. Practical tip: use removable adhesive hooks for temporary displays so walls stay damage-free. Personal example: I hung a set in front of our kitchen window; when I stew tomato sauce for dinner the warm light through the ornaments looks like tiny stained glass accents. These are easy decorating tips for everyday inspiration that refresh a room without a full redesign.

Kid-friendly variations and how to turn this into a family project

This craft is perfect for a casual family afternoon. Set up stations: one for cutting, one for painting, and one for assembling. Encourage children to experiment with stickers, glitter, and washi tape rather than tiny beads that can be choking hazards. Tip: pre-cut shapes for younger children so they can focus on decorating. Make it a learning moment by measuring cup rims, counting petals, or exploring color mixing. Anecdote: my son loves symmetry and insisted each ornament have an even number of petals, while my daughter preferred glitter-heavy designs. At the end, take photos of each creation and pin them to a family inspiration board. These personalized ornaments become little keepsakes that tell a story on your shelves.

Mixing with other décor and care for lasting display

Combine plastic cup ornaments with candles, ceramics, and books to create layered vignettes. Use varying heights and textures to build contrast. Tip: place a small felt pad under ornaments that sit on wood surfaces to avoid scratches. For hanging displays, choose clear fishing line for an invisible effect or braided twine for a more rustic look. Cleaning is easy: dust with a soft cloth and avoid harsh chemicals that may dull painted finishes. Storage tip: nest ornaments with tissue paper between them to prevent scratching. Example: after a weekend of crafting we stored extras in a labeled bin in a closet; the next time I redecorated, pulling them out felt like discovering new ornaments all over again.

Conclusion

I hope these decorating tips inspire you to try plastic cup ornaments as a creative addition to your home décor. They are a fun, budget-friendly way to bring handmade charm into everyday spaces, and they make excellent family projects that result in meaningful, display-ready pieces. If you need a cozy break while crafting, I often take a little baking pause and follow this recipe for a sweet treat: Here’s How To Make The World’s Greatest Chocolate Chip Cookies. Try one idea today and let your interior styling tell a story that is uniquely yours.

Categories
DIY

How to Finish a Potholder Loom

I still remember the afternoon my kids turned my kitchen table into a makeshift craft studio, flour on one side and a potholder loom on the other. I’m a mom in my forties, proud of the small-town values my parents taught me, and I love sharing hands-on projects with my son and daughter, who are 8 and 11. My husband will bring down a tray of lemonade while the neighbors’ kids stop by to admire our colorful squares. Those afternoons echo memories of my own childhood, sitting with my aunt as she showed me how to finish edges neatly. Finishing a potholder loom is a cozy, satisfying ritual that gives you a usable piece and a touch of handmade charm for your home décor. I’ll walk you through thoughtful, practical finishing techniques that add durability and style while fitting into modern interior styling and decorating tips.

Choose the right finishing edge for style and strength

The edge you pick determines both the look and longevity of your potholder. Popular finishes include whipstitch, overcast stitch, braided fringe, and a neat crochet border. For a kitchen that leans toward farmhouse or cottage-core, a simple whipstitch with matching cotton yarn gives a tidy, homey finish. If your interior styling favors boho or eclectic looks, add a braided fringe on two sides for texture.

Actionable tips:

  • Use a needle large enough for your yarn to avoid snagging. I teach my kids the whipstitch first because it’s forgiving and fast.
  • Match your border color to a dominant tone in your kitchen to make it feel intentional as part of your home décor palette.
  • For strength, stitch through both layers at the edge so the potholder can handle frequent use and washing.

A neat border turns a plain square into a decorative item you won’t be afraid to display on hooks or arrange on open shelving.

Add a practical backing for durability and visual appeal

A backing protects the weaving and gives the potholder a polished look. You can hand-sew a cotton fabric backing, use felt for insulation, or quilt a thin layer for extra thickness. Fabric backing also lets you coordinate with placemats, napkins, or curtains for cohesive decorating tips across your kitchen.

Practical steps:

  • Cut the backing slightly smaller than the woven square to avoid corners peeking out.
  • Use a short, tight stitch to secure the fabric to the weaving; this prevents bunching after washing.
  • If you want more heat resistance, add a layer of cotton batting or sew in a small square of insulated fabric inside.

I often let my daughter pick scraps from my sewing box to create playful, personalized combinations. The backing not only improves function but also ties your potholder into your overall interior styling.

Create a hanging loop or tab that complements your decor

A small loop turns a potholder into both a tool and a display piece. Think of it as a dual-purpose finishing touch that makes your potholder accessible and part of the room’s look. Choose a loop made from matching yarn, leather cord, or a small ribbon that echoes the room’s aesthetic.

How to do it:

  • Secure the loop into the edge when you finish the border so it is anchored to multiple stitches.
  • Reinforce the attachment by stitching through the loop base several times, or add a small backing patch for extra strength.
  • Position the loop in a corner for a traditional look, or centered on one side for a modern display.

I hang a set of three coordinated potholders on a slim wall peg near my stove — they’re practical and create a colorful vignette that fits my home décor inspiration.

Block, trim, and wash for a professional finish

Blocking and gentle washing make a handmade potholder look like it came from a boutique. After finishing the edges, trim stray yarn ends close to the fabric but not so close you risk unraveling. Blocking evens the shape and helps the border sit flat.

Steps to follow:

  • Lightly dampen the potholder and pin it gently to a flat towel to shape it, letting it air-dry fully.
  • Trim loops or uneven yarn with sharp scissors, keeping the cut clean.
  • Wash gently by hand or on a delicate cycle in a mesh bag; reshape while damp to maintain the edges.

These finishing touches create a polished item that stays attractive through use. I always show my kids how blocking smooths out their projects — it’s a satisfying bit of magic for little makers.

Style potholders into everyday home décor and inspiration

Think beyond utility and let potholders add charm to shelves, hooks, and tablescapes. They work as small placemats under hot dishes, layered coasters for a casual coffee station, or framed as textile art on a gallery wall that highlights craft and texture. Match them to your kitchen’s color story, or use them as little pops of pattern against neutral countertops.

Practical styling ideas:

  • Group several in a row on a peg rail for a curated, artisanal look.
  • Rotate color families to refresh visual interest without a full redecorating effort.
  • Use sets to echo other textiles such as tea towels or chair cushions for cohesive interior styling.

When friends drop by, these small handmade touches often spark conversations about technique and tradition. For a home that blends function and design, potholders are a delightful way to weave personal craft into everyday decorating tips.

Conclusion

Finishing a potholder loom well gives you a useful piece and a tiny canvas to express your home décor style. If you want a clear, hands-on tutorial with photos and step-by-step finishing methods, check out The Best Way to Finish Handwoven Potholders – Big Green Chair. Try a few different edges, backings, and display ideas until you find combinations that fit your kitchen and interior styling. With a little patience and practice, you’ll have durable, attractive potholders that add warmth and inspiration to your home.

Categories
Christmas

DIY Christmas Silhouettes Tutorial with easy Templates

DIY Christmas Silhouettes Tutorial with Easy Templates

As the frost covers the ground and the scent of gingerbread wafts through the air, I find myself reminiscing about the Christmases of my childhood. Each year, my siblings and I would gather around the kitchen table, our hands sticky from cookie frosting, while our parents would decorate the house with twinkling lights and festive ornaments. Now, as a mom to two lively kids—Jack, who is 10 and constantly bursting with energy, and Lily, my creative little 8-year-old—I cherish those memories and love creating new ones together. One of our favorite traditions involves decorating our home with beautiful silhouettes that evoke the warmth and magic of the holiday season. It’s easy, fun, and a perfect way to add a personal touch to our holiday decor.

Gathering Your Supplies

Before diving into our DIY silhouettes, let’s make sure we are all set with the right materials. You will need:

  • Black cardstock or construction paper: This will serve as the base for your silhouettes.
  • Scissors or an Exacto knife: For cutting out your designs.
  • Templates: You can find various free templates online, but I also like to create my own from images of Christmas trees, reindeer, or snowflakes.
  • Glue stick or tape: For attaching your silhouettes to windows or walls.
  • White sheets of paper or backdrops: This will make your silhouettes pop!

Once you have everything ready, gather the kids around the kitchen table, and let’s unleash our creativity together!

Choosing the Right Templates

Selecting the perfect silhouette templates can truly set the mood for your decorations. Start by discussing with your kids what images resonate with them most during the holidays. Do they envision adorable reindeer dashing through the snow, a majestic Christmas tree adorned with ornaments, or playful snowmen? This is a great opportunity for everyone to share their ideas.

You can find lots of templates online to suit any theme, but I often encourage my children to sketch their desired shapes. Jack loves creating reindeer with big antlers, and Lily enjoys drawing whimsical snowflakes. Printing out templates or using their designs not only honors their creativity, but it also gives our decorations a personal touch that store-bought items lack.

Cutting Out the Silhouettes

Once you have your templates ready, it’s time for the most exciting part—cutting out the silhouettes! I usually lay down a cutting mat on the table so that we can work safely and without worry. As I guide my children through this step, I ensure they’re using the right tools for their age group.

For basic shapes, scissors work great, but for intricate designs, I recommend using an Exacto knife (with adult supervision). Take your time and encourage teamwork. Jack will often hold the template steady while Lily carefully cuts around the edges. This shared experience not only builds their skills but also fosters teamwork and patience.

If you accidentally make a mistake, don’t stress! The beauty of crafting is that it allows for creativity and mistakes can lead to unexpected ideas. Embrace those moments with laughter and good humor—it’s what makes the season memorable!

Displaying Your Artwork

With your silhouettes beautifully crafted, it’s time to showcase your hard work! I like to hang our silhouettes in various locations around the house. One of my favorite spots is the front window, where passersby can admire our creations during the evening when the lights shine through.

You can either use adhesive putty for easy removal or tape (which is a bit more permanent). If your silhouettes are lightweight enough, consider hanging them with fishing line to create a floating effect. As a family, we sometimes create a layered display by grouping different silhouettes together. Jack enjoys positioning them at different heights, which generates an engaging visual effect.

Another idea is to use a large wall or door as a canvas and create a winter wonderland scene. Using multiple silhouettes, we have recreated a snowy forest complete with trees, animals, and hanging snowflakes. It’s an ongoing project that grows with each year, adding a rich tapestry of memories and crafts.

Enhancing the Ambiance

Christmas silhouettes can transform your home’s ambiance into a cozy wonderland, and a few additional touches will elevate the effect. Fairy lights scattered throughout your display can add a magical glow, creating warmth during the long, cold winter nights.

One of the family traditions we’ve started is to incorporate aromatic elements into our holiday decor. Scented candles also play a role in making our home feel inviting. My husband often picks up cinnamon and pine-scented candles, so every corner smells like the essence of Christmas. A hot mug of cocoa in our hands while we admire our handiwork adds to the experience, creating perfect moments of togetherness.

You can even use your silhouettes in a tabletop display by placing them alongside festive ornaments or pinecones, which lend a natural touch. The more layered and varied your display, the more eye-catching it becomes!

Creating New Memories Together

As you gather around to craft your DIY Christmas silhouettes, seize the opportunity to create new memories with your loved ones. Share stories of your own childhood traditions, perhaps of similar crafts or favorites from your parents. Every cut and corner adds to the essence of your past while cherishing what you’re building together now.

Encourage your kids to think of each silhouette as a story waiting to be told. What does the reindeer represent? What memories do the snowflakes invoke? As they cut, they can think of their favorite holiday moments—maybe a trip to see the lights downtown or the holiday baking they did with Grandma.

The beauty of crafting is that it connects generations. As they work on their silhouettes, they are not just decorating; they are building a family legacy. One day, those same silhouettes may decorate their homes, carrying forth the warmth of family traditions.

Conclusion

The holiday season offers a beautiful canvas for creating memories and enhancing our homes with festive decor. By crafting DIY Christmas silhouettes, you not only add a personal touch to your home but also engage in meaningful moments with your loved ones. Embrace the creativity that flows in this season, and don’t hesitate to try new designs or ideas. Remember, it is not just about the final product—it’s about the laughter, stories, and love shared along the way. So gather your supplies, find those templates, and let your family’s creativity shine. Wishing you a warm, joyous, and beautifully decorated holiday season!