Categories
DIY

Everyday Bow Tutorial – How to Make Wreaths – Wreath Making for Craftpreneurs

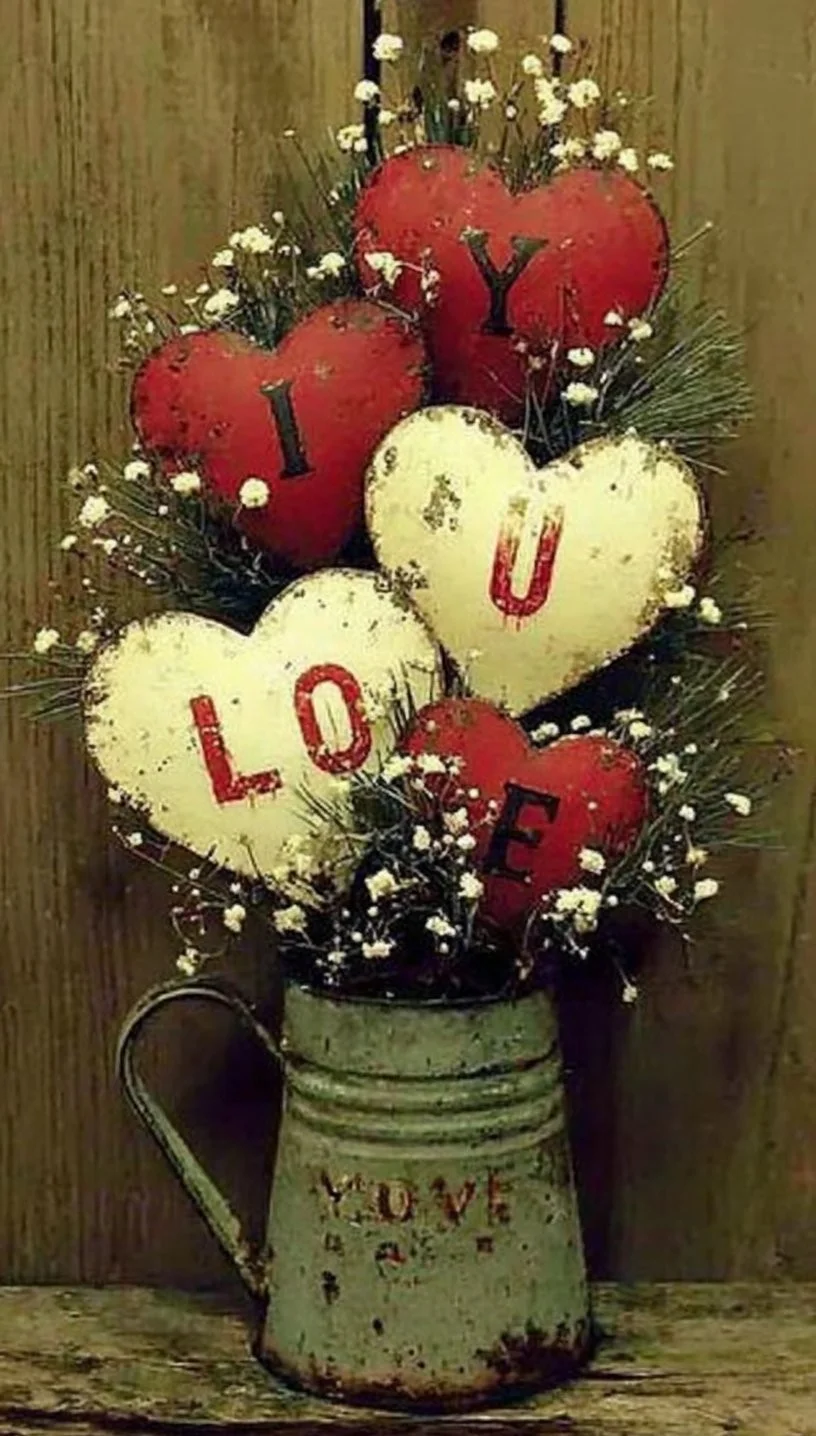
I remember the hum of my kitchen on a slow Saturday, the kids building blanket forts nearby while I looped ribbon and sipped coffee. As an American mom in my forties, I love tying traditions together with something handmade. My son likes to help snip ribbon and my daughter insists on glitter for one tiny bloom, which reminds me of afternoons with my own mother teaching me basic stitches. My husband brings snacks and my neighbor sometimes drops by to admire a new wreath. Those small moments shaped how I approach wreath making and home décor, mixing practicality with cozy charm. If you want wreath-making ideas that fit into family life, sell well online, and feel like a warm addition to any home, you are in the right spot.

Mastering the basics of bow making: tools and materials

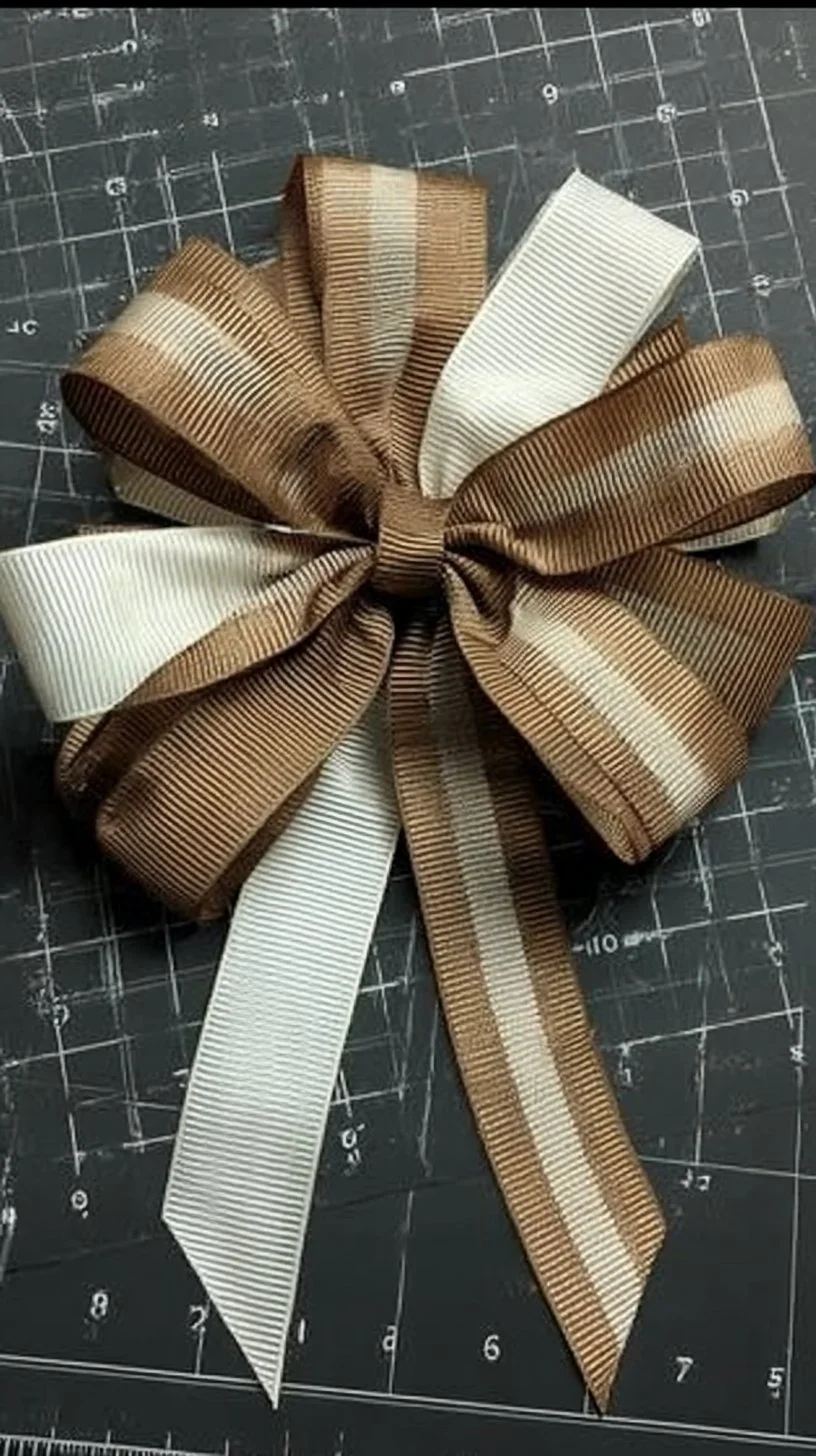
Great bows start with a short list of reliable tools: wired ribbon, scissors, floral wire, a ruler, and a foam or grapevine wreath base. Wired ribbon holds its shape, which is essential for consistent results whether you make a single wreath or batch dozens for customers. Choose ribbon widths from 1.5 to 4 inches depending on the wreath size. For home décor and interior styling, neutral tones like cream, olive, and soft gray pair well with natural wreath bases, while jewel tones add a luxe feel. Practice basic loop bows until you can produce them without measuring every loop — this saves time and gives a handmade look. Tip: mark ribbon lengths on a small clipboard to speed repetitive cuts when you are creating multiple bows for a craft business.

Everyday bow styles that elevate wreaths

There are a handful of bow styles that work across many decorating tips and interior styles. The classic loop bow is timeless and elegant; a farmhouse bow uses simpler materials like burlap for a rustic vibe; a streamer bow has long tails that look great draping over a mantel; and a layered bow mixes two ribbons for dimension. Try a small, tightly looped bow for wreaths hung indoors on gallery walls, and a larger, fluffier bow for a focal wreath in an entryway. Anecdote: my teenage niece once suggested adding a tiny charm to the knot. It became a best-seller for my online shop because customers loved the personal touch. For instruction, fold ribbon in even loops, secure the center with floral wire, fluff by separating loops, and trim tails at an angle for a polished finish.

Speed techniques and batch production for craftpreneurs

If you sell wreaths, consistency and speed matter. Make templates for common bow sizes and use a ribbon cutter board marked with measurements to reduce waste. Pre-cut ribbon bundles into standardized lengths — for example, five loops of 12 inches each for a mid-sized bow. Invest in a heavy-duty wire cutter and a pair of quick-clamp pliers to fasten bows securely to wreath frames. Keep a production flow: cut, form, secure, and trim in assembly-line order. I taught my sister this system and we knocked out orders quicker than expected while still welcoming neighbors who popped in. Pricing tip: calculate time per bow plus materials, and then test a few prices on your platform to see what sells. Don’t forget to factor in shipping protective packaging for bows with delicate wired edges.

Styling wreaths for interior décor and visual harmony

Think of a wreath as another element in your interior styling toolbox. Match ribbon textures with pillows and throws to create cohesion in living rooms or entryways. Scale matters: a 24-inch wreath needs a fuller bow than an 12-inch wreath to balance proportions. Use color theory to choose ribbon: monochromatic palettes add sophistication, while complementary colors create contrast and draw the eye. For minimalist spaces, keep bows simple and neutral. For eclectic interiors, layer patterns like thin plaid over solid ribbon for depth. Practical tip: photograph your finished wreath in situ — hung above a console or paired with a lit lamp — so buyers can envision the piece in their homes. My neighbor bought a wreath after seeing it on my doorway in a photo because she pictured it on her gallery wall.

Photography, listing, and customer care for craftpreneurs

Strong photos and clear descriptions are essential for selling handmade wreaths. Capture close-ups of bow details, show the wreath from different angles, and include a shot that shows scale against a door or mantel. Use keywords like home décor, interior styling, decorating tips, and wreath making in your product title and description to improve searchability. Describe materials, ribbon width, and care instructions so buyers know what to expect. Offer a brief personalization option, such as a choice of ribbon color or a small charm, to increase perceived value. Packaging matters: wrap bows with tissue and secure tails so the recipient receives a pristine product. When customer questions arise, respond with warmth and helpful tips, as my parents taught me to do with every neighbor who knocked.

Conclusion

I hope these practical decorating tips and bow-making ideas spark inspiration for your next wreath project or small business push. If you want a focused guide with step-by-step bow techniques and more styling inspiration, check out this helpful resource: DIY Wreath Bow Tips And Tricks With The Creative Coaches. Try a few styles, keep a small kit ready for quick production, and let family moments and personal touches guide your designs to create home décor that resonates.

Categories
DIY

How to Make Birdseed Ornaments

How to Make Birdseed Ornaments

When I think about simple projects that bring the family together, I picture my kitchen table covered in newspaper, an enthusiastic eight-year-old smudging seed on his cheek, and my ten-year-old daughter carefully pressing a cookie cutter into a sunflower seed mixture. I grew up watching my mother make things with natural materials, and now my husband and I tuck those same memories into our home décor. Neighbors stop by to admire the tiny creations hanging from our porch, and my parents always ask for a dozen more to hang in their backyard. That cozy, hand-made feeling is what I want to share with you: a friendly, guide-to-do-it-yourself approach that blends interior styling with a practical craft the whole family can enjoy.

Gather the right materials and prioritize safety

Before you begin, collect the basics: birdseed mix, unflavored gelatin or a peanut butter alternative, corn syrup or applesauce for binding, cookie cutters or molds, twine or ribbon, and a nonstick surface. Choose a birdseed blend that is fresh and free of dust to avoid mold later. If you have neighbors or children with nut allergies, skip peanut butter and use a seed-friendly binder like gelatin or a fruit puree. Work on a washable surface or lay down parchment paper to keep cleanup simple. Wear gloves if anyone has sensitive skin, and keep tools out of reach of very young kids. These small precautions keep the project enjoyable and safe while supporting a long-lasting result that contributes to your home décor.

Basic recipe and step-by-step method

A dependable recipe helps your ornaments hold together without crumbling. Start by blooming one packet of unflavored gelatin in 1/4 cup cold water. Heat gently until dissolved, then stir in 1/4 cup corn syrup or 1/3 cup applesauce for a less sticky option. Pour the binder into 3 cups of birdseed and mix thoroughly until seeds are evenly coated. Press the mixture firmly into cookie cutters or silicone molds on a parchment-lined tray. Poke a hole near the top with a skewer for hanging, then refrigerate for at least two hours. Carefully lift the ornament from the mold, loop twine through the hole, and let it cure in a cool, dry place for another day. This method keeps the ornaments sturdy and easy to display as part of your interior styling choices.

Creative shapes, molds, and textural ideas

Think beyond plain circles. Cookie cutters and silicone molds offer endless shape possibilities: hearts, stars, mini houses, and leaves all look lovely grouped together. For added texture, press a sprig of rosemary or a thin slice of dried orange gently into the surface before the binder sets. You can also layer seeds for a striped effect by pressing a thin layer of one seed type, then a contrasting one on top before the final press. If you enjoy a rustic look, use twine for hanging; for a more refined accent, choose thin leather cord or satin ribbon. These small styling choices let your birdseed ornaments function as charming home décor elements that reflect your personal interior styling sense.

Display and styling tips for home décor

Once your ornaments are ready, plan how they will complement your space. Hang a trio of different-sized ornaments from a curtain rod in a quiet corner, or group several at varying heights on a decorative branch placed in a tall vase for a natural centerpiece. They also look great clustered on a windowsill or tugged into a wreath for year-round texture. Use neutral twine to mesh with minimalist décor, or bright ribbon to add a pop of color in an eclectic room. Consider placing a shallow dish under ornaments that will be near walkways, so any dropped seeds are easy to sweep up. These decorating tips help integrate DIY birdseed ornaments into your interior styling and provide simple inspiration for readers refreshing their home décor.

Weatherproofing, longevity, and placement choices

To help ornaments last longer indoors and near sheltered outdoor areas, consider a light spray of food-safe lacquer or diluted white glue brushed on the back side only. Avoid heavy varnishes if the ornaments will be used around wild birds, and never use toxic sprays. Place ornaments away from direct sunlight to keep seeds from fading, and rotate displays to check for signs of mold or deterioration. If you want outdoor-friendly versions for covered porches, use a sturdier binder like boiling sugar syrup or vegetable shortening blended with seeds, then allow thorough drying. Proper placement and simple protective steps extend the life of your crafts and make them reliable additions to your home décor collection.

Make it a family project with kid-friendly variations

This craft is perfect for involving both children and adults, and it is a great way to introduce kids to interior styling basics. Give younger children small, supervised tasks such as sprinkling seeds, pressing into molds, or choosing ribbon colors. For older kids, challenge them to design a themed set for a room, teaching them about color balance and texture. Turn the process into a friendly competition with simple criteria like most original shape or best color layering. Keep a camera handy to document the process and display a photo strip near your finished ornaments as part of a gallery wall. These activities create lasting memories while reinforcing decorating tips and inspiration for personalizing your home.

Conclusion

I hope these decorating tips and DIY steps inspire you to add a handmade touch to your interior styling. For a detailed recipe and extra step-by-step photos to help you make birdseed ornaments with confidence, check out this helpful guide: Birdseed Ornaments – Fountain Avenue Kitchen. Try a small batch first, involve the kids, and let your home décor evolve one charming ornament at a time.

Categories
Valentine’s Day

DIY Valentine Wreath

DIY Valentine Wreath Ideas for Timeless Home Décor

I still remember the sound of glue sticks and giggles at my kitchen table when my kids were little. Now, as a mom in my forties with a curious nine-year-old son and an imaginative eleven-year-old daughter, I love turning simple crafting moments into lasting home décor. My husband often teases me for saving every ribbon, and my mom will bring over jars of buttons from her childhood sewing box. Those small bits of family history shape the way I approach decorating: practical, warm, and full of story. When I want quick inspiration, I often revisit old holiday projects or browse a trove of craft ideas like these easy holiday projects and adapt materials for year-round wreaths. Below are approachable decorating tips that blend interior styling with family-friendly DIY charm.

1. Choose neutral materials for year-round appeal

A big trend in home décor is moving away from obvious seasonal cues and toward pieces that complement your interior styling any time of year. Start with a neutral base: grapevine, foam ring, or a simple wire hoop. Add eucalyptus sprigs, preserved olive branches, or dried pampas for texture. These elements look equally fresh on an entryway wall or as a backdrop on a kitchen cabinet door. Practical tip: secure heavier items with floral wire and use hot glue only where needed for longevity. I like keeping a small kit with extra wire, floral tape, and a hot glue gun in the pantry so my daughter and I can patch or refresh a wreath without calling for reinforcements. Neutral color palettes also make it easier to switch decor accents based on the room’s color scheme, which is a smart decorating tip for cohesive interiors.

2. Mix textiles for soft, welcoming texture

Textiles are an easy way to soften a wreath and tie it into your living room or bedroom décor. Think linen bows, cotton pom-poms, wool yarn tassels, and scraps of a favorite checked shirt repurposed into loops. In my house, I let the kids pick fabric scraps when we upcycle old clothing; it becomes a story every time someone notices the pattern. For interior styling, coordinate the textile colors with throw pillows or curtains to create a curated look. Actionable idea: make 3 to 5 small tassels and group them on one side of the wreath to create an intentional focal point. If you want a clean look, choose a single type of textile and vary the size rather than the color. These decorating tips keep the design modern while still feeling handmade.

3. Add personalized family touches

Personalization keeps decor meaningful and helps it blend into your home’s narrative. Try adding tiny family keepsakes like small wooden initials, a miniature frame with a candid photo, or a charm that represents a hobby. For a classic silhouette look, trace a child’s profile or an ancestor’s portrait and cut it from black cardstock to mount on the wreath for a vintage-inspired detail. If you want templates to guide your silhouettes, this silhouette tutorial and templates offers easy patterns you can adapt. My neighbors love seeing the small frames I switch out for birthdays or milestones; it makes a simple ring feel like a family gallery. Practical suggestion: protect photos with a clear craft laminate or mini plastic sleeves so they last without warping from humidity.

4. Embrace minimalist shapes for modern interiors

Minimalist wreaths are a staple in contemporary home décor because they pair well with clean lines and neutral palettes. Use a single material, like a bent metal hoop dressed with one continuous strand of beads or a loop of leather. Keep color to a minimum—one muted tone plus natural green or white—and focus on placement. A minimalist wreath looks striking above a console table with a single lamp or grouped in a trio of different sizes for a gallery effect. I once placed a slim, simple hoop on the inside of a pantry door and it instantly elevated the space without feeling fussy. Styling tip: measure your wall or door first so the wreath feels proportionate; small wreaths can get lost on large walls, while oversized ones overpower smaller spaces.

5. Make multi-functional wreaths for flexible decorating

Design wreaths that can do double duty around the home. A lightweight hoop adorned with removable accents is perfect for swapping looks from a front door to a dining room centerpiece. Consider a wreath that converts into a table centerpiece with a flat base or one that can be opened and laid flat to cradle candles or a small vase. For busy families, storage-friendly wreaths that collapse or hang on a slim hook are game changers. I teach my children to keep a labeled box with seasonal attachments and a list of where each wreath has been used; it saves time and keeps our decor consistent. Practical idea: attach small Velcro tabs to the back of decorative elements so kids can help update the look without tools. These decorating tips help you invest in pieces that support multiple rooms and uses.

Conclusion

If you enjoy crafting and want decorating inspiration that reflects your family and interior style, these ideas make it easy to create wreaths that feel timeless rather than seasonal. Start with neutral materials, add texture with textiles, personalize with family keepsakes, try minimalist shapes, and design for flexibility so your pieces work around the home. For more ideas and visual inspiration, check out this curated list of 30 Best Valentine’s Day Wreath Ideas – DIY Valentine Wreaths 2024. Pick one simple project to try with your kids this weekend and enjoy how a small handmade piece can warm up your whole room.

Categories
Valentine’s Day

Easy DIY Valentines Party Ideas for Kids

Introduction

When I picture the kind of kid-friendly gathering I love to host, I see my kitchen table covered in paper, my son and daughter laughing as they trade markers, and my husband pouring the hot chocolate they begged for. As an American mom in my forties, I grew up making simple crafts with my own parents and neighborhood friends, and those cozy memories shape how I style parties today. I still borrow a tip my sister taught me years ago: use what you already have and make it feel intentional. Whether I am showing my kids how to fold a napkin into a heart or pulling out an old craft idea from my childhood, the goal is warmth and simplicity. For extra inspiration on kid-friendly crafts that work year round, I sometimes flip through a favorite tutorial like this homemade ornament example from a holiday collection to adapt techniques for everyday decorating: homemade ornament idea.

  1. Create a Cozy Color Palette

Choose a restrained color story to make any kid party look styled without fuss. Think two neutrals plus one lively accent color. For example, soft cream and warm gray with a pop of rosy pink keeps the room feeling intentional, not overly themed. Use fabric swatches or paper samples as a quick mockup on the table before you buy anything. Practical tip: reuse curtain fabric or throw blankets as tablecloths or runner pieces to add texture and control cost. When my daughter was eight we used her old floral curtains as a tablecloth and added mismatched mason jars for blooms; it looked curated because the palette stayed consistent. This approach transfers to interior styling too: matching small decor elements like cushions or placemats helps the party blend into your home décor so it feels like part of your everyday style rather than a one-off.

  1. Easy Reusable Centerpieces and Table Styling

Centerpieces that double as keepsakes mean less waste and more charm. Try a simple cluster of glass jars with battery tea lights and tissue paper flowers inside. Kids can make the flowers beforehand and store them for another event. Another idea is a craft-paper table runner covered in doodles and stickers; let children decorate a strip, then roll it up and save it for future use. For place settings, create name cards from folded cardstock that also hold an activity prompt, like “Draw a silly face” or “Tell a joke.” I once used painted wooden blocks as place cards and later turned them into building blocks my kids still play with. These small touches tie into decorating tips for the whole home by emphasizing multifunctional pieces and texture play.

  1. DIY Activity Stations that Double as Décor

Set up craft stations that look pretty when not in use. A pegboard on an easel can display paper shapes, ribbon spools, and scissors in an organized, attractive way. Kids can create garlands or paper bouquets that go straight from the station to the wall, saving setup time. I label jars for each material and add a small sample piece so little ones know what to make. For step-by-step inspiration and other easy craft links I have bookmarked, this collection of simple DIY projects has ideas I adapt often: easy DIY links. Practical setup tip: protect surfaces with vinyl placemats and keep wet wipes handy to keep cleanup fast so you can enjoy the party instead of tidying for hours.

  1. Wall and Window Treatments with a Handmade Touch

Lightweight decorations on walls and windows can transform a room and are simple to take down afterward. Try a layered paper chain curtain in mixed sizes and textures hung over a doorway or window. Or create temporary window clings using washable window markers or removable vinyl shapes that kids can decorate. My neighbor once had her children make sun-catcher circles from contact paper and tissue scraps; they looked so sweet in the afternoon light and doubled as art for the fridge afterward. For a more grown-up look, hang neutral macrame or fabric panels behind the snack table and add small clusters of paper blooms to anchor the display. These choices fit interior styling trends that favor tactile, handmade elements and keep your home feeling curated and welcoming.

  1. Low-Mess Craft Favors and Thank-You Displays

Think of favors as part of your décor by displaying them on a styled cart or tiered tray. Small jars with craft supplies, mini puzzle packets, or a simple DIY seed packet activity look charming and are useful long after the party. Create a gratitude board where kids pin thank-you cards they make during the event; it becomes both an activity and a visual centerpiece. I like adding a small sign with simple instructions so even shy kids know how to participate. For games that double as decor, a clear jar filled with colored tokens where guests guess the number can sit on a side table and spark conversation. When favors are practical and pretty, they contribute to your home décor rather than creating clutter.

Conclusion

I hope these approachable ideas inspire you to create a memorable and stylish kids gathering that feels like part of your home décor. If you want a ready-made list of kid crafts to try at your next gathering, check out this helpful resource for Valentine crafts and adaptable projects: Valentine crafts for kids. Try one or two ideas and build from there; small, intentional touches will make your party look thoughtfully styled and give your children memories that fit right into your family story.

Categories
Valentine’s Day

Stunning DIY Valentine’s Day Decor Ideas for Every Space

I still remember the first time my little girl and son decided to help me rearrange the living room; they were eight and ten then, each insisting on a different cushion. Now in my forties, with a husband who humors our creative chaos and parents who drop by with vintage finds, I love turning simple ideas into lasting touches that make our house feel like home. Decorating has always been part of my family rhythm, from weekend craft sessions with the kids to borrowing a wicker basket from my sister for a display. If you want cozy, approachable interior styling that feels personal and easy to maintain, start small and involve the whole family. For more practical ideas on making a warm, stylish space for every family member, check out these cozy styling tips that inspired our latest refresh.

Soft Textures and Layered Seating Layering textiles is one of the most forgiving and impactful decorating tips for home décor. Start with a neutral sofa and add a mix of textured pillows in varying sizes, fabrics like velvet and linen, and a couple of pattern accents for dimension. Idea 1: create removable velvet or linen slipcovers for pillows to switch colors without replacing cushions. Teach kids simple no-sew techniques using fabric glue or envelope closures so they can participate. Idea 2: build a reading nook with a plush throw, a low side table, and an oversized floor cushion. I made a cozy corner in our den by repurposing my grandmother’s afghan and mixing it with modern cushions; it’s where my son does homework and my daughter reads, and it instantly raises the comfort level of the whole room. These small textile changes elevate interior styling while staying practical.

Personalized Gallery Walls and Mixed Media A carefully curated wall can tell your family’s story and serve as year-round inspiration. Idea 3: design a gallery combining framed photos, children’s artwork, and small textile pieces like mini-embroidery hoops or fabric hearts. Arrange pieces in odd numbers and use consistent frame finishes to keep the display cohesive. Hang lightweight items using picture-rail hooks or command strips to avoid damage and make seasonal swaps easy. If you want to draw the eye upward, consider incorporating a subtle ceiling treatment or painted trim to complement the wall art; I once painted a soft blush stripe on a low ceiling to make our gallery feel taller and cozier. For creative ideas on accenting less obvious areas, see some unexpected approaches like bold ceiling treatments that double as decor features via this creative ceiling ideas. The result is an inviting focal point that blends sentimental pieces with modern design.

Warm Layered Lighting Lighting transforms mood and is a core decorating tip for creating depth and ambiance. Idea 4: combine overhead fixtures with table lamps, wall sconces, and dimmable LEDs to control brightness for every activity. Swap in warm bulbs for a softer, welcoming glow. Idea 5: craft simple mason jar lanterns with LED tea lights and river rocks—a kid-friendly DIY that makes hallways and porches feel intimate and styled. For dining areas, add a statement pendant or a dimmer to make meals feel special without needing a full redesign. I like to keep a couple of plug-in fairy lights behind shelving for a layered effect; they are subtle, energy-efficient, and create a constant cozy backdrop that works with many decorating styles.

Natural Elements and Lasting Botanicals Bringing nature indoors is a timeless home décor trend that adds color, texture, and scent. Idea 6: use preserved eucalyptus, dried roses, and locally sourced branches to create arrangements that last months. These materials are low-maintenance and pair well with both contemporary and traditional interiors. Build a simple vignette with a ceramic vase, a stack of books, and a small tray of pebbles to anchor the arrangement. If you have a sunny spot, rotate a couple of hardy houseplants like snake plants or pothos to balance the dried pieces with living greenery. I enjoy collecting clippings from neighbors’ gardens during summer walks; drying them in bundles becomes a winter-ready accent that still feels natural and personal.

Switchable Accents and Tabletop Styling Small, intentional accents make decorating feel achievable and flexible. Idea 7: create a set of interchangeable art prints and table runners in a palette of two to three colors; swapping these items refreshes rooms without major purchases. Idea 8: design a DIY centerpiece using layered trays, candles, small ceramic vases, and a few dried blooms for a look that can travel from everyday dining to weekend gatherings. Store these components in a labeled box so you can swap styles in minutes. I keep a “refresh kit” in our hall closet with seasonal runners, placemats, and small decor pieces; when friends pop over I can quickly style the entry table and living room. These small investments in organization and versatile pieces yield big returns in visual cohesion and decorating ease.

Conclusion

Trying a few thoughtful decorating tips can make your home feel loved and intentional without a full renovation. If you want more step-by-step inspiration that blends DIY creativity with thoughtful interior styling, check out 15 Stunning DIY Valentine’s Day Decor Ideas for Every Space for ideas you can adapt year-round. With a mix of textiles, lighting, natural accents, and personalized art, you can create a welcoming home that reflects your family’s story and offers everyday comfort and inspiration.

Categories
Valentine’s Day

DIY Valentines Wreath – Stacy Risenmay

I still remember sitting at my kitchen table with my son and daughter, scissors and glue all over the place, while my husband called from the garage and our neighbor waved hello. As an American mom in my forties, those small crafting moments feel like a thread that ties my childhood to my kids’ days now. My own mother used to make simple wreaths from fabric scraps, and I love passing that on. If you enjoy hands-on home décor projects that bring family together, this friendly guide will walk you through creating a wreath inspired by romantic motifs but styled for everyday interior styling. For a quick idea on silhouette shapes that work brilliantly on wreaths and wall art, take a peek at this tutorial I once used with the kids: silhouette tutorial and templates. These decorating tips will help you make something cozy, long lasting, and full of personality.

Choose a versatile base and shape

Start with the foundation and you are halfway to a timeless piece. Instead of committing to a highly seasonal look, pick a neutral base such as a grapevine, foam, or wire frame that can be restyled. Hearts are classic and elegant as a shape, but you can also use circles, ovals, or layered shapes to echo architectural lines in your home. Actionable tip: wrap a foam wreath with neutral linen ribbon for a sophisticated backdrop, then attach a smaller heart-shaped silhouette of reclaimed wood at the lower third for visual interest. Practical example: when my daughter wanted something less pink, we painted the wooden heart muted terracotta and added dried wheat for texture. For longevity, use pins and removable hot glue dots so you can swap elements without damaging the base. These tricks keep your home décor flexible and easy to refresh.

Layer textures for a cozy, designer look

Layering is where a simple wreath becomes a statement piece for your entryway or living room. Think velvet ribbons, woven trims, faux eucalyptus, and small clusters of preserved flowers. Tip: build from largest to smallest textures — base ribbon, medium-sized foliage, then finishing touches like metallic beads or tiny wooden hearts. A personal touch: my son loved adding tiny wooden buttons he painted; it became his signature on family projects. Practical implementation: arrange textures asymmetrically by clustering foliage on one side and leaving the other side more open for balance. This approach gives interior styling a curated feel without looking overworked. You will also find that mixing matte and slightly glossy finishes creates depth, which photographers and guests both notice.

Pick a color palette that fits your home décor

Color choices determine whether your wreath feels like a seasonal prop or an everyday accent. For home décor that blends with many rooms, choose a base of warm neutrals — warm ivory, soft taupe, or dusky gray — and add one or two accent colors like soft blush, deep burgundy, or a muted teal. Actionable suggestion: use a swatch of paint or fabric pulled from a nearby sofa cushion to ensure harmony. Anecdote: once I matched ribbon to a curtain stripe and the wreath suddenly looked intentional, like part of the room rather than an add-on. For bolder interiors, metallics like brass or pewter provide a touch of polish without screaming holiday. These decorating tips help you integrate the wreath into your overall interior styling plan.

Display and placement ideas that make an impact

Where you hang a wreath changes how it reads in your home. Over a mantel it becomes a focal point, in an entryway it offers welcoming charm, and in a breakfast nook it adds a cozy, conversational detail. Practical tip: use command hooks or decorative ribbon loops to hang the wreath at eye level for the room’s tallest person, usually about 60 to 66 inches from the floor in American homes. Another idea: create a gallery ledge where a small wreath leans against framed art for an easy, swap-friendly vignette. Family angle: involve the kids in choosing placement; my son loves the hallway because he can show friends. These placement tricks allow your wreath to serve as a lasting element of interior styling while offering fresh inspiration for other décor swaps.

Make it modular and kid-friendly for long-term use

Think ahead to storage, swapping, and repurposing so the wreath becomes a project that grows with your family. Use removable accents attached with loops or brooch pins so you can change color or motif without rebuilding the entire piece. Practical step: craft 3 to 5 detachable clusters — a neutral foliage cluster, a fabric heart cluster, a metallic ornament cluster — and store them in labeled boxes. This makes seasonal refreshes or themed updates easy without big time investments. Kid-friendly suggestion: assign small, safe tasks to your 8 to 12 year olds, like threading beads or arranging faux flowers; my daughter handles ribbon bows and feels proud of that role. These strategies keep your wreath practical, inspiring, and integrated into your home décor rotation.

Conclusion

I hope these decorating tips give you confidence to create a wreath that doubles as long-term home décor and family keepsake. For step-by-step inspiration and a full tutorial that sparked some of these ideas, visit DIY Valentines Wreath – Stacy Risenmay. With a few swaps in materials and color, a simple wreath can offer endless interior styling inspiration that feels personal and timeless.

Categories
Valentine’s Day

7 Romantic DIY Valentine’s Day Decorations

When my daughter and son tumble into the craft room with glitter on their cheeks and the biggest questions about colors, I feel right at home. As a forty-something American mom, I love turning simple materials into warm corners that invite conversation. My husband often jokes that our house smells like cinnamon and glue, and my parents still remember the paper hearts I made as a kid. Over the years I have learned to blend practical decorating tips with small traditions that make a living room feel lived-in and loved. If you like projects that involve your kids or tapping into memories from your own childhood, these approachable ideas will help you build a romantic, everyday look without spending a fortune. For more inspiration on easy festive craft lines I sometimes borrow from, check out these easy DIY decorating ideas.

  1. Soft, Layered Textiles for Instant Coziness

Idea 1: Create a layered palette with throw pillows, a textured blanket, and a subtle rug. Start by choosing two main colors and one accent hue that reads as romantic but timeless, such as dusty rose with warm beige and a hint of gold. Practical tip: buy one pro-quality neutral throw and add two lower-cost patterned pillows for contrast. Anecdote: my son helped stitch a simple pillow cover from an old sweater, which became our favorite spot for storytime. Styling tip: arrange pillows in odd numbers on sofas or window seats and fold the blanket over an armrest for an inviting vignette. This approach to textiles is a cornerstone of interior styling and home décor because it balances comfort with polished design.

  1. Candlelight and Soft Lighting Tricks

Idea 2: Use varied light sources to craft a soft, flattering atmosphere. Combine dimmable overheads, table lamps, and clusters of candles. Safety tip: for households with young kids, swap some real candles for warm LED candles that flicker convincingly. Try placing a trio of different-height candles on a decorative tray with greenery for an easy centerpiece. My neighbor taught me to add a tiny votive behind a frosted jar to create a stained-glass effect that delights kids during bedtime. Lighting is one of the most transformative decorating tips you can use to make any room feel romantic in an everyday way.

  1. DIY Floral Touches That Last

Idea 3: Favor long-lasting stems and mixed textures over delicate single flowers. Combine dried grasses, preserved roses, and a few seasonal blooms in low vases to keep arrangements from looking fussy. Practical how-to: trim stems at an angle, arrange in a triangle shape for balance, and anchor with floral foam or pebbles if needed. My daughter loves to press a few leaves between books, then we incorporate them into a glass jar display. If you want to borrow techniques from winter crafts, I also reference crafty tutorials for repurposing materials from other seasons. Using botanicals in this way offers a romantic accent that remains practical and low-maintenance.

  1. Personalized Wall and Shelf Displays

Idea 4: Make wall groupings that tell your family story. Mix framed photos, simple illustrations, and text prints with small ledges for rotating objects. Actionable tip: start with a central piece at eye level, then add supporting pieces around it, stepping back frequently to check the balance. Try a family memory shelf with a vintage plate from your parents, a small handmade heart from your child, and a candle. I love swapping items seasonally or when my children create new artwork, which keeps the display feeling fresh and personal. This curated approach to interior styling turns bare walls into meaningful focal points without needing professional help.

  1. Upcycled Rustic Accents for Character

Idea 5: Repurpose old items to create charming accents with character. Think reclaimed wood signs, mason jar vases, or painted frames. Practical steps: sand and stain a scrap board, stencil a simple phrase, and hang it over a mantel for instant personality. My siblings and I once made a pallet table together and now it holds our game nights and snacks. Budget tip: scout thrift stores or garage sales for pieces that only need a little love. These rustic touches work well with both modern and farmhouse aesthetics and are a fantastic way to practice sustainable decorating while adding romantic warmth.

  1. Simple Tabletop Styling for Everyday Romance

Idea 6: Set small “moments” around the home rather than overdressing the entire space. Place a styled tray on the coffee table with a book, a small vase, and a pretty coaster. For the dining table, use neutral linens, mismatched plates, and a runner to keep things relaxed yet intentional. Practical tip: create a quick centerpiece using items you already own: stack books, top with a bowl of citrus, and tuck in a sprig of greenery. My husband appreciates these little touches when he walks in after work; they feel intimate without effort. Such decorating tips make everyday meals and gatherings feel curated and cozy.

  1. Texture Play with Natural Materials

Idea 7: Introduce texture with woven baskets, ceramic pieces, and natural fiber rugs. Actionable suggestion: layer a jute runner under a soft area rug to add depth and interest to flooring. Use wicker baskets for storing throws and toys so practicality meets style. Story: when my parents visited, they commented on how the baskets kept the living room tidy but warm, which made me proud. Mixing textures is an easy interior styling trick that keeps a romantic scheme from feeling flat while maintaining family-friendly functionality.

Conclusion

These ideas blend practical decorating tips, interior styling inspiration, and heartfelt touches you can actually live with. Try one idea this weekend with the kids or invite a neighbor over to help make a simple centerpiece. If you want more farmhouse-friendly projects to expand your toolkit, explore this collection of farmhouse Valentine’s DIY projects for additional inspiration.

Categories
Valentine’s Day

9 Easy and Low-Cost DIY Decorations for Valentine’s Day

I’m a mom in my forties who still gets a little thrill when I hang something homemade on the wall. My son and daughter, ages 8 and 11, love to help with scissors and glitter even if my husband teases us about the mess. Growing up, my own mother taught me that a few simple touches can make a house feel like a home, and I pass those lessons on to my kids. Today I like to blend those warm memories with modern interior styling, pulling in ideas from neighbors, cousins, and the thrift-shop finds my sister insists I need. If you love budget-friendly projects, you might also enjoy this quick guide to budget-friendly decorations you can make quickly. Here are nine easy, low-cost decorations you can DIY to refresh your home décor and inspire everyday romance.

Section 1 — Simple Paper and Fabric Heart Garlands (Ideas 1 and 2) Paper and fabric garlands are classic decorating tips because they are light, inexpensive, and highly customizable. Idea 1: cut hearts from scrapbook paper or old greeting cards and string them on baker’s twine to create a long garland for a mantel or window. For a modern look, alternate patterned hearts with kraft paper for texture. Idea 2: make a fabric bunting using leftover cotton or linen. Trace a heart template, sew two pieces together leaving a small gap, stuff lightly with batting, and stitch closed. Attach to ribbon and hang above a cozy reading nook. My daughter helped me sew tiny heart pillows last weekend; we used simple hand stitches and scraps from an old shirt to teach her basic sewing. Practical tip: use a paper punch to speed up repeated shapes, and secure knots with hot glue for durability.

Section 2 — Tabletop Styling: Mason Jars and Candle Clusters (Ideas 3 and 4) Small changes on a table can transform a room. Idea 3: repurpose mason jars as vases. Wrap their necks with twine, paint the bases in chalk paint, or glue a strip of lace for a vintage vibe. Fill with stems from the yard or simple grocery-store blooms for an instant centerpiece. Idea 4: create candle clusters using jars, tea lights, and pebbles. Place a candle on a bed of sand or river stones inside a glass and surround with small votives. Group three different heights together on a tray for balance. I keep a drawer of thrifted jars and candles so I can style a quick tablescape when neighbors drop by. Tip: use flameless candles for child-friendly homes.

Section 3 — Textiles and Cushion Styling (Ideas 5 and 6) Updating pillows and throws is one of the easiest interior styling ideas to refresh a room without ripping up carpets. Idea 5: swap pillow covers to introduce warm tones or muted reds balanced with neutrals like beige or soft gray. Use removable covers for easy laundering. Idea 6: add ribbon ties or simple embroideries to plain cushions for a handmade touch. Layer blankets of different textures to create depth on sofas or armchairs. If you enjoy quick cutout projects, check out this fun tutorial for seasonal paper shapes like snowflakes that can inspire similar techniques for other motifs: DIY snowflake decorations for winter. Practical styling tip: arrange pillows from largest to smallest and mix solids with subtle patterns to keep the look polished.

Section 4 — Personalized Wall Art and Framed Memories (Ideas 7 and 8) Walls are prime real estate for personalizing your home. Idea 7: create a gallery of small frames filled with simple typography prints, kids’ drawings, or sheet-music hearts. Use thrifted frames painted the same color for cohesion. Idea 8: make a rotating frame where your family can swap love notes, recipes, or seasonal postcards. My son loves creating “coupons” for family movie nights and we display his art in a little cluster above his desk. Actionable tip: use foam board as an inexpensive backing, and secure prints with double-sided tape for easy swaps. Group frames in odd numbers for visual interest.

Section 5 — Natural and Upcycled Accents (Idea 9) Natural materials bring texture and warmth into any room. Idea 9: make small wreaths from twigs, eucalyptus sprigs, or dried grasses. Use wire to secure the base and add a ribbon made from burlap or scrap fabric for a rustic accent. You can also upcycle wine corks into mini heart mosaics or use painted wood slices as coaster-style decorations on trays. I once turned lemonade-stand signs my kids drew into tiny placemats by laminating them and trimming the edges; simple upcycling makes decor meaningful and unique. Practical tip: gather materials on neighborhood walks or from the yard to keep costs low and involve the kids in the collection process.

Conclusion

Trying these low-cost home décor ideas is a lovely way to refresh your interior styling and involve the whole family in decorating. For a larger project that blends rustic charm with easy steps, consider following the DIY Burlap Wreath for Valentine’s Day with Bow Tutorial which shows a friendly technique for creating a textured wreath using budget materials. Whether you pick one small upgrade or a few projects to rotate through the seasons, these decorating tips are simple, adaptable, and ideal for creating a warm, welcoming home that reflects your personal style.

Categories
Valentine’s Day

DIY Galentine’s Day Decorations: Easy Ideas for a Fun Party

I still remember setting up a little surprise for my best friends when I was a teen, sneaking streamers and candles while my parents slept. Now, in my forties with an energetic son and a thoughtful daughter aged nine and eleven, my Galentine gatherings are all about warmth, style, and easy living room magic that my husband and I enjoy as much as the kids when they tag along. I borrow a bit of that neighborhood potluck spirit from my sister and the tea-party touches my mother taught me, blending practical home décor with playful details. Whether I’m rearranging pillows after school carpools or borrowing a vase from my neighbor for a centerpiece, these decorating tips come from real life, not a showroom. If you like kid-friendly styling ideas too, check out this playful inspiration I used for a recent kids corner here.

Create inviting mood lighting with layers

Lighting transforms a room from ordinary to intimate. Start with three layers: overhead, task, and accent. Swap harsh bulbs for warm LED bulbs, and add plug-in sconces or table lamps around seating areas to create pockets of light. Use grouped candles of varying heights on a tray for a relaxed centerpiece; battery-operated candles work well if little hands are nearby. String globe lights across a mantel or along a bookshelf to add a soft halo that doubles as a photo backdrop. Practical decorating tips include a dimmer for the main light and inexpensive lamp shades in neutral fabrics to soften glare. For interior styling, choose bulbs with a warm color temperature and mix metals like brass and matte black for a curated look that still feels homey.

Mix-and-match tableware for effortless charm

You do not need a matching set to impress. Layer plates with a neutral charger, a patterned salad plate, and plain glassware to keep the table approachable. Fold cloth napkins and secure them with a ribbon or a small sprig of greenery for a personal touch. If you want to reuse items, designate a tray for drinks and another for snacks so guests can help themselves without crowding the table. Consider creating a color palette of two to three tones to guide dish and linen choices; this keeps the aesthetic cohesive even with mismatched pieces. These easy decorating tips keep your table ready for anything from a tea and chat to a full dessert spread.

DIY floral garlands and small statement pieces

A full flower wall can be impressive but a simple garland across a mirror or window is just as striking. Use faux blooms mixed with greenery for longevity, or purchase a few stems from the farmers market for fresh flair. I like to weave ribbon or twinkling lights into garlands for nighttime gatherings. For smaller statements, repurpose mason jars or short vases grouped at varying heights down the middle of a console table. Add a personal anecdote: my daughter helped me create a mini bouquet station once; the kids loved arranging little posies and it became part of the decor. These approachable decorating tips bring botanical charm into your interior styling without a florist budget.

Cozy seating zones for conversation and comfort

Arrange sofas and chairs to encourage conversation, not to face a TV. Pull furniture a bit closer and add layers of cushions and throws for touchable texture. Mix textures such as knit throws, velvet pillows, and woven baskets to store extra blankets. If space is tight, bring in floor cushions or poufs that tuck away easily afterward. Lighting and scent also play a role: a small diffuser on a side table and a warm lamp make seating feel intentional. For inspiration on creating a warm, welcoming seating area that borrows seasonal ideas without feeling seasonal, I often reference real-room styling tips like these guides. These interior styling approaches turn any living room into a guest-ready haven.

Personalized place settings and small favors

Personal touches make guests feel loved. Create simple place cards with kraft paper and calligraphy or print names on cardstock and tuck a small favor underneath, such as a single cookie or a mini candle. For a fun twist, pair each name with a short prompt for the night, like favorite memory or current obsession, to spark conversation. Use small bowls or ramekins for accents, and consider themed stickers or washi tape to coordinate. These decorating tips are budget-friendly and easy to assemble with the kids — my son once helped me stamp little tags for a party favor station and felt proud when guests admired his work.

Dessert and drink station styling that works for everyone

Set up a self-serve beverage and dessert station to keep traffic flowing. Use tiered trays for cupcakes and cookies, and a chic beverage dispenser for punch or iced tea. Provide small chalkboard signs that label offerings and call out allergens. Keep utensils and napkins in decorative containers, and place coasters near the drink area to protect surfaces. For a cohesive look, choose glass and metallic accents that echo the rest of your decor, and keep the backdrop simple so food pops visually. Practical tips include pre-portioning treats into pretty containers and using a cooling rack over a tray for hot items to prevent messes.

Conclusion

These simple, stylish Galentine party decor ideas blend home décor trends, interior styling know-how, and practical decorating tips so you can host with confidence and creativity. Try one or mix several ideas to suit your space and budget, and remember the best rooms feel lived-in and loved. For more playful activities and ways to celebrate with friends, see this list of 21 Fun Ways to Celebrate Galentine’s Day with Friends.

Categories
Valentine’s Day

5 Cutest Valentine’s Day Jar Gifts You Can DIY

I still remember Saturday mornings in my childhood kitchen, the sunlight catching a jar of buttons on the windowsill while my mom sang along to the radio. As a mom in my forties with a son and daughter between 8 and 12, I love recreating that cozy clutter in our home. My kids help me assemble little jars of treats and notes for neighbors, and my husband labels each one like it is a prized heirloom. If you enjoy crafting with kids, you might like this collection of simple projects for little hands to help with while learning practical decorating tips and interior styling basics: holiday crafts kids can make. These jar gifts double as sweet presents and thoughtful accent pieces that fit effortlessly into everyday home décor.

1. Love Notes Jar – Memory-Filled Accent

Turn a plain mason jar into a memory keeper by filling it with short, handwritten notes. Use colorful scrap paper, folded into tiny hearts or rectangles, and ask each family member to write one happy memory, gratitude line, or future promise. For a grown-up twist, include small prompts like “A favorite recipe” or “Our best inside joke.” Display the jar on a bedside table or mantel as part of a styled vignette with framed photos and a candle. To elevate the look for gifting, tie a ribbon around the neck and attach a tiny wooden spoon or charm. This idea blends sentimental content with practical decorating tips for creating intimate, personalized accents that enrich your interior styling.

2. Mini Photo Terrarium – Personalized Keepsake

Create a little photo terrarium using a clear jar, a couple of small printed photos, faux moss, and tiny pebbles. Roll or accordion-fold a photo to stand upright, tuck it into a nest of moss, and finish with a smattering of miniature fairy lights for evening ambience. These jars work beautifully on bookshelves, entryway consoles, or clustered on a coffee table as part of a gallery-style display. For cohesive home décor, pick photo tones that match your room palette and use a uniform type of jar for a curated look. This project makes interior styling approachable by combining personal stories with visual texture and color balance.

3. Scented Candle Jar – Cozy Glow for Any Room

Pour-your-own candles in recycled jars are charming, useful, and great for learning simple craft skills. Use soy wax, cotton wicks, and essential oil blends such as lavender-vanilla or citrus-ginger to appeal to different rooms in the house. Add dried botanicals around the edge for texture but keep them away from the flame for safety. Label each jar with kraft paper tags and decorate lids with twine or stamps. Styling tip: group two or three jars of varying heights on a tray with a stack of books and a ceramic bowl to create a warm focal point. Candle jars offer an easy way to introduce layered lighting into your decorating routine and create cozy zones throughout your home.

4. Recipe-In-A-Jar – Heirloom Flavors and Presentation

Layer dry ingredients for cookies, pancakes, or spice mixes in a clear jar and include a sturdy recipe card tied to the lid. Make it personal by using a family recipe passed down from your parents or siblings, and write a short note about why it matters. For visual impact, alternate colors and textures of ingredients so the jar becomes a decorative stripe of flavor. Present the jar with a small wooden spoon and a hand-stamped tag describing baking times and tweaks. This idea is both a thoughtful gift and a styling trick: keeping a few of these jars on open kitchen shelves adds charm and functional decor that reads as warm, lived-in interior styling.

5. Mini Herb Garden Jar – Living Décor for Shelves

Small jars can house cuttings of basil, mint, or rosemary rooted in water or a thin layer of soil for a tiny herb garden that livens up any room. Use matching jars and labels for a tidy, modern look, or mix and match vintage jars for eclectic charm. Place them on windowsills, kitchen islands, or grouped on a floating shelf to bring fresh scent and color into your home. Maintenance is simple: change water weekly for cuttings, or repot into slightly larger containers when roots fill the jar. If you like styling your kitchen with personality, these living accents pair well with curated cookbooks and decorative plates to create a kitchen vignette that blends practicality with inspiration. For creative shelf styling ideas that complement these jars, explore ways to adapt decor to your cooking space here: kitchen styling ideas.

Conclusion

I hope these five jar gift ideas spark both heartfelt giving and fresh inspiration for your home décor. They are simple enough to make with kids, carry family memories, and translate into everyday interior styling touches that lift a room. If you want more themed gift ideas to pair with these jars, check out this collection of adorable teacher gift ideas for easy presentation tips and finishing touches. Try one this weekend and tuck the finished jars into your seasonal displays or everyday shelves for a personal, stylish accent.