Categories
DIY

Boho Bunny Wreath – A Wonderful Thought

Boho Bunny Wreath – A Wonderful Thought

Introduction

I remember the afternoon my daughter and son came home from school and insisted we hang something cheerful on the door. As an American mom in my forties, I love weaving family memories into our home décor, whether it is a pillow stitched by my mother or a small craft my son made in art class. My husband laughed as the kids arranged a little gallery by the entry, and my neighbors stopped by to admire it. Those warm, everyday moments are the kind of inspiration that make interior styling feel personal and alive. In this article I will share approachable decorating tips and creative ideas that help you bring the same cozy, lived-in charm into your home, with easy projects and styling cues that work for real families.

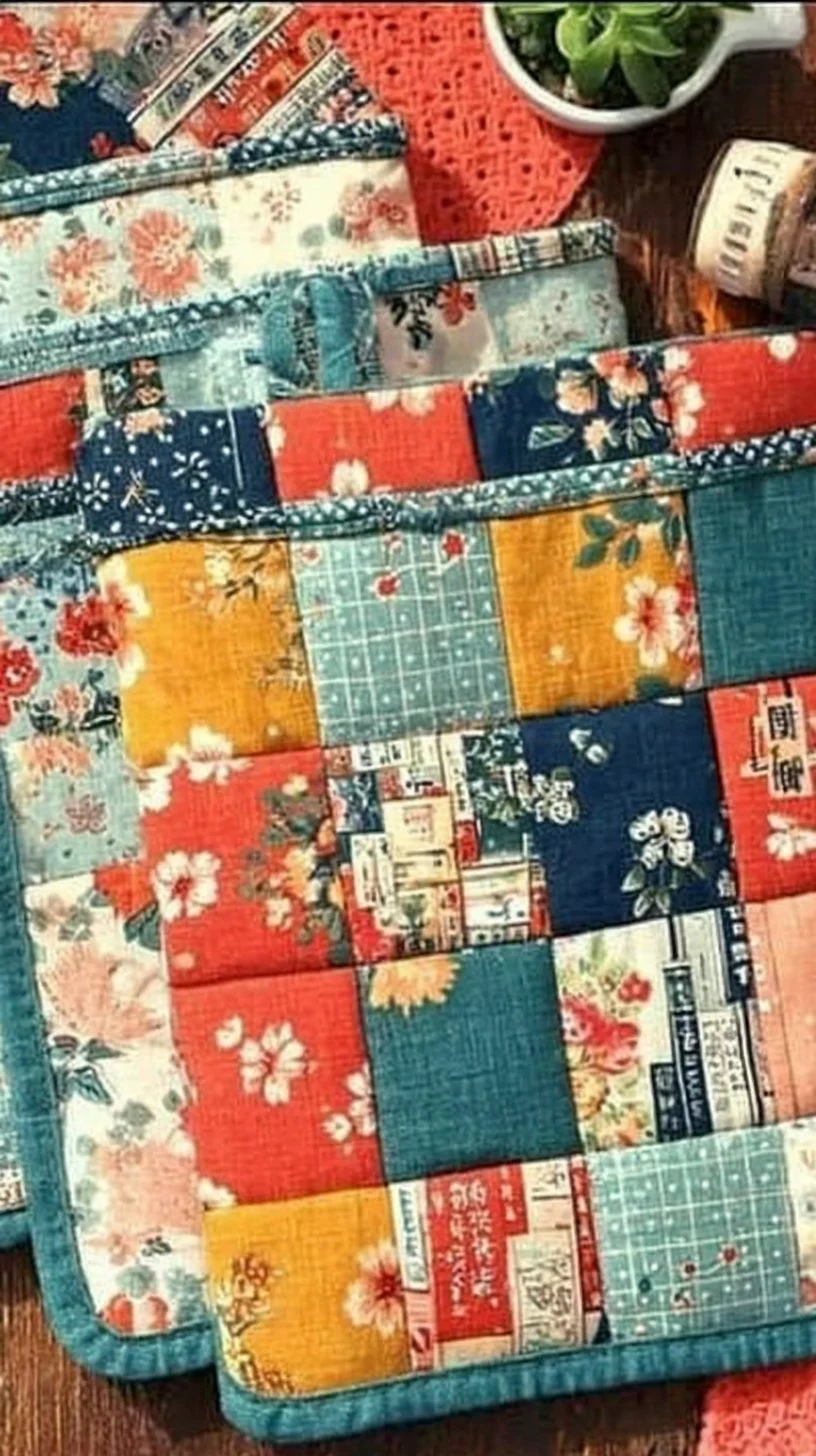
Embrace soft textures for a cozy boho look

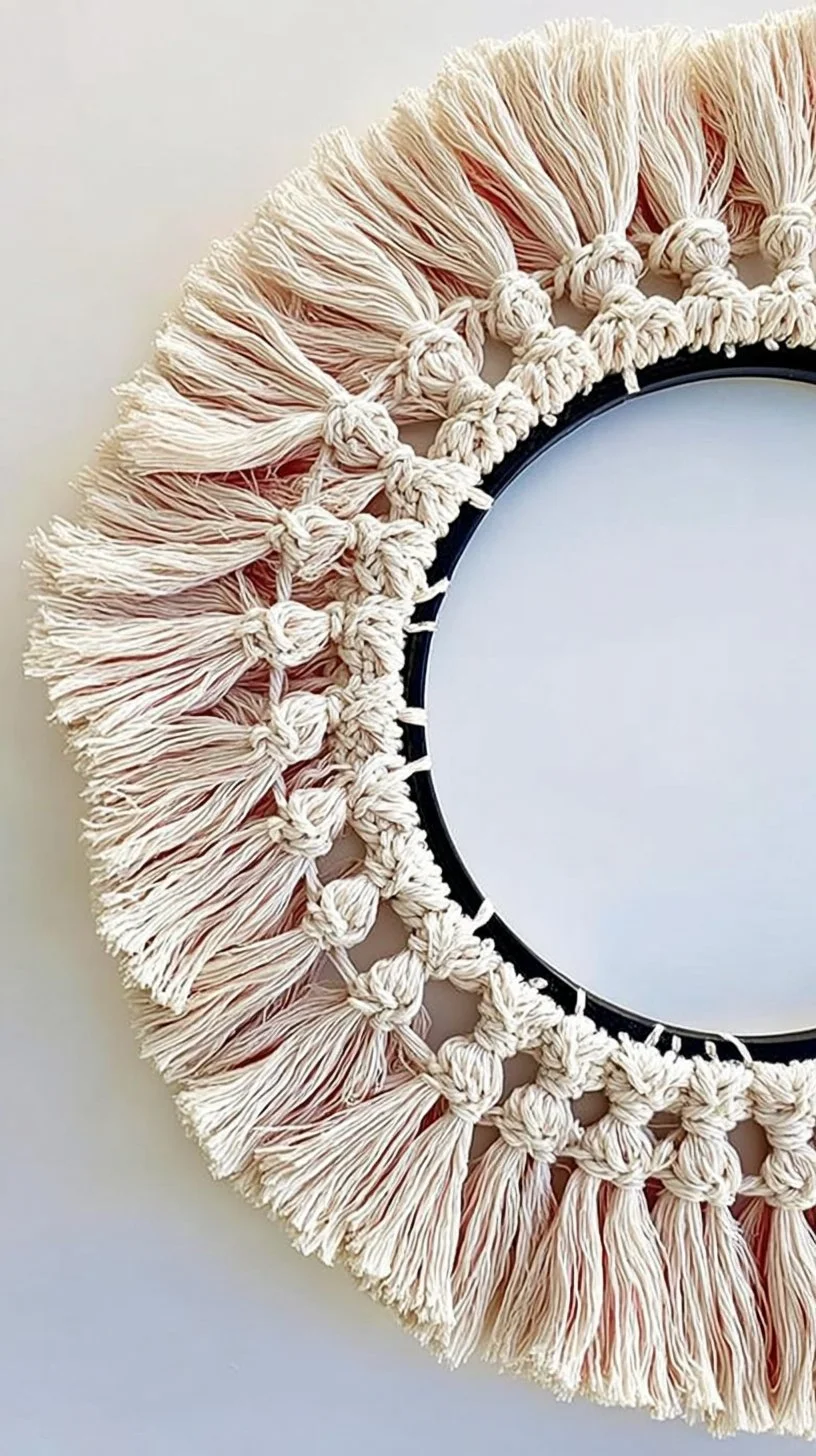
One of the easiest ways to introduce boho charm is through texture. Layer woven ribbons, faux fur, macrame cords, and cotton tassels onto a wreath base to create depth. For a kid-friendly touch, use lightweight materials so the wreath hangs securely without risking damage if a child reaches up. Practical tip: start with a grapevine or foam base, then hot-glue or tie on textures in small sections so you can adjust balance as you go. Example: I used a strip of vintage linen from my mother’s sewing box and looped it around the base; my daughter then added felt flowers she made, which gave the wreath a handmade, family-friendly feel. These small, tactile details make the wreath inviting and encourage touch and conversation when guests arrive.

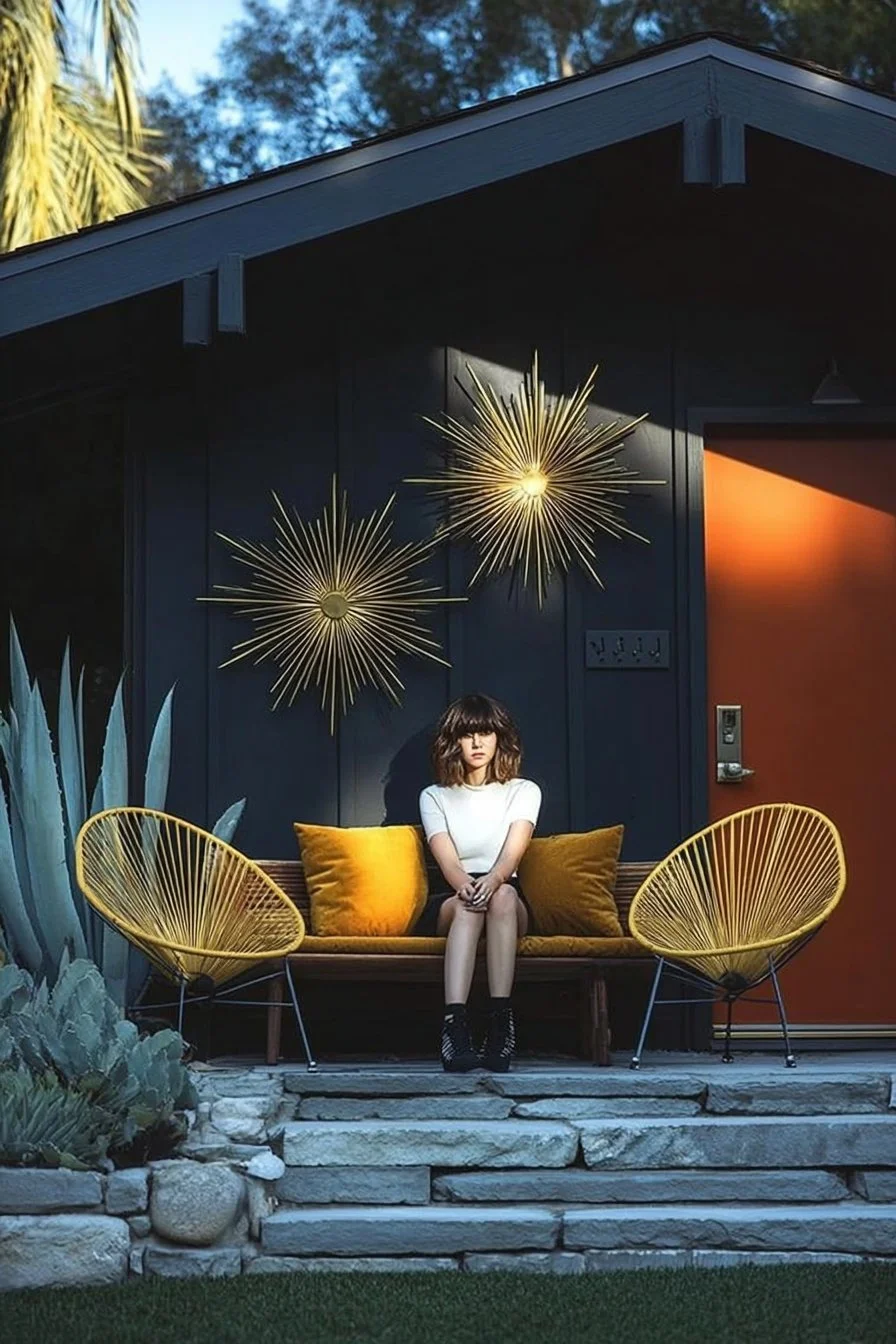
Play with neutral layers and gentle pops of color

Boho decorating often relies on neutral palettes with intentional color accents. For a wreath that blends into most interiors, begin with warm neutrals like cream, tan, and muted sage. Then add a single pop of color, such as a soft terracotta ribbon or a dusty rose bunny ear, so the piece feels curated rather than cluttered. Decorating tip: choose two neutrals and one accent color before you start. This guideline makes it simpler to shop and assemble, and keeps the design cohesive. I once helped a neighbor pick out accent hues that matched her living room throw pillows, and the wreath became a natural extension of her existing décor. This approach works well across entryways, above mantels, or as a subtle focal point on a gallery wall.

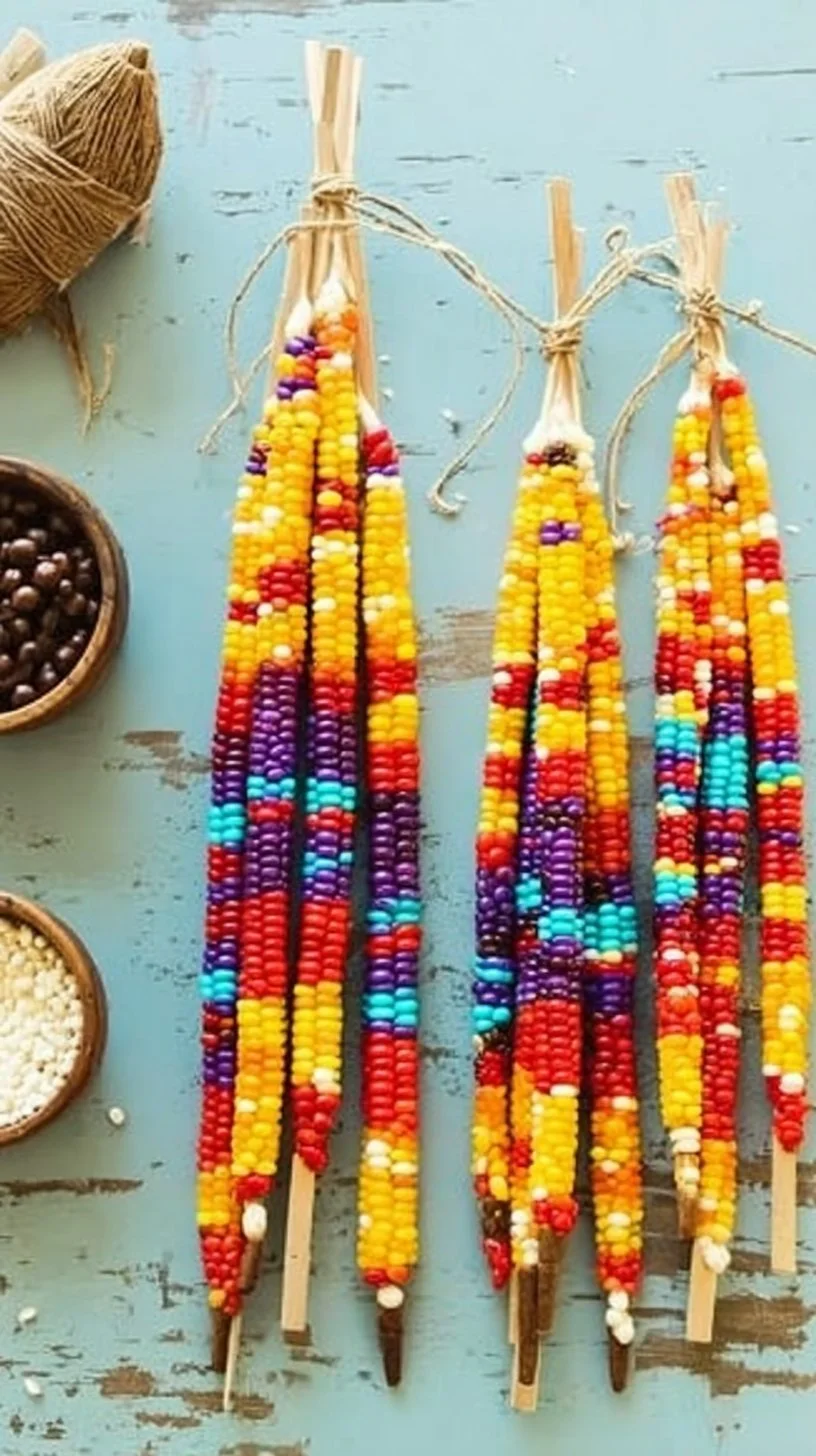
Mix natural materials for an authentic, earthy vibe

Incorporating natural elements makes a boho wreath feel grounded and versatile for everyday home décor. Think dried grasses, eucalyptus sprigs, willow branches, and wooden beads. These components add organic shapes and soft scents that enhance the sensory experience of your interior styling. Implementation tip: dry your own small sprigs from the garden or buy pre-dried bundles; they glue easily and last months with minimal shedding. Anecdote: my father used to leave bundles of dried lavender on our kitchen windowsill, and that scent now reminds me of family gatherings. When assembling, tuck natural bits into crevices and secure with floral wire so they sit flush against the base. The result is an artisanal wreath that reads as both modern and timeless.

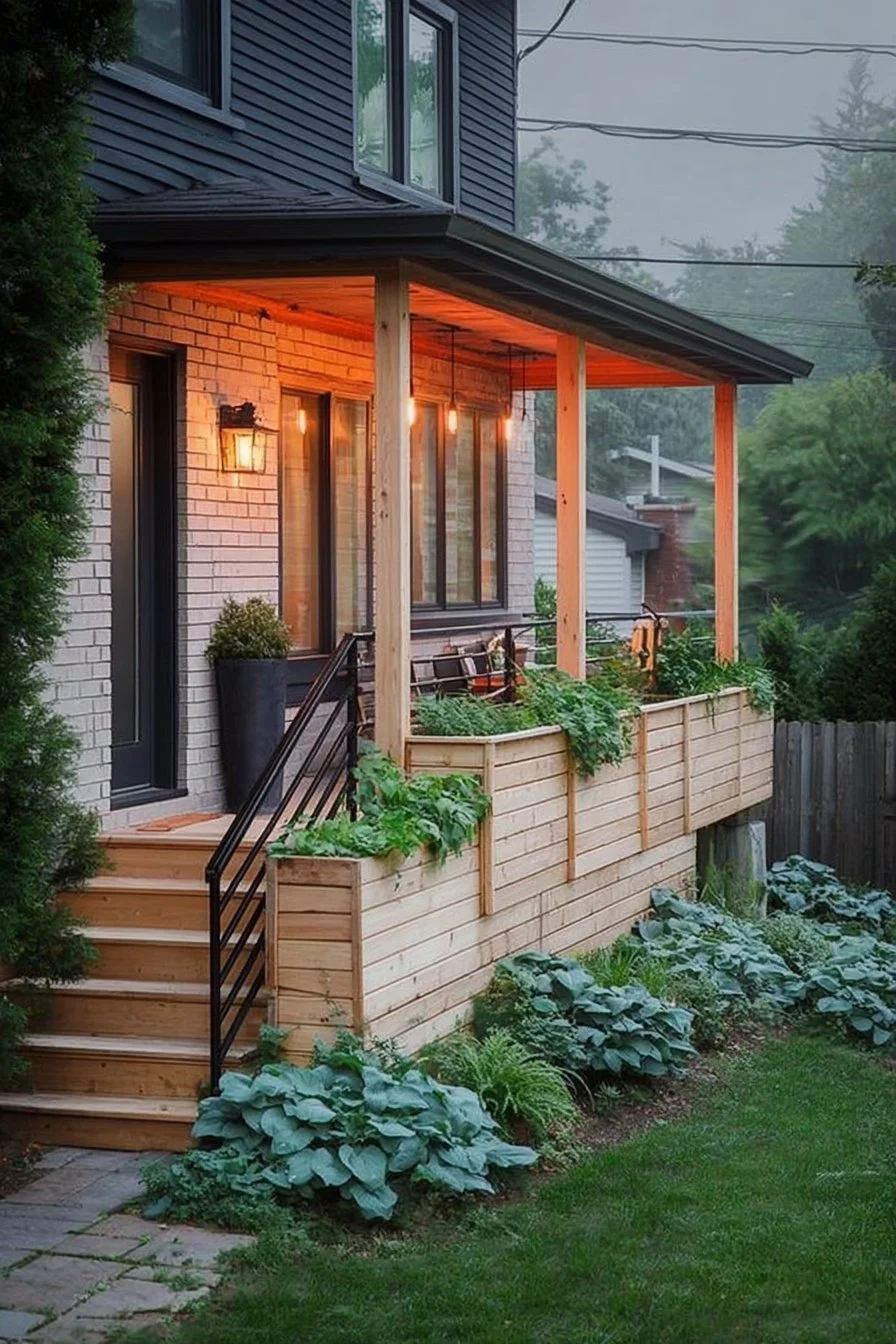
Create a welcoming entryway with layered styling

A wreath is a great starting point for a welcoming entryway, but layering will elevate the entire space. Pair your boho bunny wreath with a textured runner, a small bench, and a basket of cozy throw blankets for guests to use when they come inside. Styling tip: keep scale in mind. If your wreath is large and fluffy, balance it with a simple doormat and minimalist bench. If it is delicate, add small sculptural pieces or a potted plant for visual interest. I often let my kids place one small seasonal or handmade object on the bench when friends arrive; their personal touches turn a styled vignette into a story. Use hooks or pegs to hang keys and jackets neatly, keeping the area both practical and pretty.

Personalize with family touches and practical decorating tips

The most meaningful décor tells a story, so personalize your wreath with small items that reflect your household. Clip a tiny photo charm, a child’s mini art card, or a charm from a family trip onto the wreath base. Practical ideas: use removable clips so you can switch items out easily for birthdays or school milestones. For safety, avoid small choking hazards if little ones are in the house. I once added a tiny wooden airplane my son painted, which became his favorite part of the entry. Cleaning tip: dust gently with a soft brush or use compressed air on low to keep fibers looking fresh. These personalizations make the wreath not just decorative but sentimental, encouraging family pride in your interior styling.

Styling the wreath for year-round appeal

Although many door wreaths feel seasonal, a boho bunny wreath can be styled for everyday use by focusing on neutral, timeless elements. Keep the base neutral and change just a few accents if you want a fresh look – swap ribbons, reposition a few sprigs, or add a new handmade tag. Decorating tip: store alternate accent pieces in a small box labelled with the wreath size so updates are fast and simple. For renters or those who like to switch things often, use command hooks for mounting and lightweight materials to avoid wall damage. I swap a ribbon after holidays and my husband comments how new it looks, even though the changes are subtle. This approach keeps your home décor feeling dynamic without overwhelming your schedule.

Conclusion

I hope these decorating tips and interior styling ideas inspire you to create a boho bunny wreath that feels both stylish and deeply personal. If you would like a walk-through or more inspiration, check out this resource: Boho Bunny Wreath – A Wonderful Thought. Try one or two small projects this weekend and enjoy how a simple wreath can bring warmth and family stories into your home.

Categories
DIY

Potholder and Hot Pad Set Tutorial

I still remember the rainy afternoon when I first taught my son and daughter how to sew a simple square with a zigzag stitch. We laid out scraps on the kitchen island while my husband brewed coffee and my mother called to ask how the grandchildren were doing. As a mom in my forties who takes pride in the warmth of our home and small traditions passed down from my parents, I love turning useful items into charming décor. With two kids between eight and twelve, projects need to be both safe and satisfying. Whether we are swapping fabric choices with the neighbors or I am showing my sister how to finish a corner, these projects become family stories. Here are practical, stylish ideas to make potholders and hot pads that elevate your kitchen decor while keeping everything cozy and functional.

Choose fabrics that speak to your décor

Picking the right fabric is the first interior styling decision. Think of potholders and hot pads as textile accents that should complement your overall home décor palette. If your kitchen leans toward neutral tones, select fabrics with subtle texture like linen blends or woven cottons in warm beige, gray, or soft blue. For a bolder look, go for printed cottons with graphic shapes or retro florals that echo other patterned elements in the room. Practical tip: use cotton or linen for the outer layers and add a heat-resistant batting or insulating layer inside. When I shop with my daughter, she always picks a playful print and I show her how to balance it with a solid binding. This small exercise teaches kids about color coordination and interior styling, and gives you potholders that look intentional on a hook or shelf.

Mix texture and pattern for visual interest

Layering different textures makes a simple kitchen accessory feel curated. Combine smooth cotton with nubby chambray, seersucker, or even a cotton blend with quilting texture. Patterns can play together too: pair a small-scale gingham with a larger botanical print to avoid visual competition. For practical sewing: cut one fabric for the front, another for the back, and use a sturdy binding fabric to frame the piece. Try quilting simple concentric squares or a grid to add dimension and hold the batting in place. I often let my son pick the quilting pattern and it becomes a tiny artwork for the stove area. This mix of texture and pattern ties the potholder into broader decorating themes like farmhouse chic or modern eclectic, offering a small yet effective decorating tip for cohesive kitchen decor.

Design placement and display as part of styling

Potholders and hot pads do double duty when displayed thoughtfully. Instead of hiding them in a drawer, hang them on hooks, stack them on open shelving, or arrange a trio by the kettle for instant visual warmth. Consider a color story: coordinate three matching or complementary pads on a wooden peg rail, or drape a single bright potholder over a vintage ladder styled against the wall. Practical hack: add a small loop at the corner for easy hanging and to create a consistent display line. I keep one near the stove for use and one displayed by the window; each time a neighbor drops by, they remark on the playful mix of fabrics. This is a simple way to incorporate functional decorating tips into everyday life and make usefulness part of your interior styling.

Add personalized embroidery and small embellishments

Personal touches make handmade hot pads feel like heirlooms. Embroidery, simple appliques, or monograms can transform a basic square into a treasured keepsake. Try small motifs like kitchen utensils, herbs, or a family initial stitched in contrasting thread. If you have kids, let them draw a design you can transfer and stitch together. For subtle style, use tone-on-tone stitching so the texture reads as elevated rather than busy. When I embroidered a tiny sprig for my mother’s birthday, she hung it in her kitchen and told every guest the story of our family sewing days. Practical note: use embroidery stabilizer when stitching on cushioned pieces and secure threads on the inside so they do not catch when you use the pad. These little additions make your pieces conversation starters and deepen the meaning of your home decor choices.

Coordinate sets and swap by seasonless themes

Sets create cohesion. Make two or four matching or complementary potholders and hot pads that tie in with your kitchen’s main textiles like towels and chair cushions. Think in terms of themes rather than seasons: coastal neutrals, vintage florals, modern geometrics, or rustic checks work year-round. For a polished presentation, wrap a set with twine and a kraft tag if you are gifting someone, or arrange them stacked on a countertop tray to serve as a purposeful vignette. My neighbor and I trade sets we make for each other; her bold geometric set brightens my backsplash and my neutral set softens her modern counter. Tip: label the storage drawer with fabric swatch samples so you can reproduce or add to the set later, keeping your decorating inspiration organized.

Practical finishing tips and maintenance

Good finishing makes your potholders both durable and decorative. Use reinforced topstitching around edges and a double-fold binding for strength. Insulating batting and a heat-proof layer protect hands and countertops; test your materials by holding the finished pad over a warm pot before gifting it. For care, wash cotton potholders on a gentle cycle and air dry to preserve shape and color. If a stain happens, spot treat with a mild detergent and a soft brush. Keep a small repair kit with matching threads and an extra fabric scrap for quick fixes. I once repaired a singed corner after my son accidentally held a pot too long, and the tiny patch became a charm in our storytelling. These small maintenance habits will keep your handmade items looking intentional and integrated with your home décor.

Conclusion

I hope these decorating tips and styling ideas inspire you to turn simple potholders and hot pads into meaningful home décor pieces that reflect your personality and family stories. If you want a step-by-step project to follow, check out this detailed Potholder and Hot Pad Set Tutorial on DIY Joy: Potholder and Hot Pad Set Tutorial – DIY Joy. Try a small set this weekend, involve the kids, and enjoy how a practical craft can brighten your kitchen and reinforce the warm, lived-in style of your home.

Categories
Outdoor

7 Top Outdoor Decorating, Lighting, Swings, Ceilings, Railings, and Tiles Ideas

I still laugh at how our little porch has become the command center of our neighborhood. Mornings start with cereal boxes in hand and a chorus of kids heading for the bus, and evenings end with neighbor kids lingering for a last story or two while my own two argue over who gets the best spot. Between homework folders, a soccer cleat here and a ballet shoe there, I found that small changes to that front step made our days feel calmer and our memories richer. I started hunting for simple ways to make that space cozy without breaking the bank, bookmarking home decor ideas on Pinterest and mixing practical fixes with sentimental touches. If you love the idea of a porch that holds family rhythms and welcomes neighbors, these decorating inspiration tips might be the gentle nudge you need to start. Check out a few budget projects that worked for us, like this guide to budget-friendly small bathroom remodel ideas that inspired easy swaps around the house.

    1. Create a Cozy Seating Zone with Layered Textures

      A porch that invites lingering is one that feels soft and intentional. Start with a sturdy bench or a compact loveseat, then layer cushions, outdoor-friendly throws, and a woven rug. Layering brings depth and warmth and is one of those interior styling tips that translates beautifully outdoors because textures read as comfort to kids and guests alike. Use color to anchor the space; my children love picking bright pillow covers for impromptu art sessions, and a reversible cushion is a quick fix after a muddy soccer game. For families, choose water-resistant fabrics and removable covers so cleaning is stress free. Add a small side table for a cup of coffee or a homework book and you have a functional, stylish spot where life happens.

    2. Porch Swings and Hanging Seats that Pull Everyone Outside

      A porch swing is not just a seat, it is a ritual. Whether you pick a classic wooden swing, a cushioned love seat swing, or a modern hammock chair, the motion calms kids and adults after busy days. Swings encourage shared moments like reading together or watching the sun dip behind sycamores, and they become the default hangout during summer evenings. Make sure to install with proper anchors and weatherproof chains or rope. If space is tight, a single hanging egg chair offers cozy privacy for an older child doing homework while you keep an eye on dinner. Pair with a throw and a small ottoman to create a mini reading nook that becomes family lore.

    3. Ceiling Treatments that Elevate the Look

      The porch ceiling is often overlooked, but painting it or adding beadboard instantly feels like a designed room rather than an afterthought. A pale blue or soft cream can brighten low light and make late-night porch talks feel open and breezy. Beadboard or tongue-and-groove panels add cottage charm and mask imperfections, which is especially helpful when you’re balancing aesthetics with busy family life. Consider a clear finish or outdoor paint for low maintenance. For a slightly bolder touch, add simple stenciled patterns near the light fixture to delight kids without creating clutter. These small ceiling changes count as thoughtful home décor ideas that make guests feel the effort without you needing to fuss daily.

    4. Railings That Balance Safety and Style

      Railings protect curious climbers while shaping your porch’s personality. Cable railings provide modern lines and unobstructed views, while classic spindles give traditional charm. A low planter railing blends safety with gardening, letting kids help tend herbs or flowers within arm’s reach. We installed a half-height railing with built-in planters where my son keeps his tomato plant; watching him water it after school became his proud ritual. For rental homes or tighter budgets, paint the existing railing in a fresh color and swap simple hardware for a quick style upgrade. This is practical decorating inspiration that keeps safety first but looks intentional.

    5. Outdoor Tiles, Painted Floors, and Rug Layering

      Flooring choices anchor the porch visually and functionally. Porcelain tiles made for outdoor use give a sleek, durable finish that resists summer spills and winter freeze. If replacing flooring is beyond the budget, painting your porch floor with a patterned stencil or a durable porch paint gives big impact for little cost. Layer with an outdoor rug to define seating areas and add softness for tiny feet. Our painted checkerboard lasted seasons and provided endless games for neighbors’ kids, while rugs kept the mud at bay during rainy afternoons. Choose slip-resistant finishes and low-maintenance materials so the space stays inviting through everyday life.

    6. Lighting that Extends Porch Life After Dark

      The right lighting turns a porch into an evening haven for family dinners or storytelling. String lights create cozy ambiance and make the porch feel magical to children at dusk. Wall sconces provide task light for reading or sorting backpacks, and step lights enhance safety for late-night returns. Solar path lights are an eco-friendly addition that requires no wiring, perfect for busy parents juggling carpools and bedtime. Layer lighting levels so you can switch from bright cleaning light to soft mood light for summer nights. Our go-to is a dimmable overhead fan light for hot evenings and a row of fairy lights for weeknight wind-down; together they make the porch feel like an extra room where memories happen.

    7. Smart Additions and Family-Friendly Details

      Small conveniences make a porch truly livable. Add hooks for backpacks and jackets, a boot tray for muddy pairs, and a basket for toys to keep the clutter contained. Smart switches or motion-sensor lights add safety and cut down on forgotten switches, useful when hands are full of school projects or grocery bags. Consider a small storage bench that doubles as seating so sports gear is out of the way but easy to grab for practice. My daughter uses a hanging organizer to keep craft supplies handy for quick DIY moments inspired by seasonal projects like those in this Valentine’s craft ideas guide. These practical touches are interior styling tips that respect the rhythms of family life while keeping the porch beautiful.

Conclusion

If you want a porch that works for playdates, quiet mornings, and neighborly conversations, pick a few ideas that fit your family rhythm and try them slowly. Whether you focus on lighting, a new swing, or a painted floor, small intentional changes create big returns in comfort and curb appeal. Save this article, pin the looks that speak to you, and revisit ideas as your kids grow and routines shift. For more curated inspiration and seasonal looks, explore these porch and patio design ideas you’ll love all season.

Categories
Outdoor

Mid Century Modern House Exteriors That Last

I still remember dropping the kids off at school on a damp Tuesday and waving to Mrs. Harper next door as she watered her succulents, the way her front windows caught the grey morning light like a little stage. My two kids, eight and eleven, clamored from the minivan with backpacks bouncing, and my mind wandered to the little projects that make a house feel like ours again: swapping a tired mailbox for something sleeker, planting low-care shrubs that survive the neighborhood’s wandering squirrels, or finally painting the fence a bolder hue. Between carpools, homework and bedtime rituals, those small changes are how we stitch comfort into everyday life. Lately I keep bookmarking images of houses that seem effortless and personal, the kind of spaces that make you imagine family breakfasts and backyard playdates lingering into golden afternoons. That instinct for thoughtful, livable design is exactly what draws me to modern styling and practical home décor ideas like these.

  1. Clean Lines and Low Rooflines: Keep it simple, live comfortably

Mid century modern exteriors are memorable for their clean, horizontal lines and low roof profiles that feel both understated and intentional. The simplicity of a flat or gently pitched roof calms the street view and gives the whole home a cohesive silhouette. Why it works: clean geometry reduces visual clutter, which makes homes feel wider and more grounded—perfect when you want a safe, familiar backdrop for family life. How to apply it: choose siding materials that emphasize horizontal lines, like long planks of cedar or fiber cement lap siding, and maintain a narrow roof overhang to preserve the style. Paint trim in a complementary but subtle tone to keep the lines crisp. Lifestyle note: for busy weekday mornings, a garage or carport with a low roof can double as a sheltered drop-off spot for backpacks and sports gear, keeping the porch clutter-free and calm.

  1. Warm Woods and Natural Materials: Texture that welcomes

One hallmark of mid century design is the mix of natural materials paired with modern forms. Warm woods like teak, walnut and cedar bring tactile depth to an exterior and age gracefully over time. Why it works: natural textures create an emotional connection, making a modern façade feel more approachable and family-friendly. How to apply it: use wood cladding on a feature wall, add a wood slatted privacy screen, or incorporate stone at the entry to anchor the house. Sealing and finishing will protect surfaces while preserving grain and warmth. Lifestyle note: a wood-clad porch bench or a cedar mailbox shelf makes mornings smoother when kids need a last-minute shoe or glove, turning beautiful materials into useful family spots. These practical touches double as subtle interior styling tips when you carry similar textures inside.

  1. Floor-to-Ceiling Glass and Indoor-Outdoor Flow: Bring the yard in

Expansive windows and sliding glass doors are a signature move in mid century homes, prioritizing natural light and visual connection to the yard. Why it works: more glass makes interiors feel larger and brighter, which is comforting for families who spend time both indoors and out. How to apply it: invest in high-performance glazing to keep energy costs down, and frame openings to align with key views like the play lawn or patio. Pair with simple window treatments that can be opened fully to encourage airflow and sightlines. Lifestyle note: when the kids spread toys or art projects at the kitchen table, the view out to the backyard helps everyone stay relaxed rather than feeling boxed in. For those redesigning bedrooms or other rooms, check out creative space planning tips like these modern bedroom design ideas that echo the open, light-filled ethos.

  1. Open Plans, Built-ins and Functional Touches: Design that supports daily life

Mid century influence is as practical inside as it is outside, with open floor plans, built-in storage and well-considered mudroom areas that keep life organized. Why it works: purposeful built-ins and transitions make the home feel efficient and calm, helping parents manage clutter without sacrificing style. How to apply it: plan a bench with cubbies at the entry, integrate a low, built-in shelving unit in the living area for books and game storage, and keep sightlines clean from entry to backyard. Consider swapping an oversized vanity for a compact mid century-inspired option in smaller bathrooms to maximize movement. Lifestyle note: a built-in homework nook lets my kids spread out after school while I prepare dinner nearby, and having a dedicated drop zone prevents backpacks from taking over the sofa. For ideas on creating cohesive bathrooms that match this approach, see this mid century bathroom inspiration vanity and layout guide.

  1. Statement Front Doors and Color Pops: Personality without fuss

A bold front door or a playful pop of color can turn a modest exterior into a memorable moment on the block. Why it works: mid century design balances restraint with accents, and a bright door provides visual warmth and personality without overwhelming the whole look. How to apply it: choose a saturated, durable paint for the front door—teal, mustard or a rich red—and pair it with understated hardware. Keep surrounding elements neutral to let the door be the focal point. Lifestyle note: a colorful door becomes an easy reference for kids waiting to be picked up, and neighbors often remember houses by these small, joyful choices. Combine color with practical features like a covered porch mat or built-in bench to welcome muddy sneakers while keeping the aesthetic intact.

  1. Landscaped Geometry and Outdoor Living: Simple plants, lasting impact

Landscape makes the house feel complete. Mid century yards favor geometric planting beds, low-maintenance perennials and hardscaping that echoes the home’s lines. Why it works: structured plantings and functional outdoor zones extend living space and require less maintenance—critical for busy families. How to apply it: define walkways with concrete pavers interspersed with groundcover, use ornamental grasses and shrubs for year-round interest, and create a modest patio with clean lines for family dinners. Add a small play lawn bordered by pea gravel for durability. Lifestyle note: our weekend rituals—barbecues, soccer in the yard, or neighbor playdates—feel more cohesive when the outdoor space flows from the interior and stays low-effort. These practical decorating inspiration moves help homes look curated without constant upkeep.

Conclusion

Mid century modern house exteriors offer a timeless balance of form and function that suits real family life—clean lines that calm the eye, warm materials that invite touch, and smart details that make daily routines easier. If you want to explore more visuals and real-world examples that prove this design style endures, take a look at These Mid Century Modern House Exteriors Prove Why This Design Style Is Here To Stay for fresh decorating inspiration and ideas you can adapt for your home. Save the ideas that resonate, and try one small change this week to see how much a thoughtful detail can transform your day-to-day.

Categories
DIY

DIY Beaded Corn Fall Craft

I remember sitting at my kitchen table with a mug of chamomile, watching my eight year old son string beads while my ten year old daughter carefully selected colors. As an American mom in my forties, I love passing down small creative rituals that connect us to family stories and to the handmade things my mother taught me. My husband chips in when he can, and Grandpa stops by with old jars of beads he saved from his workshop. Those afternoons of quiet crafting with little chatter from the kids are how I learned to make simple pieces that feel like home. If you like warm, approachable decorating tips that welcome family participation, these beaded corn ideas will give you charming inspiration for interior styling, plus easy projects your kids can help with.

Materials and prep: what to gather for success

Start with basic, affordable supplies so this project fits any budget and home décor plan. You will need pipe cleaners or floral wire, an assortment of seed beads in various sizes, a sturdy base for each ear of corn such as a small styrofoam cone or rolled cardstock, and simple craft glue. For interior styling, pick bead finishes that match your palette: glossy neutrals for modern Scandinavian rooms, matte earth tones for rustic looks, or jewel tones for an eclectic vignette. Practical tip: sort beads into small dishes or muffin tins to keep little hands organized. If your children are helping, pre-thread a few sections or use larger beads to reduce frustration. This prep makes the craft doable and keeps the end result polished for display as home décor.

Beading techniques and color palettes that work with home décor

There are a few easy techniques to create textured, realistic patterns that elevate interior styling. Try stitching beads in rows around a cone or twisting beaded pipe cleaners to mimic kernels. Alternate sizes and finishes to catch light and add depth. For color palettes, imagine the room where you will display the piece: choose complementary tones to tie into pillows or artwork. A neutral living room benefits from warm amber and cream beads, while a bold gallery wall can handle turquoise and brass accents. Anecdote: my daughter mixed a metallic bead with a soft pastel and it became our favorite piece because it contrasted the sofa fabric in a delightful way. Small variations in technique create big visual interest that reads as thoughtful home décor rather than a craft project.

Styling beaded corn in living spaces and vignettes

These beaded ears are versatile accents for mantels, bookshelves, entry tables, or as part of a centerpiece. Group three different sizes at varying heights to create balance. Place them in a shallow bowl with polished stones or on a wooden tray with small candles to add texture. For an entryway, line a narrow shelf with beaded corn leaning against framed family photos for a curated look. Tip: coordinate with natural elements like fresh greenery or dried grasses to make the pieces feel integrated in the room. I once tucked a beaded ear into a decorative pitcher on a side table; neighbors complimented the subtle handmade touch during a casual visit. These styling tips make the beaded corn feel like purposeful interior styling, not just a craft left on a shelf.

Kid-friendly variations and family project tips

Turn this into a repeatable family activity that suits ages and skill levels. For younger kids, use larger pony beads and pipe cleaners so they can thread easily. Older children can try more intricate patterns or mix tiny seed beads for finer detail. Create a simple template or color key for each child to follow, or let them invent their own combination for creative freedom. Make it a weekend ritual: set out a “bead bar” with labeled jars and let the kids make one item while you work on a more complex piece. Practical safety note: supervise small beads around younger siblings and store extras in a sealed container. My son took pride in gifting a beaded ear to Grandma; it became a keepsake and a story we retell when she visits. These family-friendly approaches keep interior decorating collaborative and meaningful.

Display longevity and care to keep pieces looking fresh

Beaded items need a little care to stay beautiful. Avoid placing them in direct sunlight which can fade bead finishes. Dust gently with a soft brush or use a hairdryer on cool, low setting to blow dust away from crevices. If a bead comes loose, have a small repair kit on hand with glue and matching beads so kids can learn simple mending skills. For storage between uses, wrap each ear in tissue and keep in a shallow box to prevent crushing. Consider making a few variations in different color stories so you can rotate them through your home décor when updating pillows or wall art. A small investment in care keeps these handcrafted pieces looking intentional and integrated with your interior styling.

Conclusion

These beaded corn ideas offer approachable decorating tips and DIY inspiration that blend craft with thoughtful interior styling. If you want a step-by-step pattern to try with kids or to adapt for your own color scheme, check out this Beaded Pipe Cleaner Indian Corn tutorial for clear instructions and visuals. It is a useful resource when planning a family crafting session that results in polished home décor pieces you will enjoy displaying. Beaded Pipe Cleaner Indian Corn – One Little Project

Categories
DIY

Here’s How You Make Those Viral Plastic Cup Ornaments

Here’s How You Make Those Viral Plastic Cup Ornaments

I remember the late afternoon light in our kitchen, when my two kids were sprawled across the table, markers and glue in little piles, and I was trying to carve out a quiet creative hour between pizza practice and homework. As an American mom in my forties, raised by parents who loved weekend craft fairs, I find joy in turning ordinary things into something special. My son, who is ten, and my daughter, who is nine, love making projects that end up on display, not shoved in a drawer. My husband cheers us on, and sometimes our neighbor drops by with a cup of coffee and a compliment. Those simple, joyful sessions inspired me to try plastic cup ornaments for our home décor. They are budget-friendly, kid-approved, and surprisingly chic when styled right.

Why plastic cup ornaments are a fresh home décor trend

Plastic cup ornaments are part of a tiny revolution in accessible interior styling. People are looking for inexpensive, sustainable ways to refresh a room without buying mass-produced objects. These ornaments take disposable cups and transform them into sculptural accents that add personality to shelves, mantels, and window nooks. They fit perfectly into current home décor trends that value upcycling and handmade details. Use them as grouped vignettes, hanging mobiles, or shelf-sized sculptures. Practical tip: keep a small bin for clear and colored cups so you can mix transparencies. Example: I grouped three translucent ornaments on a bookshelf next to my favorite coffee table book; the light caught them and suddenly a plain shelf looked curated. This is the kind of decorating tip that reads expensive but costs next to nothing.

Materials and the basic technique anyone can follow

You do not need fancy supplies to start. Basic materials include clear or lightly tinted plastic cups, scissors, a hole punch or heated needle for hanging holes, acrylic paints or permanent markers, glue for embellishments, and twine or ribbon for hanging or display. Start by deciding on a shape: cut petal shapes to create a floral orb, or stack rim-to-rim to build layered spheres. A practical tip: warm the scissors under hot water before cutting the plastic for smoother edges. Safety note: supervise kids and handle hot tools yourself. Anecdote: my daughter loved choosing the color palette, while my son got obsessed with counting the number of petals for symmetry. For durability, coat painted areas with a matte clear sealer so the finish withstands handling and dust. This is a simple DIY that gives immediate decorating inspiration.

Color, texture, and finishing touches for professional results

Color and texture will elevate these ornaments from craft to design. Choose a cohesive palette that matches your room’s tones: soft neutrals for a Scandinavian look, jewel tones for a boho edge, or metallics for a modern vibe. Try sanding cup rims lightly to create frosted edges, or use alcohol ink to achieve marbled effects. Tip: use a sponge brush for translucent washes of paint so light still passes through. For texture, glue thin strips of lace, yarn, or even natural fibers like jute to the outer edges. Example: I painted a set of cups in a warm sage and applied a gold leaf highlight to the rim; they became the focal point on my mantel. These finishing touches are the decorating tips that make upcycled items look intentional and styled.

Styling ideas for everyday rooms and unexpected places

Think beyond the tree. Plastic cup ornaments work in the entryway above a console, clustered in a pendant-style mobile over a reading chair, or grouped on a coffee table tray as a sculptural set. Try hanging a small trio at varying heights in a narrow hallway to add vertical interest. For kitchen styling, use them as lightweight hanging planters for air plants. Practical tip: use removable adhesive hooks for temporary displays so walls stay damage-free. Personal example: I hung a set in front of our kitchen window; when I stew tomato sauce for dinner the warm light through the ornaments looks like tiny stained glass accents. These are easy decorating tips for everyday inspiration that refresh a room without a full redesign.

Kid-friendly variations and how to turn this into a family project

This craft is perfect for a casual family afternoon. Set up stations: one for cutting, one for painting, and one for assembling. Encourage children to experiment with stickers, glitter, and washi tape rather than tiny beads that can be choking hazards. Tip: pre-cut shapes for younger children so they can focus on decorating. Make it a learning moment by measuring cup rims, counting petals, or exploring color mixing. Anecdote: my son loves symmetry and insisted each ornament have an even number of petals, while my daughter preferred glitter-heavy designs. At the end, take photos of each creation and pin them to a family inspiration board. These personalized ornaments become little keepsakes that tell a story on your shelves.

Mixing with other décor and care for lasting display

Combine plastic cup ornaments with candles, ceramics, and books to create layered vignettes. Use varying heights and textures to build contrast. Tip: place a small felt pad under ornaments that sit on wood surfaces to avoid scratches. For hanging displays, choose clear fishing line for an invisible effect or braided twine for a more rustic look. Cleaning is easy: dust with a soft cloth and avoid harsh chemicals that may dull painted finishes. Storage tip: nest ornaments with tissue paper between them to prevent scratching. Example: after a weekend of crafting we stored extras in a labeled bin in a closet; the next time I redecorated, pulling them out felt like discovering new ornaments all over again.

Conclusion

I hope these decorating tips inspire you to try plastic cup ornaments as a creative addition to your home décor. They are a fun, budget-friendly way to bring handmade charm into everyday spaces, and they make excellent family projects that result in meaningful, display-ready pieces. If you need a cozy break while crafting, I often take a little baking pause and follow this recipe for a sweet treat: Here’s How To Make The World’s Greatest Chocolate Chip Cookies. Try one idea today and let your interior styling tell a story that is uniquely yours.

Categories
DIY

DIY Cute Yarn Birdies You Can Make in Minutes

DIY Cute Yarn Birdies You Can Make in Minutes

I still remember sitting at my kitchen table while my kids did their homework and my mother called to ask about Sunday dinner. As a proud forty-something American mom, I love filling our home with small handmade touches that tell a story. My son, who is ten, and my daughter, who is nine, love to add their doodles to my projects, and sometimes my husband and I will sip tea and string yarn together after the kids are in bed. These little birdies started as a rainy-day craft, inspired by the crocheted ornaments my grandmother kept on her mantle. Sharing them with neighbors and giving them as tiny gifts to schoolteachers has become a weekend ritual. If you like cozy, approachable decorating ideas that blend family memories with modern home décor, this is a perfect, quick craft to add warmth to any room.

Quick supplies and simple techniques for busy households

Creating yarn birdies does not require a closet full of craft supplies. Start with basic materials: yarn in a few favorite colors, scissors, a glue gun or fabric glue, small styrofoam or yarn-wrapped cores if you want a round body, and a few beads or tiny felt scraps for eyes and beaks. For interior styling on a budget, choose a neutral palette with one accent color that matches your living room or bedroom. The technique is forgiving: wrap yarn around a small cardboard ring or balloon, tie it off, and shape it with scissors. If your children are between 8 and 12, they can safely help with wrapping and gluing while you handle hot glue. Practical tip: set up a craft tray to contain stray yarn and make clean-up quick. This approach keeps decorating tips realistic for busy families and supports collaborative projects with kids and neighbors.

Styling birdies as shelf and mantel accents

Once you have a handful of birdies, think about placement. Group them on a mantel with a mix of books and potted plants to create layered texture. Use odd numbers, like three or five birdies, for a more natural arrangement. Try varying heights by placing some on small wooden blocks or cake stands to add dimension. For interior styling that feels curated, pick one shelf in your living room and build the display around a family photo or a favorite ceramic piece. A small anecdote: my daughter loves to set the birds near her science books; she says they keep her company during study time. Practical tip: secure tiny birdies with museum putty if pets or little siblings are active in the home. These small touches bring decorating inspiration into everyday spaces.

Creating playful garlands and mobiles for cozy corners

Stringing multiple birdies into a garland is an instant update for a reading nook or entryway. Use thin twine or sturdy ribbon and space the birds about 6 to 8 inches apart. For mobiles, suspend three to five birdies from a wooden hoop and hang near a window where they can gently sway. This adds movement to a room without overwhelming the decor. If you are aiming for a cohesive look, coordinate the yarn colors with throw pillows or curtains in the same room. A practical tip: attach birds with small clothespins so you can rearrange or wash the garland easily. I once made a mobile for my son’s homework corner and he said it made studying feel more fun. These ideas are easy to implement and give immediate decorative payoff.

Tabletop arrangements and center-of-attention displays

Yarn birdies make charming tabletop decor for coffee tables, bedside tables, or kitchen islands. Create a simple centerpiece by placing a cluster of birdies in a shallow tray with smooth stones or faux moss for texture. For a more elevated look, perch a bird on the rim of a decorative bowl or drape one over a stack of hardcover books as a playful accent. Use them to punctuate a vignette of candles and ceramic vessels to introduce softness and color. Practical tip: mix materials like wood, glass, and fabric to maintain balance in your interior styling. My neighbor loved this idea and brought a trio of birdies to our last book club meeting to decorate the snack table; everyone ended up asking how to make them. These small decorative pieces become conversation starters.

Customization, gift ideas, and family craft nights

One of the best parts of yarn birdies is how customizable they are. Add tiny stitched initials for teacher gifts, glue on little beaded eyes for sparkle, or use patterned yarn for a vintage look. Host a family craft night where each person personalizes a birdie; my siblings and I once made a dozen in an evening and labeled each with a memory from our childhood. For practical gift packaging inspired by decorating tips, tuck a birdie into a simple kraft box with shredded paper and a handwritten note. If you plan to sell or gift these at community fairs, attach a little card with care instructions for long-lasting home décor. These projects teach kids crafting skills and create keepsakes that reflect personal stories and interior styling preferences.

Conclusion

Handmade accents like yarn birdies are an easy and affordable way to refresh your home décor and spark creativity in the whole family. If you want a step-by-step visual guide to making similar pieces, check out this helpful tutorial: DIY Cute Yarn Bird : 5 Steps (with Pictures) – Instructables. Try a few techniques, involve your kids or neighbors, and let these little birdies bring new warmth and inspiration to your decorating routine.

Categories
Outdoor

6 Easy DIY Christmas Decorations for Outside

I used to stand at my kitchen sink, watching my two kids squabble over who gets to hang the biggest ornament on the front porch, while my neighbor waved from across the driveway with a plate of cookies. Life in my forties is busy, messy, and full of small rituals that make our house feel like a home. Weeknight homework sessions, weekend soccer games, and those quiet moments when the youngest naps and the oldest builds forts on the living room rug all blend into the kind of memory I want to keep. Decorating outside became a family ritual that helped us slow down, invite neighbors over, and teach the kids practical crafting skills. Those afternoons of hot cocoa and glue guns turned into thoughtful displays that reflect our family and neighborhood. If you like simple projects that involve kids and deliver big curb appeal, I share plenty of home décor ideas that are easy to pull off on a weekend. For more quick projects, I sometimes reference other DIY roundups like this helpful guide on DIY outside decorations DIY outdoor decorations.

Section 1: Lanterns on the Porch and Pine Cone Garland

A mason jar lantern is an instant mood maker and a practical light by the door. It works because glass and a warm light feel inviting and scale well on steps or a bench. To make them, clean jars, add battery-operated tealights or fairy lights, and wrap the neck with twine or ribbon. For stability, nestle jars in shallow trays filled with sand or small rocks. Kids can help paint frosty designs or glue small sprigs of greenery. Pair these with a simple pine cone garland strung along the railing. Pine cones are free on neighborhood walks, and adding ribbon or cinnamon sticks makes them smell lovely. This duo fills your porch with cozy texture and scent, while giving the whole family easy jobs that look cohesive from the curb.

Section 2: Planter Box Evergreen Arrangements and Painted Pots

Using existing planter boxes to display cut evergreen branches, berries, and ornaments makes your porch come alive without buying a tree. This idea works because the planters frame entryways and allow layered heights that catch the eye. Cut locally sourced greens and tuck in battery lights or red berries for pops of color. Let kids place a few shatterproof ornaments so they feel ownership. If you prefer a craft that lasts into other months, paint terra cotta pots with simple motifs like stars or stripes and use them as holders for festive clusters. Painted pots are a fun weekend project that also teach children color mixing and layout, while giving your curb a handcrafted look that neighbors often compliment.

Section 3: Solar String Lights in Shrubs and Lighted Pathway Jars

Solar string lights are an easy way to get illuminated charm without worrying about cords. They work because they recharge during the day and create an ambient glow at night. We tucked solar strings into bushes and around the mailbox so evening walks by the kids feel safe and magical. For an extra touch, line your walkway with jars turned into luminaries. Press battery tea lights or solar stakes into jars with a base of sand or pebbles to hold them steady. Kids love arranging the jars like little beacons, and it gives your path a festival feel without complex wiring. These lighting choices provide both safety and visual appeal for little ones playing outdoors after dark.

Section 4: Pallet Porch Tree and Candy Cane Walkway Stakes

A DIY pallet tree is a charming focal point when you nail slim pallet planks into a triangular shape, sand the edges, and paint or stain. It works because the rustic shape reads like a tree but is space friendly and lightweight for a porch. Add strings of lights and family-made ornaments. My kids painted tiny wooden disks with thumb prints to hang, and grandparents still remark on them every visit. Along the path, candy cane walkway stakes are simple and wonky enough that the neighborhood kids always giggle. Use PVC pipe bent into hooks, paint with stripes, and anchor them in the grass. These projects are great for rainy afternoons and teach kids basic tools and painting skills. For more low cost craft inspiration, check this collection of easy DIY decorations low cost DIY decorations.

Section 5: Wreath Variations and Sled Sign

A wreath made from grapevine, evergreen trimmings, or even remnant fabric works because the circular shape symbolizes welcome and ties the whole entrance together. Create wreaths using a wire frame and invite kids to glue on small wooden shapes or family mementos. Wreaths can be swapped between the front door and garage for balanced styling. Nearby, a repurposed wooden sled painted with your family name or a simple message makes a nostalgic accent. Lean it against a porch post or mount it to a fence. My husband and I found an old sled at a yard sale and the kids painted stripes on it, turning a thrift discovery into a yearly favorite that sparks neighborly conversation.

Section 6: Upcycled Window Frames and Burlap Ribbon Bunting

Old window frames can be refreshed into charming outdoor displays by painting them in soft hues and hanging greenery, small wreaths, or strings of lights through the panes. They work because they create architectural interest and add depth to a plain wall or fence. My kids love choosing the seasonal accents to dangle from the sashes. Another simple project is burlap ribbon bunting strung between posts or on a porch railing. It adds texture and movement and holds up well in weather. Cut long strips, knot them or fold them into flags, and secure with twine. These projects are low cost, sturdy, and perfect for involving the whole family in a weekend styling session.

Conclusion

I hope these approachable home décor ideas and interior styling tips inspire you to create displays that feel personal and warm. Try one project with your kids or combine a few to boost curb appeal while making memories. If you want lighting inspiration for outdoor layouts or creative room lighting ideas, check out Room & Space Ideas | Govee US for helpful guides and product ideas: Room & Space Ideas | Govee US. Save this article for later and come back when you need more decorating inspiration or practical projects to share with the family.

Categories
DIY

How To Make Reversible Soup Bowl Cozy

When my kids were little, our kitchen table felt like the center of everything: homework sprawled beside cereal bowls, my husband bringing in mugs of coffee, my mother dropping by with a basket of fabric scraps. Now that my son is ten and my daughter is eight, I still love small handmade touches that warm the home and remind me of my childhood summers mending with my grandmother. As an American mom in my forties, proud of our family traditions and the practical creativity that runs in our clan, I find reversible bowl cozies are a simple project that blends usefulness with personal style. They protect hands and surfaces, make soup feel more special, and are a perfect little home décor accent that reflects your taste. Let me walk you through thoughtful choices and styling tips that make these cozies both beautiful and functional.

  1. Choose fabrics that marry function and style

Start by picking two fabrics that complement each other and your home décor. A sturdy cotton for the inner layer will resist spills and handle warmth, while a textured linen or quilting cotton on the outer side brings pattern and personality to your countertop or dining table. Think of color palettes you already use: neutral grays and creams for a minimalist feel, or soft florals and warm plaids for a cozy farmhouse look. When selecting prints, keep scale in mind — small prints pair well with bold solids or stripes. Wash and dry your fabrics before cutting to avoid shrinking later. If you want extra insulation and a quilted appearance, add a thin batting layer. These choices boost interior styling and create a cohesive decorating tip for a table setting that looks curated and intentional.

  1. Design reversible color and pattern combinations

Reversibility is your chance to play stylist. Pick one side that is bold or seasonal in tone without locking you into a holiday motif, and another side that reads as a neutral everyday option. For example, pair a muted sage with a small geometric pattern in navy, or a warm terracotta with a soft cream stripe. Try color-blocking by using contrasting edge piping or topstitching to create a tailored look. If you have children, include a side with a playful print they will love, and a grown-up side for more formal dinners. I often make two cozies and keep one on each side of our cupboard so my daughter can pick the fun pattern while I reach for the calmer one. These reversible design ideas serve both function and decoration in modern home décor.

  1. Step-by-step construction made simple

A clean, repeatable method helps the project stay enjoyable. Cut two identical circles or rings for fabric and one for batting if desired. Mark the center with a small stitch so layers align. Sew with right sides together, leaving a gap for turning, then trim curves and clip seams to reduce bulk. Turn the piece right side out and press it flat with an iron, making the gap easy to topstitch closed. Add an inner quilting stitch or concentric circles from the center to hold batting in place. If you prefer a no-sew option, fabric glue or fusible interfacing can provide structure for an emergency cozy, although sewn finishes last longer. Keep a simple template from sturdy cardboard so you can make matching sets that elevate your kitchen styling.

  1. Sewing techniques for durability and insulation

Durability matters when small hands and frequent machine washes are in play. Double-stitch stress points and use a reinforced topstitch around the edge to prevent fraying. For insulation without bulk, choose a heat-resistant batting designed for pot holders, or layer cotton batting with fusible interfacing to stabilize the shape. Quilting not only secures layers, it adds a decorative element that becomes part of your interior styling. Consider using cotton thread that blends in on one side and contrasts on the other to showcase the reversible nature. My neighbor taught me that little touches like vintage buttons or embroidery can personalize a cozy into a keepsake, and those accents are small decorating tips that make guests ask where you found them.

  1. Styling and placement ideas for home décor impact

Think beyond the bowl. Reversible bowl cozies can double as miniature trivets, small coasters for teacups, or decorative accents on an open shelf. Group a set of three in graduated sizes on a wooden tray to create a tabletop vignette that complements your living room or entryway. Use a coordinated color scheme to tie in with throw pillows and kitchen linens for a deliberate interior styling approach. For busy households, keep a basket near the stove stocked with ready-to-use cozies so warming soup becomes effortless. I like to tuck one under a potted plant to protect my sideboard; it looks intentional and keeps surfaces safe. These small styling ideas are practical decorating tips that make your home feel curated.

  1. Care, gifting, and personalization tips

To keep cozies looking fresh, wash on a gentle cycle and reshape while damp. Avoid high heat if your fabrics include delicate prints. Personalize cozies with initials, simple embroidery, or a stamped leather tag for a polished handmade gift. They make thoughtful housewarming presents or teacher thank-you gifts and are a lovely way to share a bit of family tradition. When I sent a set to my sister, she layered them into a gift basket with a jar of homemade soup mix and a handwritten recipe card, which became an instant family favorite. Small touches like matching wrapping paper or a customized note enhance the homemade appeal and encourage recipients to use them in their own interior styling efforts.

Conclusion

If you want a simple DIY project that combines practicality with charming home décor, reversible bowl cozies are a wonderful place to start. They provide functional protection, reflect your interior styling choices, and offer plenty of room for personalization and gifting. For a clear pattern and step-by-step guidance to get you sewing right away, check out this helpful tutorial from DIY Reversible Bowl Cozy – 5 out of 4 Patterns. Try making a few variations to mix and match with your table linens and storage baskets, and enjoy how a small handmade item can refresh your decorating inspiration.

Categories
DIY

How to Finish a Potholder Loom

I still remember the afternoon my kids turned my kitchen table into a makeshift craft studio, flour on one side and a potholder loom on the other. I’m a mom in my forties, proud of the small-town values my parents taught me, and I love sharing hands-on projects with my son and daughter, who are 8 and 11. My husband will bring down a tray of lemonade while the neighbors’ kids stop by to admire our colorful squares. Those afternoons echo memories of my own childhood, sitting with my aunt as she showed me how to finish edges neatly. Finishing a potholder loom is a cozy, satisfying ritual that gives you a usable piece and a touch of handmade charm for your home décor. I’ll walk you through thoughtful, practical finishing techniques that add durability and style while fitting into modern interior styling and decorating tips.

Choose the right finishing edge for style and strength

The edge you pick determines both the look and longevity of your potholder. Popular finishes include whipstitch, overcast stitch, braided fringe, and a neat crochet border. For a kitchen that leans toward farmhouse or cottage-core, a simple whipstitch with matching cotton yarn gives a tidy, homey finish. If your interior styling favors boho or eclectic looks, add a braided fringe on two sides for texture.

Actionable tips:

  • Use a needle large enough for your yarn to avoid snagging. I teach my kids the whipstitch first because it’s forgiving and fast.
  • Match your border color to a dominant tone in your kitchen to make it feel intentional as part of your home décor palette.
  • For strength, stitch through both layers at the edge so the potholder can handle frequent use and washing.

A neat border turns a plain square into a decorative item you won’t be afraid to display on hooks or arrange on open shelving.

Add a practical backing for durability and visual appeal

A backing protects the weaving and gives the potholder a polished look. You can hand-sew a cotton fabric backing, use felt for insulation, or quilt a thin layer for extra thickness. Fabric backing also lets you coordinate with placemats, napkins, or curtains for cohesive decorating tips across your kitchen.

Practical steps:

  • Cut the backing slightly smaller than the woven square to avoid corners peeking out.
  • Use a short, tight stitch to secure the fabric to the weaving; this prevents bunching after washing.
  • If you want more heat resistance, add a layer of cotton batting or sew in a small square of insulated fabric inside.

I often let my daughter pick scraps from my sewing box to create playful, personalized combinations. The backing not only improves function but also ties your potholder into your overall interior styling.

Create a hanging loop or tab that complements your decor

A small loop turns a potholder into both a tool and a display piece. Think of it as a dual-purpose finishing touch that makes your potholder accessible and part of the room’s look. Choose a loop made from matching yarn, leather cord, or a small ribbon that echoes the room’s aesthetic.

How to do it:

  • Secure the loop into the edge when you finish the border so it is anchored to multiple stitches.
  • Reinforce the attachment by stitching through the loop base several times, or add a small backing patch for extra strength.
  • Position the loop in a corner for a traditional look, or centered on one side for a modern display.

I hang a set of three coordinated potholders on a slim wall peg near my stove — they’re practical and create a colorful vignette that fits my home décor inspiration.

Block, trim, and wash for a professional finish

Blocking and gentle washing make a handmade potholder look like it came from a boutique. After finishing the edges, trim stray yarn ends close to the fabric but not so close you risk unraveling. Blocking evens the shape and helps the border sit flat.

Steps to follow:

  • Lightly dampen the potholder and pin it gently to a flat towel to shape it, letting it air-dry fully.
  • Trim loops or uneven yarn with sharp scissors, keeping the cut clean.
  • Wash gently by hand or on a delicate cycle in a mesh bag; reshape while damp to maintain the edges.

These finishing touches create a polished item that stays attractive through use. I always show my kids how blocking smooths out their projects — it’s a satisfying bit of magic for little makers.

Style potholders into everyday home décor and inspiration

Think beyond utility and let potholders add charm to shelves, hooks, and tablescapes. They work as small placemats under hot dishes, layered coasters for a casual coffee station, or framed as textile art on a gallery wall that highlights craft and texture. Match them to your kitchen’s color story, or use them as little pops of pattern against neutral countertops.

Practical styling ideas:

  • Group several in a row on a peg rail for a curated, artisanal look.
  • Rotate color families to refresh visual interest without a full redecorating effort.
  • Use sets to echo other textiles such as tea towels or chair cushions for cohesive interior styling.

When friends drop by, these small handmade touches often spark conversations about technique and tradition. For a home that blends function and design, potholders are a delightful way to weave personal craft into everyday decorating tips.

Conclusion

Finishing a potholder loom well gives you a useful piece and a tiny canvas to express your home décor style. If you want a clear, hands-on tutorial with photos and step-by-step finishing methods, check out The Best Way to Finish Handwoven Potholders – Big Green Chair. Try a few different edges, backings, and display ideas until you find combinations that fit your kitchen and interior styling. With a little patience and practice, you’ll have durable, attractive potholders that add warmth and inspiration to your home.