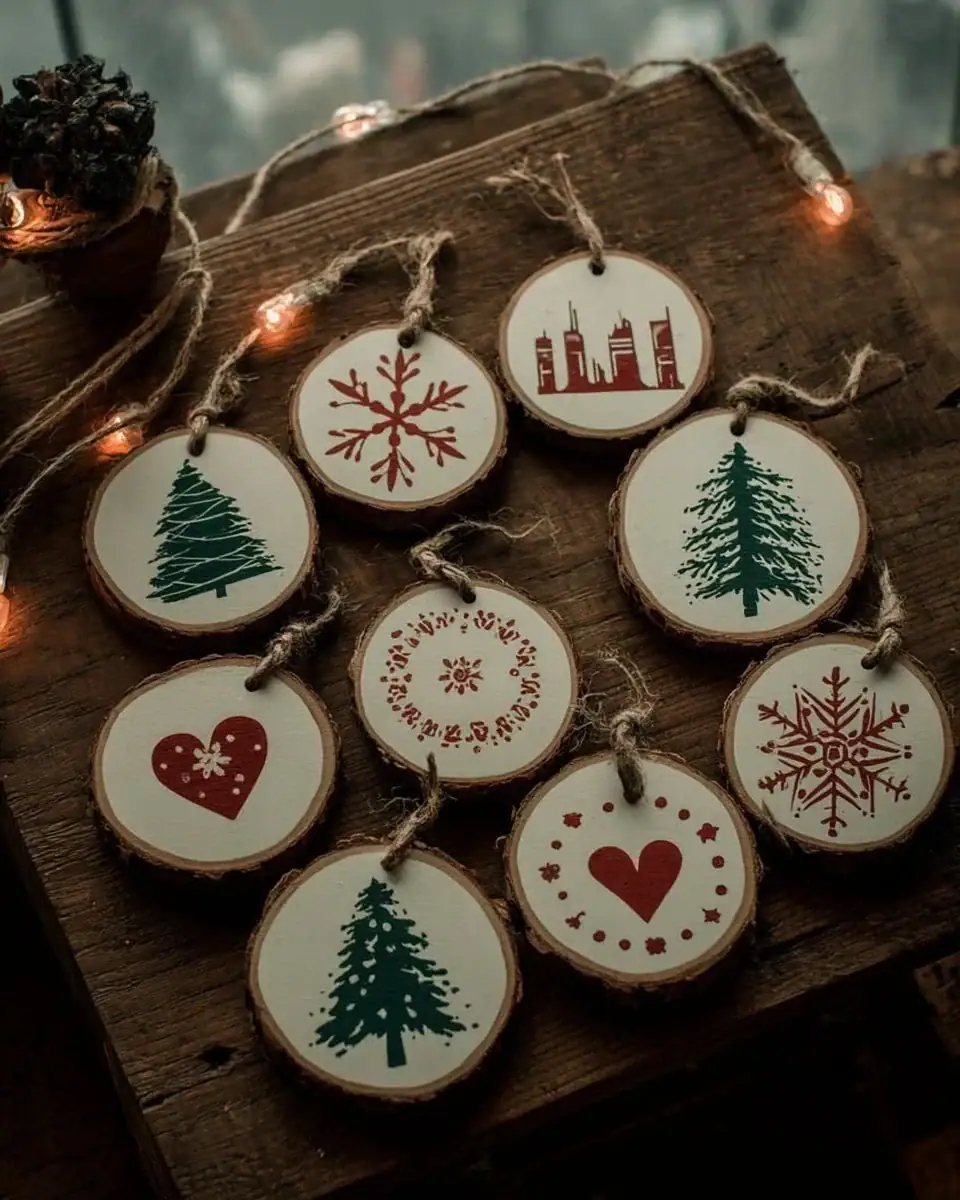
As the holiday season approaches, many of us are on the lookout for creative and unique ways to decorate our homes. One charming trend that has gained popularity in recent years is the use of natural elements in festive decor. Hand-painted wood slice ornaments embody this rustic beauty, bringing warmth and a personal touch to your holiday styling. In this guide, we’ll explore the delightful process of creating your own wood slice ornaments, offering practical tips, inspiring ideas, and the festive spirit that comes with crafting your seasonal decorations. So let’s dive in and spread some cheer this Christmas!
Understanding the Charm of Wood Slice Ornaments
Wood slice ornaments capture the beauty of nature while reflecting the cozy, rustic aesthetic often associated with farmhouse decor. When you think about seasonal decor, these ornaments stand out as unique statements that blend seamlessly with any holiday theme. The varieties available in nature, from the grain patterns to different wood types, allow for endless creative possibilities.
To get started, consider gathering materials from local craft stores or even venturing into nature to find fallen branches. If you’re lucky enough to have a woodworker in the family, you might ask them to cut some slices for you. Aim for a width of about ¼ inch to create sturdy ornaments that hold paint and embellishments well. Once your wood slices are ready, you’ll find yourself enthralled by the possibilities for creativity!
Essential Supplies for Your Crafting Adventure
Before you unleash your creativity, you’ll want to gather all the materials necessary for making your ornaments. A checklist can simplify this process, ensuring that your DIY experience is enjoyable and stress-free. Here’s what you need:
- Wood Slices: As mentioned, these can be purchased or handmade.
- Sandpaper: To smooth any rough edges and prepare the surface for painting.
- Acrylic Paints: Choose colors that reflect the holiday spirit—think reds, greens, golds, and whites.
- Paintbrushes: Various sizes for detailed work and broader strokes.
- Sealant: A clear, finishing spray or Mod Podge can protect your designs.
- Twine or Ribbon: For hanging your finished ornaments on the tree.
- Optional Embellishments: Glitter, stickers, or stamps to personalize your creations.
Having everything at hand will streamline your crafting process, allowing you to focus on bringing your artistic visions to life!
Creative Painting Techniques to Try
Once you’ve prepped your wood slices, it’s time to unleash your creativity with paint. This is where individuality shines, as any technique can add a unique flair to your ornaments. Here are some painting techniques to inspire you:
- Stenciling: Use holiday-themed stencils to create precise designs. These can range from snowflakes to festive phrases like “Joy” or “Peace”—perfect for capturing the essence of the season.
- Freehand Painting: If you have a steady hand, feel free to embrace your inner artist. A simple evergreen tree or a whimsical reindeer can add a charming touch.
- Sponging: For a textured look, dab paint with a sponge instead of a brush. This technique works wonderfully for snow or tree foliage impressions.
- Layering Colors: Start with a base coat, then add details using contrasting colors. Perhaps a bright red background with white snowflakes can bring your wooden slices to life.
Personalization: Make It Yours
One of the most rewarding aspects of creating your own holiday decorations is the opportunity for personalization. Your wood slice ornaments can tell a story or represent your family’s unique traditions. Here are some ideas for adding that personal touch:
- Family Names: Paint each family member’s name onto an ornament. This not only personalizes your tree but also serves as a beautiful keepsake for years to come.
- Dates and Memories: Mark special years, such as wedding anniversaries or births. Use a fine-tipped brush to write the year right at the bottom of the ornament.
- Photographs: For a modern twist, print mini photos of family members, glue them onto slices, and embellish with paint.
- Quotes and Sayings: Inspiring words or fun phrases can inspire laughter and joy. Consider “Home for the Holidays” or “Joy to the World” to elevate the festive theme.
The Perfect Finishing Touch: Sealing Your Masterpieces
After you finish painting and personalizing your wooden slices, it’s essential to protect your handiwork so it lasts through many holiday seasons. A sealant provides a protective layer against dust, moisture, and wear, ensuring your ornaments shine brightly year after year.
Apply a clear acrylic spray sealant outdoors, adhering to the manufacturer’s instructions. Ensure your ornaments are fully dry before applying the sealant to avoid smudging your designs. For additional flair, you could sprinkle a little glitter on the ornaments while the sealant is still wet, giving your creations a festive sparkle!
Displaying Your Handmade Ornaments
Once your lovely wood slice ornaments are finished, it’s time to show them off! There are many creative ways to display your handmade treasures throughout your home.
- Christmas Tree Decor: Drape twine or ribbon through the top of each slice, create a loop, and hang them on your tree for an eye-catching presentation.
- Garland: String your ornaments onto a length of twine or ribbon to create a charming garland. Drape it along your mantel, stair railing, or a console table—wherever you want to add a touch of holiday cheer.
- Table Settings: Place small wood slice ornaments around your dinner table as charming accents to your holiday meal setup. It’s a unique way to bring conversation and warmth to the festive gathering.
- Gallery Wall: If you’re feeling bold, create a gallery wall using your ornaments as art pieces. Mount them in shadow boxes or arrange them creatively around family photos.
Conclusion: Embrace the Spirit of DIY This Christmas
Creating hand-painted wood slice ornaments is an enjoyable way to express your creativity and celebrate the spirit of the season. Not only do these charming decorations enhance your holiday decor, but they also become a cherished part of your family’s traditions. As you craft each ornament, you’ll likely share stories, laughter, and special moments that will last a lifetime. So gather your supplies, invite your family and friends, and embark on this delightful DIY journey. Your home will shine the brightest this holiday season with your personalized touches, and who knows—you might start a new holiday tradition of your own! Happy crafting!