Categories
DIY

8 Easy Snowman Crafts That Sell Out Every Holiday Season

8 Easy Snowman Crafts That Sell Out Every Holiday Season

As the frost begins to blanket our cozy suburban neighborhood, I can’t help but feel heat bubbling up from fond memories of childhood winters spent making snowmen with my siblings. Now, as a proud mom of two, I find myself following in those delightful footsteps with my own son and daughter, who are 8 and 12, respectively. Our home is filled with twinkling lights and nostalgic scents of gingerbread and cinnamon. While holiday decorations sparkle in every corner, there’s something so charming about focusing our crafting sessions around those jolly snowmen. Whether it’s for our family traditions or holiday gifts for neighbors and friends, these crafts offer a wonderful way to spread cheer and foster creativity. With the right touch, you can whip up snowman crafts that will surely sell out every holiday season!

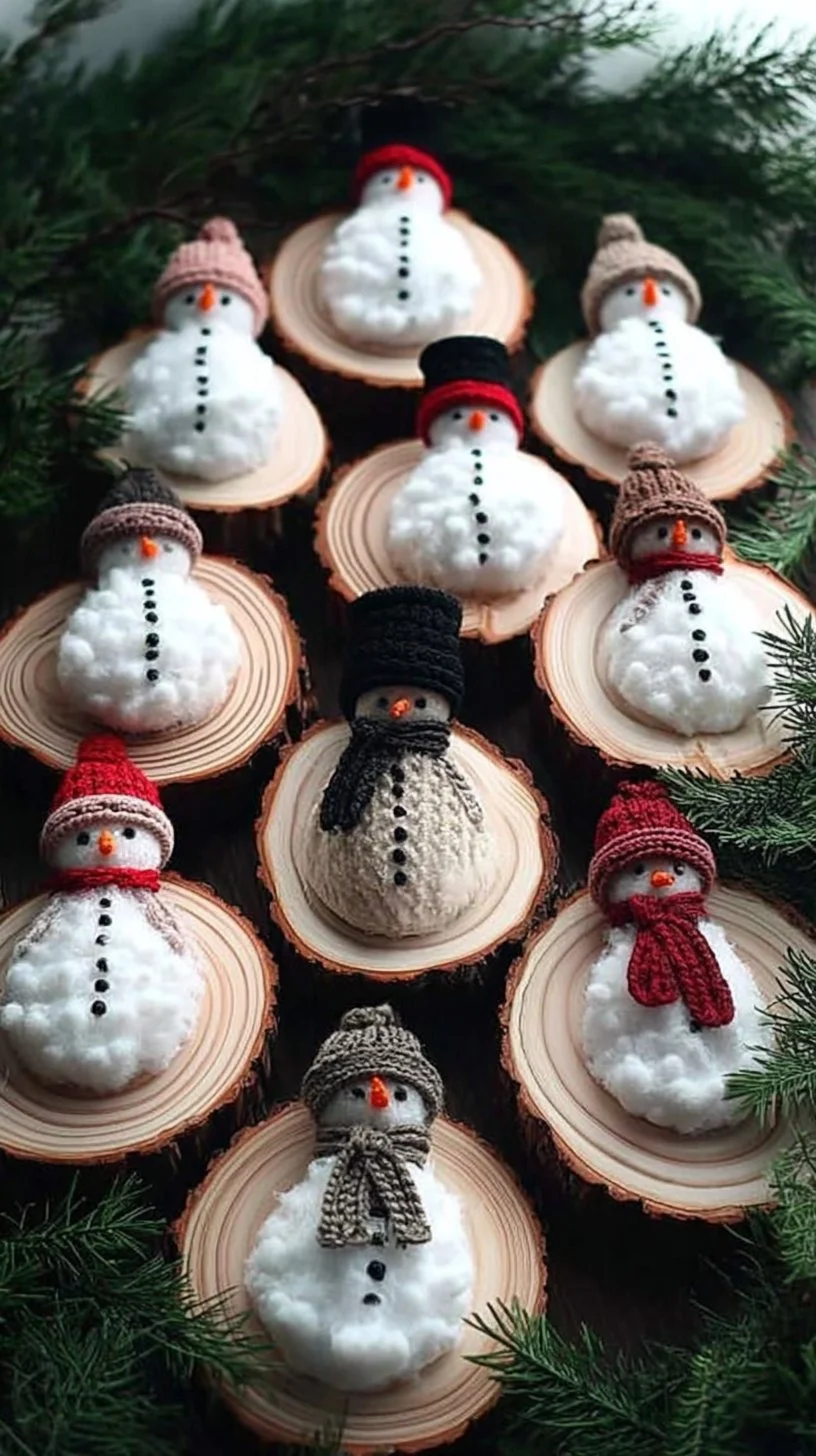
1. Classic Snowman Ornaments

Creating snowman ornaments is a simple yet delightful project that both my kids and I enjoy. All you need are clear plastic or glass ornaments, white paint, and some glitter. Start by pouring a small amount of white paint inside the ornament and swirling it around to coat the inside. Once dry, let your children decorate the outside with a marker, adding features such as eyes, a carrot nose, and a big smile.

For added fun, sprinkle some glitter inside before sealing them up. These ornaments appeal greatly during the holiday season, making them popular items at local craft fairs. Last year, we made a whole batch to gift to grandparents, and they absolutely loved the personal touch!

Tips:

  • Use non-toxic paint for safety.
  • Try different sizes or shapes of ornaments for variety.

2. Snowman Garland

A snowman garland brightens up any room and is remarkably easy to create. Using white felt, cut out snowman shapes and decorate them with buttons and fabric scraps for scarves and hats. String them together with twine or ribbon to make a festive garland that can adorn your mantelpiece or doorframe.

My daughter and I crafted a similar garland two years ago, and it brightens our hallway every winter. It’s also a fantastic project for kids’ parties or holiday gatherings where everyone can contribute. Garland crafting has become a tradition in our home, ensuring each year brings a fresh and unique addition.

Tips:

  • Mix materials: felt, paper, or even recycled cereal boxes can work.
  • Let the kids add their flair: each snowman can look entirely different!

3. Snowman Luminaries

As the nights grow colder, there’s something enchanting about a glowing snowman luminary lighting up your porch. To make these, use empty glass jars (like those leftover from your pasta sauce) and paint them with acrylic paint. Create a snowman face on the jar and place a tealight candle or battery-operated light inside.

These luminaries have been such a hit in our neighborhood, as they guide our friends and family to our front door during holiday gatherings. I love that we can get the kids involved in painting and decorating while also adding warmth and charm to our seasonal decor.

Tips:

  • Make sure to use proper paint to withstand the outdoor elements.
  • Try different sizes of jars for various heights and layers.

4. Snowman “Building” Kits

Who doesn’t love the idea of building their snowman? Although we live in a warmer climate, creating a snowman kit is a fabulous way to inspire fun during the holidays. Use a mix of small decorative items: pom-poms for noses, buttons for buttons, and small scarves made from fabric.

We made snowman kits a couple of years back and distributed them to our neighbors for a festive community meetup. Each family received their mini building supplies, and they had such a blast constructing their own unique snowmen during our get-together!

Tips:

  • Include directions for building your snowman—this adds a fun touch!
  • Package everything in clear bags tied with twine for a finished look.

5. Snowman-Themed Wreaths

Transform your front door into a frosty wonderland with a snowman-themed wreath. Start with a foam or wire wreath frame and wrap it with white tulle or cotton batting. Use additional embellishments like buttons, felt hats, and festive ribbons to complete your snowman look.

Making wreaths has become an annual sibling project every December, and it’s thrilling to see how much creativity they put into their designs. Last year, we attached mini evergreen branches to give our wreath a pop of natural color, which made our house feel even more inviting!

Tips:

  • Personalize the wreaths by adding family names or monograms.
  • Use waterproof materials if you plan to hang them outdoors.

6. DIY Snowman Mugs

Personalized mugs are perfect for hot cocoa or coffee on chilly mornings. You can create snowman mugs using plain white ceramic mugs and porcelain paint pens. Have the kids decorate each mug with snowman faces, complete with cheerful smiles and winter hats.

These mugs have become a holiday staple in our home. Each year, we sip hot drinks from mugs we’ve lovingly designed together, and I even consider selling a few at the local holiday market! They make wonderful teacher gifts or holiday favors.

Tips:

  • Cure your mugs according to the paint instructions to make them dishwasher safe.
  • Consider adding a packet of hot cocoa along with each gift mug for a thoughtful touch.

Conclusion

Crafting with your children during the holiday season is not only a great way to create joyful decorations but it also strengthens familial bonds and builds lasting memories. Each snowman craft can be uniquely tailored to your style, offering endless possibilities for creativity and fun. So go ahead, gather your supplies, and let your imagination run wild! This festive season, let the playful spirit of snowmen inspire you and bring a burst of joy to your home decor and community. Let’s embrace the whimsy and charm of winter, one craft at a time! Happy crafting!

Categories
DIY

Paper Christmas Tree Craft

As the holiday season draws near, our home transforms into a wonderland of twinkling lights, fragrant pine, and the laughter of my children, Emily and Jack, as they help with the decorations. My heart swells with warmth as we unwrap cherished ornaments passed down from my parents, each carrying a story of its own. Those moments spent together, crafting memories and engaging in festive activities, are what make this season truly special. Just the other day, we stumbled upon a fun yet simple craft idea that I couldn’t wait to share: creating paper Christmas trees! Now, you might be wondering how a simple piece of paper can bring the spirit of the holidays to life, but trust me, it can. So, grab your scissors and glue, and let’s explore this delightful craft journey together.

Why Create Paper Christmas Trees?

Before we dive into the crafts, let’s consider why paper Christmas trees have become such a delightful trend in seasonal decor. First and foremost, they are incredibly versatile. You can customize them to fit any color scheme or theme in your home. This year, my kids and I have chosen a silver and blue palette that mirrors the frosty charm of winter, but you can go with traditional green or any whimsical color you desire.

Moreover, making these trees is a fantastic way to engage children in crafting. Both Emily and Jack love getting their hands sticky with glue and paints, and I cherish the creativity they unleash during the process. Lastly, crafting these trees doesn’t break the bank! It’s an affordable way to incorporate festive decor without overspending, giving you more room to enjoy other seasonal splurges.

Gathering Your Supplies

Now that you’re excited about this project, let’s talk about supplies. The best part? You probably already have most of what you need at home! Here’s a list that will get you started:

  1. Paper: You can use colored construction paper, old greeting cards, or even wrapping paper scraps.
  2. Scissors: Ensure they’re kid-friendly if your little ones are helping out.
  3. Glue or Tape: White school glue works well for paper trees, but double-sided tape can be beneficial for quicker assembly.
  4. Decorative Items: Think glitter, buttons, beads, or sequins for added sparkle. Our favorite? Using up leftover craft items from previous projects!
  5. A Base: You might want to glue your finished trees onto a sturdy paper base or a small piece of cardboard so that they stand tall.

Get your supplies together, and set up a cozy crafting area in your home. Perhaps put on some festive music or a holiday movie to get everyone in the mood.

Crafting the Paper Trees

Alright, let’s jump into the fun part—making those paper trees! Here’s a simple step-by-step guide to help you create your own.

  1. Cut out the Paper: Start by cutting your paper into various sizes of triangles. My kids love experimenting with different heights and widths for a fun visual effect.
  2. Assemble the Tree Shape: Take the largest triangle and lay it flat. Then, glue smaller triangles on top, layering them to form a tree. You can even use a circular piece of paper at the bottom to act as the tree trunk!
  3. Add Decorations: Here comes the fun part! Let your children unleash their artistic flair by adding decorations. They can sprinkle glitter, stick on beads, or even draw on their designs with markers.
  4. Final Touches: Once the glue has dried, consider adding a festive star on top. A simple yellow paper star cutout can bring a touch of magic.
  5. Display Your Creations: From your dining table to your living room mantle, there are countless ways to showcase your paper creations around your home.

Watching Emily and Jack put their unique spin on each tree is what keeps this tradition alive and wonderful. Who knew empty paper could transform into such a vibrant part of our holiday decor?

Personalizing Your Tree

One of the delightful aspects of creating paper Christmas trees is the opportunity for personalization. In our home, we love to incorporate elements that reflect our family’s personality. This year, we decided to make each tree tell a story.

For Jack, we included buttons and Lego pieces, showcasing his love for building and play. For Emily, we created a pastel-themed tree adorned with intricate doodles and drawings of our family’s favorite winter scenes.

Encourage your children to think about what represents them the best, be it their favorite colors, hobbies, or memories. This touch of personalization adds meaning to their creations and truly brings the spirit of the season into your home.

Expanding the Craft: Tree Variations

If you’re like me and enjoy shaking things up, consider trying out different variations of paper trees. Here are a few inspiring ideas:

  1. 3D Paper Trees: For a more advanced project, cut multiple layers of triangles and fold them outward to create a three-dimensional tree. Kids love seeing these come to life!
  2. Mixed-Media Trees: Combine paper with recycled materials like fabric, old magazines, or even those leftover Christmas cards. This can lead to some truly unique designs.
  3. Themed Trees: Adjust your trees to suit any theme—think of a beach-themed tree adorned with shells for a quirky twist or holiday trees inspired by famous book characters. Imagination knows no bounds!

As we decorated our themed trees with little cut-outs from last year’s holiday greeting cards, Emily gleefully exclaimed, “Look, Mom! The Grinch is on my tree!” You could just feel the festive spirit multiplying!

Displaying Your Crafty Masterpieces

Once you have a mini forest of paper Christmas trees ready, you must think about how to display them. Here are tips on showcasing your festive labor of love:

  • Centerpiece: Arrange your trees on a tray as a centerpiece for your holiday dining table. Place soft white lights around them for that extra cozy touch.
  • Mantle Magic: Place your creations on the fireplace mantle. We like to mix them in with our string lights and seasonal garlands for added visual interest.
  • Window Display: Transform your window sill into a winter wonderland with these charming trees, making it a delight for both inside and outside viewers.

Crafting a warm and inviting atmosphere in your home is what the holidays are all about. Each time I glance at our adorned mantle, I’m reminded of the joyful moments we shared during our crafting sessions.

Final Thoughts

The holiday season beckons us to embrace creativity, warmth, and togetherness. Engaging in this paper Christmas tree craft is not just about decorating your home; it’s about spending quality time with family and creating memories that will last a lifetime. Whether you choose to go with traditional designs or opt for whimsical themes, the joy of crafting together will resonate long after the decorations are taken down.

So, gather your supplies, unleash your kids’ creativity, and enjoy making paper Christmas trees that reflect your family’s unique style. I promise it will become a cherished tradition in your home, just as it has in ours! Happy crafting!