Categories
Christmas

7 Christmas Decor Ideas: Bright Entry Charm

As the holiday season draws near, the excitement in the air is palpable. Twinkling lights, the scent of pine, and the cheer of festive music create an irresistible atmosphere of joy and warmth. One of the first places your guests will notice as they arrive is your entryway, making it an essential canvas for your holiday decorations. Transforming this space into a magical entrance can set the tone for your entire home, inviting everyone in with holiday cheer. Allow us to guide you through a collection of delightful, creative ideas that will infuse your entryway with seasonal charm!

1. Festive Wreaths: A Timeless Tradition

A classic holiday wreath gracing your door is a marvelous way to signal that the season has arrived. This year, consider stepping outside the traditional box. Instead of the usual evergreen, why not experiment with materials like burlap, felt, or even ornaments?

For a unique touch, create a DIY wreath using pine cones and cinnamon sticks. Just glue them onto a circular base and finish with a festive bow. Placing LED lights within your wreath can also give it a magical glow, especially during evening hours. This simple yet charming detail will greet guests as they arrive and add a warm, welcoming feel.

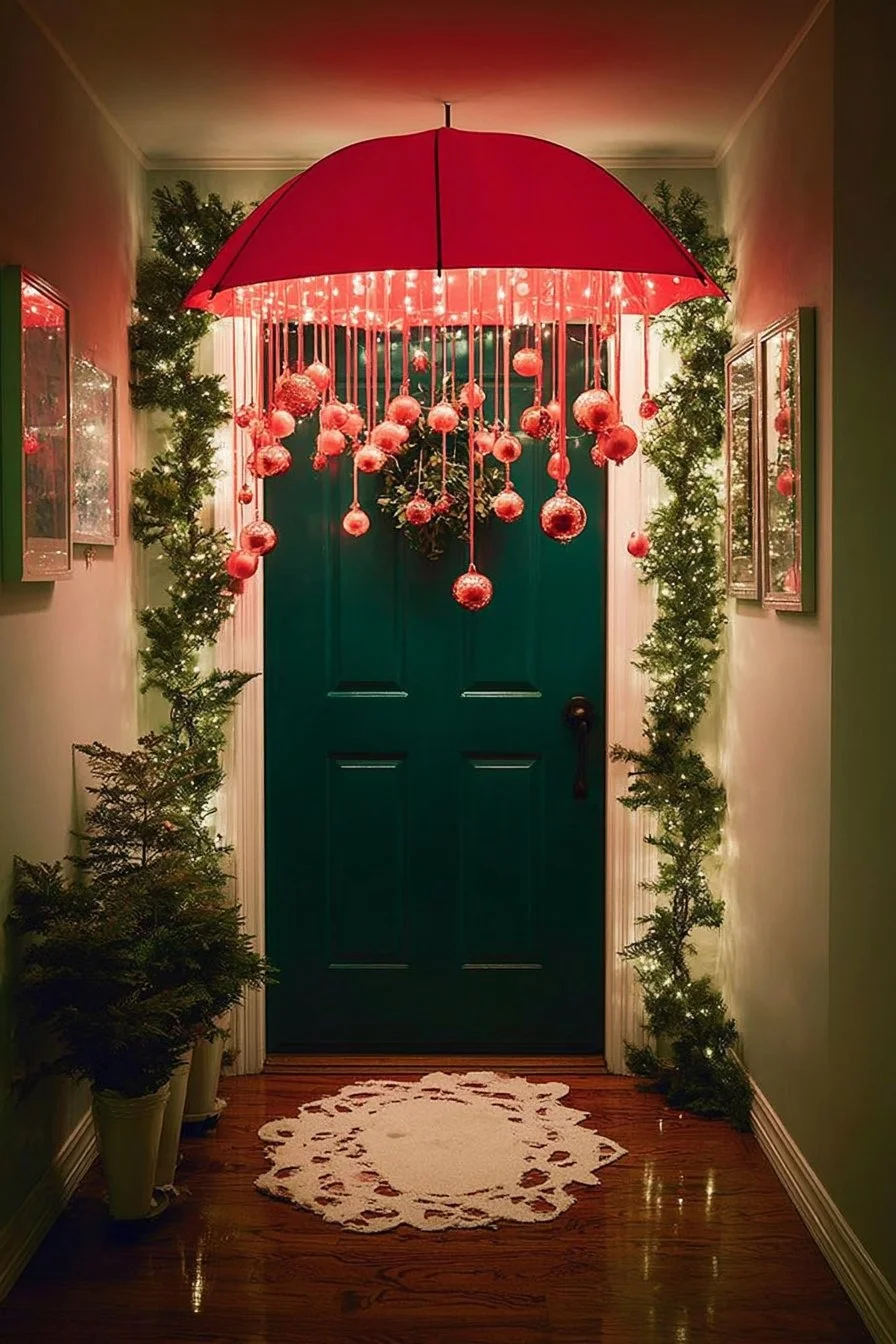
2. Illuminated Pathways: Lighting the Way

As sunlight diminishes, the importance of captivating outdoor lighting becomes paramount. Brightening up your entryway with twinkling lights can easily turn an ordinary path into an enchanting one.

Consider using lanterns placed symmetrically on either side of your walkway. For added flair, hang fairy lights around trees or bushes along the path. Alternatively, stake solar-powered lights with festive motifs into the ground. Stringing lights along your railing or above your door can also create a breathtaking effect. This not only enhances curb appeal but also offers a sense of security to your guests as they make their way to your home.

3. Seasonal Accents: Cozy Textiles and Colors

To make your entryway feel as inviting as a warm hug, incorporate festive textiles into your decor. Throw pillows in rich reds, greens, and metallics can add not only color but also comfort to any seating space near the entry.

Don’t forget to layer in a beautifully patterned rug featuring holiday motifs! For a touch of elegance, you might consider a sophisticated runner with gold accents. Mixing and matching these elements allows for a cozy, inviting atmosphere—a perfect prelude to the holiday festivities awaiting inside your home.

4. Charming Signs: Personalized Warmth

Adding some personalized touches can help convey the joy of the season. You might consider decorative signs declaring messages like “Welcome” or “Season’s Greetings,” which can be easily crafted from wood or even repurposed pallets.

For those feeling crafty, try painting a piece of reclaimed wood with festive colors and your family name or a cheery holiday message. Placing these signs near your door or propped up against a wall can offer that personal touch that guests will appreciate and remember. Customization makes your entryway not just seasonal but reflective of your family’s spirit and joy.

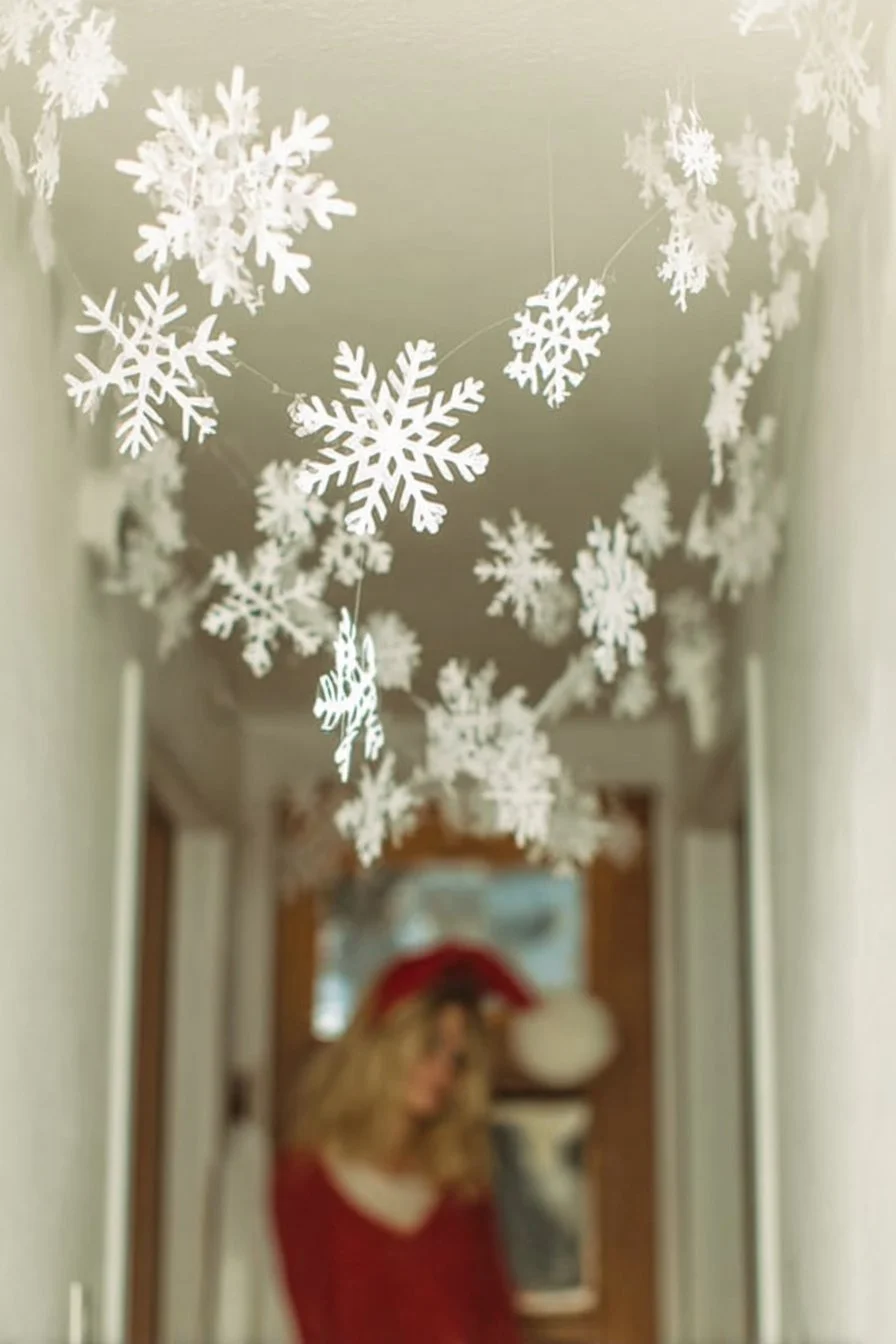
5. Greenery Galore: Natural Elements

Incorporating greenery can breathe life into your holiday decor—nothing says Christmas quite like the enchanting aroma of fresh pine or holly. Create a charming display with a combination of potted plants and garlands.

Consider using fresh eucalyptus and pine sprigs to create a beautiful garland that can drape over your door or a bannister. You might even hang small ornaments or pine cones from it for an added whimsical touch. If you’re short on time or prefer low maintenance, opt for high-quality artificial greenery that can be reused year after year without sacrificing style.

6. Holiday Displays: Seasonal Table Arrangements

If you have a console table or a surface by your entry, this is the perfect spot for a festive display that can wow your visitors. Start with a base layer—perhaps a lovely table runner or a seasonal-themed mat—and build your arrangement.

Layer in elements like candles of varying heights, small evergreen trees in decorative pots, and holiday-themed vases filled with ornaments or cranberries. If you want to add a personal touch, consider including framed family photos from previous holiday gatherings. This inviting vignette will not only capture the essence of the season but can also segue perfectly into your home’s festive atmosphere.

7. Holiday Displays: Seasonal Table Arrangements

If you have a console table or a surface by your entry, this is the perfect spot for a festive display that can wow your visitors. Start with a base layer, perhaps a lovely table runner or a seasonal-themed mat—and build your arrangement.

Layer in elements like candles of varying heights, small evergreen trees in decorative pots, and holiday-themed vases filled with ornaments or cranberries. If you want to add a personal touch, consider including framed family photos from previous holiday gatherings. This inviting vignette will not only capture the essence of the season but can also segue perfectly into your home’s festive atmosphere.

Conclusion: Celebrate the Season

This holiday season, let your entryway reflect your unique style and joy. From dynamic wreaths and illuminated pathways to cozy textiles and personalized accents, your entry can become a beacon of warmth and welcome. Each idea brings a touch of festive inspiration that transforms this often-overlooked space into a bright assertion of seasonal spirit. So grab your favorite decorations, gather your family, and start creating a holiday entry that will leave a lasting impression on everyone who steps through your door. Happy decorating and enjoy every moment of this wonderful season!

Categories
DIY

A Guide To Making 3D Cardboard Stars

As the seasons change, our homes beckon for a touch of warmth and charm, especially during the festive times. One delightful way to embellish your space is by crafting stunning 3D cardboard stars. Whether you’re gearing up for holiday decorations or seeking a unique touch to your everyday home styling, these stars can transform your decor into a captivating display. They’re not just visually impressive; they’re also a fantastic DIY project that can engage your creativity and provide a sense of accomplishment. Get ready to adorn your home with vibrant textures and shapes that speak of the joy of crafting!

Why Choose Cardboard?

When it comes to sustainable crafting, cardboard is a top contender. This versatile material is light, easy to work with, and often readily available, making it a preferred choice for eco-conscious crafters. Not only is it cost-effective, but using cardboard also promotes recycling and repurposing, aligning perfectly with modern eco-friendly decor trends. Your cardboard stars can be painted, adorned with glitter, or left in their natural state for an understated look that complements any seasonal theme from glitzy holiday celebrations to rustic autumn gatherings.

Selecting Your Materials

Before diving into your crafting adventure, gather the right materials. Start with sturdy cardboard for durability. You can use old boxes—think shipping or leftover packaging materials. A craft knife or scissors will be essential for cutting your shapes, while a ruler and pencil will help ensure your stars are symmetrical and uniform. Don’t forget items to decorate your stars: paint, glitter, fabric scraps, or even twine can all add a personal touch and elevate your festive inspiration.

Tip: When cutting your cardboard, score the lines lightly first with your craft knife. This technique gives you a clean edge and prevents the cardboard from tearing, ensuring a polished finish.

Crafting Your Star Shapes

Begin your star-making journey by transferring your designs to the cardboard. A classic five-point star is a delightful choice, but why stop there? Explore different shapes, such as six-pointed stars or even complex starbursts for a dynamic twist. Trace your shape, ensuring you have at least two identical stars for a 3D effect. Cut them out carefully, and if you’ve decided on a layered star, cut additional stars in slightly smaller sizes.

Handy Tip: If you’re crafting with kids, provide simpler shapes to keep them engaged, such as a basic five-point star, and gradually introduce more complexity as they build their skills and confidence.

Creating the 3D Effect

To craft your stars into eye-catching 3D models, you’ll need to add depth and dimension. One popular method is to fold the points of the star inward slightly. To achieve this effect, start by making small incisions at the points of your star (about 1 inch deep). Then, fold each point toward the center and glue or tape them in place.

Consider this: Use a small piece of string or wire to create a hanging mechanism if you’d like to suspend your stars from the ceiling or windows. Simply attach it to the top point before securing it into 3D shape. This little detail can elevate your seasonal decor, especially during the holidays when you want to maximize the sparkle and enchantment of your setting.

Painting and Decorating

Once your star shapes are in place, it’s time to unleash your creativity through painting and decorating! The color palette you choose can set the mood for your space. For winter holidays, consider shimmering golds and silvers, while warm reds and greens exude a cozy autumn vibe.

Don’t shy away from texture! Use sponges or brushes for different painting effects, and consider adding layers of glitter or sequins for a glorious sparkle. For a more rustic touch, wrap parts of your stars in twine or fabric strips.

Fun Idea: If you want to create a festive garland, string several stars together, spacing them apart. This can be a charming focal point above a mantel or on a door frame, enhancing your seasonal decor.

Exploring Seasonal Themes

As you craft your stars, think about how they can reflect different seasonal themes. For Christmas, you might create a variety of sizes and colors, pairing them with evergreen garlands and fairy lights for an enchanting display. For Halloween, craft black and orange stars adorned with bat silhouettes or spooky glitter. In spring, light pastels and floral patterns can breathe life into your decor, making these stars perfect for welcoming in the warmer days.

Inspiration: Think about using themed paper or fabric from local craft stores to lend specific seasonal motifs, whether that’s snowflakes for winter, sunflowers for summer, or falling leaves for autumn. This will add an extra layer of personalization to your home styling.

Involving Family and Friends

Crafting 3D cardboard stars can be a heartwarming group activity that brings together family and friends. Set up a crafting evening with bites and music; everyone can work on their stars, share creative ideas, and enjoy each other’s company. This shared experience not only sparks joy but also creates cherished memories. Over time, you’ll have a dazzling collection of stars, each telling a story of laughter and camaraderie.

Consider this: Host a themed crafting night where everyone brings their favorite decorations. This can lead to delightful exchanges of ideas and techniques, thus enhancing your overall crafting skills while deepening relationships.

Conclusion

Creating 3D cardboard stars is a charming and resourceful way to bring warmth and personality into your home during any season. These stars not only serve as beautiful decorations but also embody creativity, sustainability, and family bonding. So gather your materials, unleash your artistic flair, and let your stars shine brightly in your seasonal decor. Whether you opt to hang them, place them on a tabletop, or string them as garlands, the impact of your handcrafted stars will undoubtedly elevate your festive inspiration, making your space feel inviting and brimming with joy. Happy crafting!

Categories
DIY

DIY Snowflake Decorations for Winter

As the chill of winter sets in, our homes naturally beckon for a touch of warmth and creativity. This season, why not embrace the beauty of snowflakes—those unique, delicate wonders that epitomize winter? Crafting DIY snowflake decorations can not only brighten your space but also engage your creativity in a fun and cozy way. Whether you’re preparing for holiday gatherings or simply want to infuse your home with festive charm, these enchanting decorations will transform your winter wonderland into a stunning display. Let’s dive into some crafty ideas that will allow you to sprinkle your space with the magic of snowflakes!

1. Paper Snowflake Ornaments: A Classic Craft

Nothing beats the simplicity and charm of paper snowflake ornaments. These timeless decorations are easy to make and can be customized to fit any decor style. To start, gather your materials—white or colored paper, scissors, and a pencil.

Begin by folding the paper into a triangle shape (or multiple triangles for larger snowflakes) and snipping small shapes along the edges. Unfold your creation to reveal a stunning snowflake design! For an added festive touch, consider sprinkling some glitter on your snowflakes or using metallic paper for a shimmering effect.

Once finished, hang them from the ceiling or window frames using transparent threads for a magical floating effect. You can also attach them to your holiday tree for an enchanting twist on traditional ornaments!

2. Snowflake Window Stencils

Transform your windows into frosty scenes with snowflake stencils! This decor is not only visually striking but also offers a bit of privacy while still allowing light into your home.

To create your own stencils, print out snowflake designs available online, or draw your desired patterns on cardstock. Cut out the center sections, then use them to outline your windows with removable window clings or spray snow.

Once you’ve applied your snowflake stencils, add a few twinkling LED lights beneath the window to enhance the effect once night falls. The glow will turn your home into a cozy retreat, making your winter nights feel exceptionally special.

3. Snowflake Garland: A Festive Focal Point

Garlands have long been a favorite for seasonal decorations, and a snowflake-themed garland can provide an eye-catching accent to any space.

Start by crafting multiple snowflakes out of paper, felt, or even wood. Once you’ve amassed a collection, string them together using twine or ribbon, spacing them evenly to create a flowing effect. If you’re feeling adventurous, mix different shapes and sizes for an added pop of dimension.

Drape your garland across mantels, doorways, or along your staircase to create a beautiful focal point in your home. This simple DIY project is perfect for enhancing holiday decorations while bringing a touch of winter into your decor.

4. Snowflake Candle Holders: Illuminating Ambiance

Want to set a cozy atmosphere this winter? Snowflake candle holders provide an elegant way to illuminate your space while adding to your seasonal decor.

To craft these charming decorations, all you need are glass votive holders and some snowflake stickers or lace. Simply adhere the stickers to the outside of the holders, or wrap lace around them and secure it with twine or ribbon.

When you light a candle inside, the flickering flame will cast enchanting snowflake shadows across your walls, creating a warm ambiance perfect for chilly winter evenings. These candle holders also make wonderful gifts, adding a personal touch to your holiday gift-giving!

5. Snowflake Wall Art: A Framed Winter Wonderland

If you’re looking to make a statement, consider creating a large snowflake wall art piece. This impactful decoration can serve as a perfect backdrop for your holiday gatherings or cozy winter evenings.

Begin by selecting a canvas or wooden board as your base. Choose either a monochromatic scheme or vibrant colors that fit your unique style. Using paint, arrange various-sized snowflake shapes in a pleasing layout. You might want to use a sponge or stencil for sharp designs or give them an abstract twist.

Alternatively, you can opt for a collage-style design using fabric, paper, or even recycled materials for a more textured look. Hang it prominently in your living room or entryway for a captivating seasonal accent that reflects the beauty of winter.

6. Interactive Snowflake Activity for Kids

Involve the little ones in the magic of winter decorations with an interactive snowflake crafting session! This activity not only fosters creativity but also sparks excitement for the seasonal decor you’ll create together.

Provide your children with various materials—paper, string, beads, and even eco-friendly glitter. Encourage them to design and decorate snowflakes, letting their imaginations soar. You could even introduce a friendly competition among siblings to see who can design the most unique snowflake!

Once done, save the snowflakes to hang on your garlands, walls, or windows, creating a family art display. This experience not only creates cherished memories but also allows for a lively and festive atmosphere in your home.

Conclusion

Embracing the beauty of snowflakes in your seasonal decor is a delightful and fulfilling way to celebrate winter. From paper snowflakes to illuminated candle holders, these DIY projects offer simple yet impactful ways to enhance your home styling while nurturing your creative spirit. As the holidays approach and the cold weather sets in, gather your materials, invite loved ones, and enjoy the process of bringing a little magic into your space. Start crafting today and fill your home with the joyous spirit of winter!

Categories
DIY

Christmas Paper Chain in Four Easy Steps

Crafting a Christmas Paper Chain in Four Easy Steps

As the chilly December air wraps around our home, I often find myself reminiscing about Christmases gone by. The faint sound of Mariah Carey’s holiday hits playing in the background fills our cozy kitchen as my husband brews his favorite spiced tea, and my kids—Danny and Lucy—dash around the house in excitement. This time of year, I’m transported back to my own childhood, where the scent of pine mingled with laughter and the warmth of family. One of our favorite traditions is creating festive decorations, and I delight in sharing my passion for crafts with my children. This year, we decided to make our own Christmas paper chain—a simple yet engaging activity that brings us all together, just like my parents did with me. Making a colorful paper chain is not only a fantastic way to decorate our home but also a memorable experience for the entire family.

Why Choose a Paper Chain for Decorations?

You might wonder why a paper chain made it to our list of holiday decorations. Well, the charm lies in its simplicity and versatility. Unlike many holiday decorations that can cost a pretty penny, crafting a paper chain is budget-friendly and can be customized to fit your unique style. We love opting for vibrant colors that match our existing decor while also incorporating a little sparkle, like glitter paper or metallic shades.

Last year, we made chains that coordinated with our tree ornaments, and the result was delightful! Plus, involving the kids in creating decorations fosters togetherness and sparks the magic of the season. It’s a wonderful way to keep traditions alive while encouraging creativity.

Gather Your Supplies

Before diving into crafting, you’ll want to gather a few essential supplies. Don’t worry; you likely have most of these items lying around the house! Here is what you’ll need:

  1. Colored Paper: Construction paper or scrapbook paper works wonderfully. I recommend choosing a selection of colors that resonate with your holiday theme.
  2. Scissors: Safety scissors for little hands or regular scissors if you’re helping. My kids love to take turns cutting the strips.
  3. Glue or Tape: You can use glue sticks, double-sided tape, or even washi tape for a fun, easy way to hold the chain together.
  4. Ruler and Pencil: For measuring and marking if you want your strips to be uniform in size.
  5. Optional Decorations: Glitter, stickers, or markers to add unique touches and personalize each strip.

Step One: Cut Your Paper Strips

Start by cutting the colored paper into even strips. A good size is approximately 1 inch wide and 6 inches long, but you can adjust based on your preferences. We like to have a mix of sizes for a more whimsical look. My son enjoys using the ruler and pencil to measure, while Lucy takes joy in decorating the edges with stickers and drawings before we even begin connecting them. This step adds an additional layer of creativity, allowing each family member to express themselves.

Step Two: Create Your First Link

Once your strips are ready, it’s time to create the first link of your chain. Choose a strip and form a circle, overlapping the ends slightly. Use your chosen adhesive to secure it. This part is where my kids’ excitement really kicks in; it feels like we’re creating something magical together! We usually go for a vibrant red or green paper to symbolize the festive spirit, but you could easily opt for blues or golds for a winter wonderland vibe.

Each time we craft a link, the anticipation builds, and before we know it, we have a beautiful chain starting to come together!

Step Three: Link Them Together

With the first link created, it’s time to add more. The next step is simple but takes a little teamwork. Slide the next strip through the first link and repeat the process of making a circle and securing it. We usually alternate colors for a more dynamic look. As we connect link after link, I share stories from my childhood about how we used to drape similar chains around our tree and door frames, making the activity feel even more meaningful.

This year, I caught Danny peeking at our previous year’s chain, and we talked about how we can combine colors from both years to make this one even more splendid. Ideas abound when you allow everyone to inject their thoughts into the project!

Step Four: Hang and Admire

The last step in our crafting journey is the most rewarding: finding the perfect spot to hang our newly crafted paper chain! We usually drape it over our mantle, around the Christmas tree, or even along our stair rail. This year, we are trying something new—tying it around our family’s picture frame gallery to create a festive centerpiece for our living room.

Every time I walk through, I smile at the effort, creativity, and laughter that went into making it. The chains remind us of our lovely memories, and I love witnessing my kids’ pride as they show it off to neighbors and relatives.

Conclusion: Your Turn to Create Holiday Magic

Making a Christmas paper chain is more than just an arts and crafts project; it’s a heartwarming way to make lasting memories with your loved ones. Whether you’re crafting with little ones or indulging in some joyful solitude, this activity will surely spread the festive spirit throughout your home.

So gather your supplies, tune in to your favorite holiday tunes, and let the creativity flow. I would love to hear about your crafting adventures and the unique twists you put on this classic decoration. After all, the holiday season is about embracing joy, creativity, and togetherness in our homes.

Happy crafting and Merry Christmas!

Categories
DIY

6 Holiday Crafts Kids Can Make to Warm Up Your Home

Creating holiday crafts with kids can be one of the most delightful ways to warm your home with festive cheer. As the chilly breezes start to blow and the scent of cinnamon fills the air, I remember cozy evenings spent in my childhood home with my family, crafting handmade decorations that would adorn every corner of our space.

Now, as a proud mom of two energetic kids who are 10 and 12, I strive to carry on that tradition. I love seeing them get creative with their ideas, adding a dash of their growing personalities into each craft. Our kitchen table transforms into a creative hub, brimming with glitter, felt, and colorful papers. Whether we’re preparing for Thanksgiving, Christmas, or just winter in general, these projects quicken the heart and inspire joy.

If you’re looking to bring some extra charm to your holiday decorations this year, here are 6 delightful crafts your children will enjoy making. These projects require minimal supplies and are perfect for spending quality time together.

1. Festive Paper Chains

Paper chains are a timeless favorite and can be made with just a few sheets of colorful paper. Grab some red, green, and gold paper to start making seasonal masterpieces. I remember making these with my siblings, trying to see who could make the longest chain!

  • How to Create: Cut strips about one inch wide and six inches long from your chosen paper. Start with one strip, forming it into a loop and fastening the ends with glue or tape. Take another strip, thread it through the first loop, and create another loop. Continue until you reach your desired length.

  • Tip: Hang these chains around the house or drape them on the Christmas tree for a playful, retro touch.

2. Snowy Window Art

Transform your windows into a winter wonderland with snowflake decorations. Using a safe, non-toxic window marker or white paint, kids can express their artistic flair right on the glass.

  • How to Create: Design snowflakes, snowmen, or even festive words across your windows. Let the kids get creative; they could even draw scenes that tell their own holiday stories.

  • Personal Touch: I always enjoy sharing stories about how my parents decorated the house, which inspires my kids to create scenes reminiscent of our family traditions.

3. DIY Sparkle Ornaments

Handmade ornaments serve as beautiful keepsakes and can be cherished for years. Use clear plastic or glass ornaments (available at most craft stores) as your base.

  • How to Create: Fill clear ornaments with colored beads, fake snow, or glitter. Paint the outside with holiday-themed designs or personal messages. Top them off with a lovely ribbon for hanging.

  • Anecdote: My mother has a tradition of giving each child a new ornament each year, and we love seeing how our collections grow and reflect our personalities!

4. Pinecone Christmas Trees

Gather pinecones from your backyard or a local park and transform them into whimsical trees. This is an excellent way to bring nature into your holiday decor.

  • How to Create: Paint the pinecones with green paint and let them dry. Decorate with little beads, sequins, or pom-poms attached with glue. Attach a star on top using cardboard or craft foam for that perfect finishing touch.

  • Tip: Pair these with some fairy lights to create a festive scene on a side table or your mantle.

5. Handmade Gift Wrap

Encourage creativity while preparing for the gift-giving season by making your own wrapping paper. This not only adds a personal touch to your gifts but also becomes a fun activity to do together.

  • How to Create: Use plain butcher paper or kraft paper as your base. Have the kids decorate it with stamps, drawings, or even holiday-themed stickers. Wrap your gifts using your unique creation and secure it with twine or ribbon.

  • Anecdote: My son loves to decide who gets which handmade wrapping and often incorporates the recipient’s interests into the design, which is a lovely sentiment!

6. Scented Salt Dough Ornaments

Salt dough ornaments are another wonderful way to create cherished keepsakes. Not only is the process enjoyable, but making them can fill your home with delightful scents.

  • How to Create: Mix 2 cups of flour, 1 cup of salt, and 1 cup of water to form a dough. Roll it out, cut shapes with cookie cutters, and make holes for hanging. Bake at a low temperature until hard and then decorate with paint or glitter.

  • Tip: Add cinnamon or other spices to the dough mixture for an aromatic twist that will make your home smell delightful during the holidays.

Conclusion

Holiday crafting is more than just a fun activity; it creates memories that linger long after the season has passed. The laughter, collaboration, and creativity involved make it a cherished ritual in our household. I invite you to gather your own little ones around the table, share your own stories, and dive into these projects together. Beyond enhancing your festive decorations, each crafted piece will hold special meaning and sentiment—treasured markers of time spent together. So embrace the magic of the season, unleash your creativity, and fill your home with a warmth that can only come from handmade love. Happy crafting!

Categories
DIY

Easy Xmas Lights Handprint Craft Template

Easy Xmas Lights Handprint Craft Template: Celebrate the Season with Your Loved Ones

As a mom in my forties, I can’t help but reflect on the joy that comes with the holiday season. Every year, as the days grow shorter and the nights sparkle with lights, my heart fills with warmth. I remember how I used to gather around the fireplace with my parents and siblings, creating cherished memories that would last a lifetime. Now, I get to recreate those moments with my own children, aged 8 and 12. My son, always excited, runs around the house looking for ways to spread holiday cheer. And my daughter, with a creative spark, insists that we decorate every corner of our home. One of our favorite seasonal crafts is a handprint project that turns their little hands into a delightful wreath of Christmas lights.

This year, I’m thrilled to share our EASY Xmas lights handprint craft template with you! It’s not just an activity; it’s a stress-free way to immerse yourself in the festive spirit while creating lasting mementos of your kids’ growth without the hassle of complicated supplies. In this article, you’ll discover various simple themes, tips, and ideas to enhance your holiday decorations at home and to embrace the spirit of giving. Let’s dive into the colorful world of easy holiday crafts!

Why Simple Handprint Crafts Are Special

Incorporating straightforward crafts like handprints into your holiday traditions is more than just a fun pastime; it’s a beautiful way to celebrate your children’s developmental milestones without needing to be an expert artist. Each handprint becomes a cherished keepsake, capturing your kids’ growth year after year. It warms my heart to think that one day, my grown children will look back on these creations, maybe even laughing at how small their hands were.

To get started with our easy handprint lights craft, all you need is some paper, colorful paint, and your little ones’ hands. Simply dip their hands in the paint to create the shape of Christmas lights and then add bulbs using our simple template. Each creation is unique and showcases your children’s personalities. For added fun, discuss the colors of the lights they remember from our neighborhood’s Christmas displays or what their favorite holiday memories are. This craft not only beautifies your home but also sparks warm conversations with minimal effort.

Seasonal Decor: Simple Ways to Bring the Outside In

As the temperatures drop, there is nothing quite like filling your home with the spirit of the season. Seasonal decorations can transform an ordinary space into a festive wonderland. While many opt for extravagant store-bought decor, I find that the most heartwarming pieces are those simple projects that involve the entire family.

Consider incorporating handmade ornaments into your display or using easy-to-make garlands from natural elements such as pinecones, twigs, and berries. My children love collecting these items from our backyard or local parks. Using a mini hot glue gun, we create stunning garlands that not only decorate our home but also connect us with nature. Think of it as a small family adventure that brings joy and laughter, just like the sledding trips we take together! This authentic touch of nature can effortlessly elevate any holiday décor and create a cozy atmosphere for family gatherings.

Crafting Memories: The Power of Easy DIY Decorations

DIY decorations are a wonderful way to get creative and spark the holiday spirit in your home without the pressure of perfection. Each project offers an opportunity for families to bond and collaborate, much like our tradition of baking holiday cookies every year. As we mix ingredients, I often share stories from my own childhood, teaching my children the significance of our family recipes.

So, why not explore some festive and easy DIY ideas? From creating homemade wreaths to crafting snowman centerpieces from upcycled materials, the options are endless and accessible. All you need are basic crafting supplies you likely already have, like scissors, glue, and markers. Encourage your kids to present their crafts as gifts to neighbors or grandparents. These gestures of love not only strengthen family bonds but also foster a sense of community.

Create a Holiday Tradition: The Christmas Tree Countdown

As the holidays approach, nothing excites my family more than our Christmas tree countdown—a tradition we faithfully uphold every year. In a world filled with hustle and bustle, counting down the days helps us pause and appreciate the beauty of the season. We start by searching for a tree, whether we opt for a fresh fir or a charming artificial option.

While decorating the tree, we incorporate our kids’ simple DIY decorations and precious handprint crafts. We reminisce about previous holidays as we unwrap each ornament that represents a story from our family’s past. This year, I plan to introduce a new element: a simple paper chain countdown leading up to Christmas Day, adorned with their handprint lights. Each day, we’ll cut down one link and share a family memory or wish. It adds a layer of excitement, making each day feel special without requiring complex planning.

Engaging the Neighborhood: Holiday Decorating Competition

One of the best ways to spread holiday cheer is by engaging not just your family but the entire neighborhood. Organizing a holiday decorating competition can be a delightful way to foster community spirit. Collect your neighbors’ email addresses and send out a festive message suggesting a friendly contest. You can even create a “People’s Choice” award from the easy holiday crafts created by your kids!

Last year, we participated in a neighborhood decorating competition that was filled with laughter and cheer. Many neighbors came together to decorate their homes with lights—some even created elaborate displays synchronized to music! At the end of it all, we gathered for cookies and cocoa, where everyone shared their unique crafting ideas. Hosting such events can create lasting friendships and shared memories, making the holiday season even sweeter.

Conclusion: Embrace the Season of Togetherness

The holiday season is truly a magical time filled with opportunities to create memories that last a lifetime. As you explore new ways to decorate your home and bond with your loved ones, I encourage you to incorporate the easy Xmas lights handprint craft into your traditions. These colorful creations are more than just decorations—they symbolize love, creativity, and the joy of family.

So gather your supplies, invite your family to join, and let your home sparkle with festive inspiration. Together, you can create a holiday atmosphere that reflects your family’s spirit, emphasizing the importance of togetherness, creativity, and sharing love during this special time of year. Happy crafting!

Categories
DIY

Homemade Christmas DIY Ornament for Kids

Homemade Christmas DIY Ornament for Kids

As the first snowflakes begin to twinkle in the morning light, I nestle on our living room couch, feeling the warm glow of the fireplace. My kids—Jack, almost 12, and Lucy, a spirited 9-year-old—are sketching ideas for this year’s homemade holiday ornaments. There’s something magical about this time of year, isn’t there? With the smell of cinnamon and pine filling our home, I find myself reminiscing about my childhood. I remember crafting ornaments with my siblings as we listened to carols, our laughter echoing with glee. It’s a tradition that has transformed from generations past into our cozy family ritual today. Our mission? To create unique, heartfelt decorations that reflect our family’s spirit and creativity. If you’re looking to join in this festive fun with your kids, here are some fantastic ideas that will sprinkle your holiday home with joy and charm.

Festive Nature Ornaments

One of my favorite ways to connect with the beauty of the season is through nature. Each year, we gather twigs, pinecones, and acorns during a family hike, turning them into delightful ornaments. This year, we made lovely little pinecone mice. All you need are pinecones, googly eyes, small balls of clay for noses, and some natural twine for hanging. My kids loved picking out different sizes of pinecones to create their little fellow friends.

Tip: To create an adorable mouse ornament, glue the eyes and clay nose in place. You can wrap a thin ribbon around the top for a festive touch. The possibilities are endless—think about collecting colorful leaves or dried flowers to make pressed leaf ornaments. If you’re looking for a way to incorporate sustainability into your holiday decorations, this is a fun and eco-friendly approach!

Painted Cookie Cutters

Let’s talk about something that brings back memories of baking with my mom—cookie cutters! A simple set of holiday cookie cutters can take a turn to become a beautiful ornament. My kids loved carefully painting each shape with bright colors; we opted for vibrant reds and greens, decorating them with glitter for a sparkling effect.

You can use air-dry clay or salt dough as the medium, which is easy and fun to work with. Once the dough is rolled out, the kids can press the cookie cutters to shape the ornaments. Once they dry, a light coat of paint brings them to life!

Tip: Don’t forget to punch holes at the top before they dry, allowing them to hang on your tree. Trust me, the glimmering surprises of these beautiful ornaments will flicker in the holiday lights, bringing a smile to everyone who sees them.

Family Memory Ornaments

As we gather around the table, it gets emotional when I suggest creating ornaments that hold family memories. Each year, we try to encapsulate special moments from our lives. My husband and I pull out some cherished photos, and the kids pick the ones they love the most; this year, we went with our summer camping trip photos.

With clear plastic or glass ornaments available at craft stores, we place printed photos carefully inside, along with a bit of artificial snow or glitter. Hopefully, it won’t fall out, but hey, a little mess only adds to the fun!

Tip: To make it even more personal, add handwritten notes to describe the memories captured, tucking them neatly in the ornament. Every time we hang them, it’s like unwrapping a heartfelt gift of nostalgia.

Fabric and Fiber Ornaments

Have some old fabric scraps or yarn lying around? Perfect! Bright colors and patterns can be ideal for stitching delightful ornaments that reflect your family’s personality and style. A few years ago, we made little fabric stars and hearts that danced gracefully on our tree.

The kids and I spent an afternoon sewing (not to mention the giggles and minor tangles from the threads!). We cut shapes from our fabric, stitched them together, filled them lightly with cotton, and adorned them with buttons. They were practical, fun, and zero waste—I felt like a proud mom, considering these homemade treasures.

Tip: Let your kids drive the colors and designs they want. Integrating their choices makes the final product even more special. Plus, it’s a wonderful way to improve their motor skills while having a merry time!

Upcycled Ornaments

In our quest to stay eco-friendly, we’ve embraced upcycling our everyday materials into splendid ornaments. This year, we decided to transform old Christmas cards into beautiful baubles. The children loved scissor-snipping, creating an array of shapes from the colorful cards—trees, stars, and snowmen.

Once cut, we glued them back-to-back with a bit of twine in between for a layered effect. As I watched them giggle while decorating each piece with glitter and ribbons, I felt grateful for the creativity that blossomed right before my eyes.

Tip: Collect cards from friends and family each year to craft a collection that tells your unique holiday story! It’s a joyful way to connect with loved ones while reducing waste and introducing your kids to the importance of recycling.

Special Touches for Personalization

No matter what DIY ornaments you create, adding your unique personal touches can elevate them to something truly special. Consider incorporating family heirlooms, like a beloved button or a small charm from your child’s first Christmas. Lucy has a tiny red button that her grandma gave her, and she can’t resist using it every year.

When decorating ornaments, let your kids sprinkle on glitter or use stamps with holiday motifs. Our family tradition also includes sitting together as we write our year’s blessings and putting them into ornaments. It’s a touching way to reflect on our wonderful memories and count our blessings before the holidays.

Tip: To elevate the personalization, create a small hand-lettered tag for each ornament with the date and children’s names. These little touches become treasures, not just for us but for generations to come.

Conclusion

Bringing homemade Christmas ornaments to life is a beautiful way to embrace the joy of the season while creating family traditions. Whether weaving memories from nature, fabric, or family stories, each decoration becomes a symbol of love and togetherness. So gather your supplies, invite your kids into the creative process, and enjoy the laughter, mess, and warmth that fills your home. Embrace the spirit of the season—this is where memories are made, and joy is found. Why not start your holiday crafting adventure today? You’ll be cherishing these homemade treasures for years to come. Happy crafting!

Categories
DIY

Kid Made Christmas Ornaments | Fun and Easy DIY Holiday Crafts

Kid-Made Christmas Ornaments: Fun and Easy DIY Holiday Crafts

As winter settles in and the enchanting aroma of cinnamon and pine fills our home, I find myself transfixed by the twinkling lights outside. The excitement about the upcoming holidays is palpable — the warmth of family traditions, the heartwarming stories from my parents about their childhood Christmases, and the laughter that erupts between my two kids, ages 8 and 12, as we embark on our festive projects. Each year, we gather around our kitchen table, clad in our comfiest holiday sweaters, ready to create magical decorations. This is not just about adorning the tree; it’s a cherished time for us to bond, showing them the joys of creativity while passing on traditions that have meant so much to me.

Let’s dive into some festive and fun crafting ideas to make your home feel extra special this holiday season. These kid-made Christmas ornaments not only add that personal touch to your decorations but also create wonderful memories you’ll treasure forever.

1. Salt Dough Ornaments: Timeless Treasures

One of the first crafts we always create as a family is salt dough ornaments. Simple and straightforward, this timeless activity has a way of bringing out everyone’s creativity. With just three ingredients – flour, salt, and water – you can create dough that’s moldable and easy for kids to shape into their favorite holiday designs.

Recipe and Tips

To make the salt dough, mix 2 cups of flour, 1 cup of salt, and 1 cup of water in a bowl until it forms a clay-like consistency. Knead until smooth. Roll out the dough to about 1/4 inch thick, and let your kids use cookie cutters to create shapes like stars, Christmas trees, or gingerbread men. Don’t forget to make a small hole at the top for hanging!

Once baked at 200°F (about 1-2 hours), the possibilities are endless. Let the kids paint their creations, adding glitter, sequins, or even pressed leaves for a touch of nature! These ornaments can become cherished keepsakes, and each year as you hang them up, you’ll be reminded of the laughter shared during their creation.

2. Upcycled Ornaments: Eco-Friendly Festivity

As a family who appreciates the beauty of being sustainable, we often look for creative ways to upcycle items around the house. This holiday season, turn ordinary items into extraordinary decorations that make an eco-friendly statement.

How-To Guide

Empty toilet paper rolls, bottle caps, and fabric scraps can become delightful ornaments with just a bit of imagination. For instance, toilet paper rolls can be painted and cut into rings, which you can then glue together to form festive shapes like wreaths.

Another favorite is to create “Pinecone Friends.” Use collected pinecones as a base, attaching googly eyes, pipe cleaners, and acorns to create charming characters. We’ve had a blast giving these little creatures names and stories about their adventures.

By involving the kids in research and materials gathering locally, you instill in them an appreciation for the environment while making beautiful decorations that are meaningful and unique.

3. Photo Ornaments: Memories in the Making

One of the sweetest crafts we’ve done involves turning our cherished family photographs into ornaments. It’s a beautiful way to share fond memories with friends and family during festive gatherings.

Craft Steps

To create these ornaments, print photos of your family from past Christmases. You can choose to mount the photos on cardboard circles or cut them into fun shapes. To add flair, we like to embellish them with some glitter or ribbon around the edges.

Use a glue stick to stick the photo on a piece of cardboard and seal it with a layer of decoupage glue to give it a glossy finish. Finally, attach a string for hanging, and voila! As you adorn the tree with these little snapshots, you can’t help but smile at the memories each ornament evokes.

4. Painted Wooden Ornaments: A Splash of Color

If you’re looking for a craft that combines fun and fine motor skills, painted wooden ornaments might just be the answer. These can be found at craft stores or even online, and their versatility makes them perfect for customization.

Crafty Ideas

Let your kids unleash their artistic side: use acrylic paint, markers, or even stamp sets featuring festive designs. While painting, my children often come up with funny names for each ornament, inspired by their designs. For example, an adorable snowman might get dubbed “Chilly Charlie,” bringing even more customization to our decor.

Once painted, sprinkle a bit of glitter for that holiday sparkle and finish with a protective topcoat. The beauty of this project is that they double as gifts for relatives, making it a win-win for a beautiful holiday season.

5. Beaded Ornaments: Sparkling Creations

Beaded crafts have always been a delight in our household, bringing hours of focused activity filled with giggles and stories. Creating beaded ornaments can be both a tactile and colorful experience as your children design their creations.

Instructions and Inspiration

Provide a variety of beads in seasonal colors – think reds, greens, blues, and golds. Pipe cleaners work wonderfully as a base; simply let your child string the beads in various patterns. Twisting and bending the pipe cleaners into shapes such as candy canes, stars, or simple wreaths adds another level to this craft.

We often turn this into a lesson in colors and patterns, and it’s amazing to see the creativity and skill my kids show each year. Handing these ornaments out lets them feel proud about their handcrafted gifts — a wonderful way to spread holiday cheer.

Conclusion

So there you have it — a collection of joyous crafts to fill your home with laughter and love this holiday season. Take these ideas and let your children’s creativity shine, creating memories that will last a lifetime.

Remember, the beauty of these kid-made ornaments lies not just in their charm, but in the stories they tell and the memories they evoke. As you hang these heartfelt creations, transport yourself back to the moments spent crafting together. Embrace the warmth of your home styled with festive inspiration that truly reflects your family’s story. Happy crafting!

Categories
DIY

8 Easy Snowman Crafts That Sell Out Every Holiday Season

8 Easy Snowman Crafts That Sell Out Every Holiday Season

As the frost begins to blanket our cozy suburban neighborhood, I can’t help but feel heat bubbling up from fond memories of childhood winters spent making snowmen with my siblings. Now, as a proud mom of two, I find myself following in those delightful footsteps with my own son and daughter, who are 8 and 12, respectively. Our home is filled with twinkling lights and nostalgic scents of gingerbread and cinnamon. While holiday decorations sparkle in every corner, there’s something so charming about focusing our crafting sessions around those jolly snowmen. Whether it’s for our family traditions or holiday gifts for neighbors and friends, these crafts offer a wonderful way to spread cheer and foster creativity. With the right touch, you can whip up snowman crafts that will surely sell out every holiday season!

1. Classic Snowman Ornaments

Creating snowman ornaments is a simple yet delightful project that both my kids and I enjoy. All you need are clear plastic or glass ornaments, white paint, and some glitter. Start by pouring a small amount of white paint inside the ornament and swirling it around to coat the inside. Once dry, let your children decorate the outside with a marker, adding features such as eyes, a carrot nose, and a big smile.

For added fun, sprinkle some glitter inside before sealing them up. These ornaments appeal greatly during the holiday season, making them popular items at local craft fairs. Last year, we made a whole batch to gift to grandparents, and they absolutely loved the personal touch!

Tips:

  • Use non-toxic paint for safety.
  • Try different sizes or shapes of ornaments for variety.

2. Snowman Garland

A snowman garland brightens up any room and is remarkably easy to create. Using white felt, cut out snowman shapes and decorate them with buttons and fabric scraps for scarves and hats. String them together with twine or ribbon to make a festive garland that can adorn your mantelpiece or doorframe.

My daughter and I crafted a similar garland two years ago, and it brightens our hallway every winter. It’s also a fantastic project for kids’ parties or holiday gatherings where everyone can contribute. Garland crafting has become a tradition in our home, ensuring each year brings a fresh and unique addition.

Tips:

  • Mix materials: felt, paper, or even recycled cereal boxes can work.
  • Let the kids add their flair: each snowman can look entirely different!

3. Snowman Luminaries

As the nights grow colder, there’s something enchanting about a glowing snowman luminary lighting up your porch. To make these, use empty glass jars (like those leftover from your pasta sauce) and paint them with acrylic paint. Create a snowman face on the jar and place a tealight candle or battery-operated light inside.

These luminaries have been such a hit in our neighborhood, as they guide our friends and family to our front door during holiday gatherings. I love that we can get the kids involved in painting and decorating while also adding warmth and charm to our seasonal decor.

Tips:

  • Make sure to use proper paint to withstand the outdoor elements.
  • Try different sizes of jars for various heights and layers.

4. Snowman “Building” Kits

Who doesn’t love the idea of building their snowman? Although we live in a warmer climate, creating a snowman kit is a fabulous way to inspire fun during the holidays. Use a mix of small decorative items: pom-poms for noses, buttons for buttons, and small scarves made from fabric.

We made snowman kits a couple of years back and distributed them to our neighbors for a festive community meetup. Each family received their mini building supplies, and they had such a blast constructing their own unique snowmen during our get-together!

Tips:

  • Include directions for building your snowman—this adds a fun touch!
  • Package everything in clear bags tied with twine for a finished look.

5. Snowman-Themed Wreaths

Transform your front door into a frosty wonderland with a snowman-themed wreath. Start with a foam or wire wreath frame and wrap it with white tulle or cotton batting. Use additional embellishments like buttons, felt hats, and festive ribbons to complete your snowman look.

Making wreaths has become an annual sibling project every December, and it’s thrilling to see how much creativity they put into their designs. Last year, we attached mini evergreen branches to give our wreath a pop of natural color, which made our house feel even more inviting!

Tips:

  • Personalize the wreaths by adding family names or monograms.
  • Use waterproof materials if you plan to hang them outdoors.

6. DIY Snowman Mugs

Personalized mugs are perfect for hot cocoa or coffee on chilly mornings. You can create snowman mugs using plain white ceramic mugs and porcelain paint pens. Have the kids decorate each mug with snowman faces, complete with cheerful smiles and winter hats.

These mugs have become a holiday staple in our home. Each year, we sip hot drinks from mugs we’ve lovingly designed together, and I even consider selling a few at the local holiday market! They make wonderful teacher gifts or holiday favors.

Tips:

  • Cure your mugs according to the paint instructions to make them dishwasher safe.
  • Consider adding a packet of hot cocoa along with each gift mug for a thoughtful touch.

Conclusion

Crafting with your children during the holiday season is not only a great way to create joyful decorations but it also strengthens familial bonds and builds lasting memories. Each snowman craft can be uniquely tailored to your style, offering endless possibilities for creativity and fun. So go ahead, gather your supplies, and let your imagination run wild! This festive season, let the playful spirit of snowmen inspire you and bring a burst of joy to your home decor and community. Let’s embrace the whimsy and charm of winter, one craft at a time! Happy crafting!

Categories
Christmas

Budget-Friendly Christmas Decor: The Garden Style

Budget-Friendly Christmas Decor: Transform Your Home from Porch to Living Room and Beyond

The holiday season fills the air with a festive spirit, and nothing sets the mood quite like beautifully styled decor that reflects the joy of the season. However, decking your halls doesn’t have to break the bank! With a dash of creativity and a sprinkle of resourcefulness, you can transform your home—from the inviting porch to the cozy living room—into a winter wonderland that impresses family and friends without emptying your wallet. Let’s dive into some budget-friendly ideas that will not only elevate your space but also add warmth and cheer to your holiday celebrations.

1. Welcoming Your Guests at the Porch

The first impression matters, and your front porch is the gateway to your holiday spirit! Start with a festive wreath. You can easily craft one using natural elements like pinecones, holly, and twigs that you might find in your backyard or at a local park. Wrap some string lights around it for that twinkling effect that can be seen even when the sun sets early.

Don’t forget about cheerful welcome mats and seasonal accents! You can repaint old planters in holiday colors and fill them with winter blooms or evergreen branches. Even an inexpensive garland can be draped along the railing to create a visually captivating entrance. Adding a few handmade ornaments or decorations can make your porch truly stand out, inviting everyone to step inside and soak in the joyous atmosphere.

2. Cozy Up Your Living Room

Your living room is where all the holiday magic happens, and it’s easy to create a warm, inviting space with minimal expense. Start by layering textiles. A cozy throw blanket draped over the sofa or festive cushions featuring holiday motifs can instantly transform the room’s aesthetic. Visit thrift stores or shop at local markets for unique, second-hand finds that can add character.

Consider creating a DIY centerpiece for your coffee table. A simple glass bowl filled with ornaments, pinecones, or even seasonal fruit like oranges and pomegranates can add a pop of color. To enhance the ambience, sprinkle in some cinnamon sticks and star anise for a delicious festive aroma. Not only does this create a visual treat, but it also fills the air with delightful scents reminiscent of holiday kitchens.

3. Mindful Lighting for a Magical Atmosphere

Lighting plays a crucial role in holiday decor. Fairy lights are not just for the outdoor trees! Drape them around your mantel, weave them through a staircase banister, or even hang them on a large mirror to create an enchanting glow. You can score budget-friendly string lights from local shops or online sales.

For a unique twist, consider using candles. While traditional white or red candles are classic, mixing in some metallic or colored candles can add a touch of modern flair. Pair them with simple DIY candle holders made from glass jars adorned with twine or painted in festive colors. Group different heights and styles together for an impactful display that’ll illuminate your holiday gatherings.

4. Crafting Your Own Ornaments

Ornaments are a quintessential part of holiday decor, and crafting your own can be a fun and meaningful activity. Gather the family for an ornament-making evening using materials you already have at home. For instance, salt dough ornaments can be easily made using flour, salt, and water, shaped into festive designs, and painted once dried.

Alternatively, consider upcycling everyday items like dried orange slices, repurposed wine corks, or even old Christmas cards cut into shapes. These DIY ornaments add a personal touch to your tree and can spark conversations during your holiday get-togethers. Each ornament tells a story, reflecting your creativity and love for the season.

5. Festive Table Settings on a Budget

Your dining table deserves some holiday charm too! You can create an inviting atmosphere without investing in expensive tableware. Start with a neutral tablecloth or runner as your base, then layer textures with cloth napkins adorned with seasonal patterns.

Make place cards from natural materials like leaves or small branches, reflecting the beauty of winter. For an eye-catching centerpiece, gather items from nature – think winter berries, pinecones, or even small branches arranged in a mason jar. Drench them in snow spray for that magical winter feel, and your guests will be amazed at how inviting your table looks.

6. Adding Scent and Sound to the Season

Creating an amphitheater of festive scents and sounds can elevate your holiday decor experience. Simmer pots are an affordable way to fill your home with delightful aromas. Combine ingredients like water, orange peels, cinnamon sticks, and cloves in a pot on the stove for a homemade potpourri that embraces the joyous season, making your home not just look good, but smell exquisite too.

Meanwhile, adding seasonal tunes can engage the senses even further! Create a playlist of beloved holiday songs to accompany your decorations, dimming the lights for an extra cozy vibe. This simple addition is the perfect finishing touch to an inviting environment that encourages conversations, laughter, and cherished memories.

Conclusion

As you can see, transforming your home into a festive haven doesn’t require an extravagant budget; rather, it’s all about creativity, resourcefulness, and a thoughtful approach. From the welcoming porch that greets your guests, to the cozy living room where you gather for festive cheer, every corner of your home can embody the spirit of the season without any financial strain.

So, roll up your sleeves and get crafty this holiday season! Embrace these budget-friendly decorating ideas, and make this Christmas a beautiful celebration filled with warmth, love, and cherished memories that will last long after the decorations are put away. Happy decorating!