Categories
Outdoor

6 Rustic Backyard Decor Ideas for Cozy Jardines rústicos

I still remember the Sunday morning when my oldest decided the backyard was a pirate ship and the neighbor’s golden retriever was clearly the first mate. Between school runs, piano practice, and packing snacks for soccer, those small backyard rebellions are the moments I live for. As a mom in my forties with two kids aged eight and twelve, I love spaces that hold chaos and calm at the same time. A few years ago I started slowly reshaping our patch of grass into a place that invites play, fosters quiet reads, and sparks memories with neighbors over lemonade. Along the way I found inspiration from cozy interior looks and simple outdoor tricks that made our yard feel like an extra room. If you like an easy mix of function and charm, these ideas will help you bring warmth, character, and practical style to your outdoor life while keeping the kids front and center. For a peek at indoor-outdoor cozy vibes, I often flip through farmhouse bedrooms inspiration like this one: farmhouse bedrooms inspiration.

1. Reclaimed Wood Seating and Communal Table

There is something unforgettable about a weathered table where pizza gets messy and homework spreads out for a quick tutoring session. Reclaimed wood furniture brings a lived-in authenticity that fits rustic gardens perfectly. Why it works: the patina of old wood tells a story, hides scuffs from kids and pets, and blends seamlessly with plants and stone for a cohesive look. How to apply it: scout local salvage yards or buy reclaimed planks to build a long bench and a chunky table. Seal only where needed to protect against rot but leave enough texture to keep that farmhouse feel. In my yard, we moved the picnic table near the herb patch so my daughter can grab basil for pizza, and our neighbors often linger after weekend barbecues. This approach combines practical seating for family life with an aesthetic that feels intentionally loved rather than staged. It’s a top choice for anyone looking for home décor ideas that endure.

2. Winding Stone Paths with Native Planting

My son loves to race from the back door to the apple tree, and a clear, pretty path keeps the races neat and the grass intact. Stone or gravel paths rooted in curved lines add movement and a sense of discovery to any garden. Why it works: curves mimic nature, guide foot traffic gently, and create little pockets for plantings and seating. How to apply it: choose locally sourced flagstone or decomposed granite, lay a simple base, and stagger stones so grass can weave through. Add low-maintenance native perennials along the edges for seasonal color without constant fuss. Include flat stepping stones for scooters and safe play, and consider a slight slope for drainage. Our neighbors compliment the path every time they walk over; it makes even a short stroll feel like a mini-adventure. This project is a smart blend of decorating inspiration and practical landscaping that suits busy families.

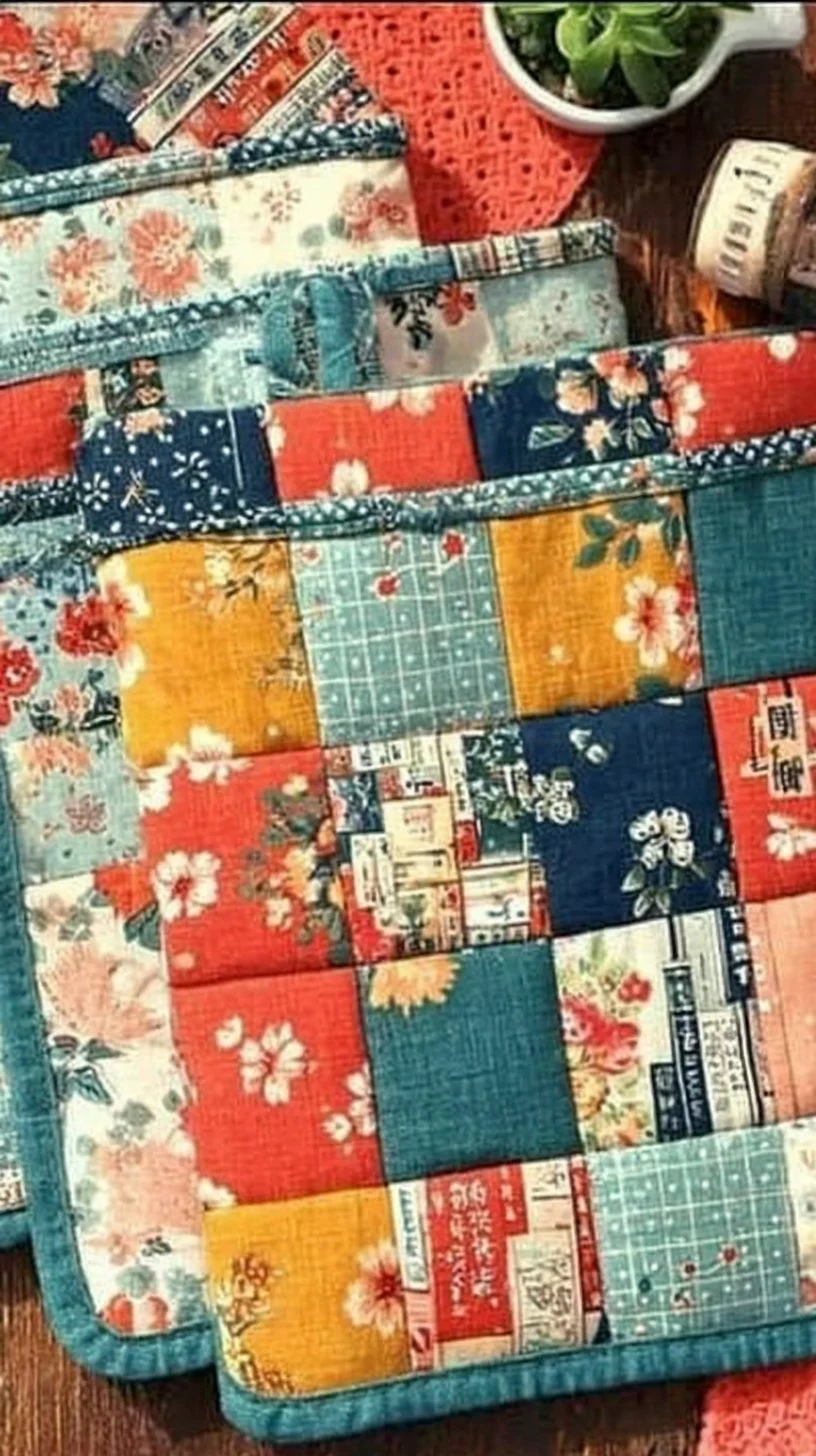
3. Vintage Containers and Layered Planters

We grew tomatoes in an old wheelbarrow the year my youngest decided gardening was a science project and a snack bar. Using vintage containers—metal tubs, terracotta, old crates—creates instant rustic charm and keeps plant care simple. Why it works: containers define spaces, raise beds for easier care, and let you experiment with color and texture. How to apply it: group different sizes on a patio or porch, line them with good soil, and mix edibles with ornamental plants to please both kids and adults. Seal metal containers to prevent rust stains, and use wheels on heavy pots so you can rotate them for seasonal sun. My kids have a tiny herb garden they tend themselves, which means fewer fights about watering the lawn. This idea pairs well with interior styling tips about mixing antiques and modern pieces to create a cohesive look that spans inside and out.

4. Soft Lighting with Mason Jars and String Bulbs

Evenings are my favorite time in the yard when homework is done and the glow of lights makes everything feel softer. Simple lighting transforms a functional yard into a cozy gathering place. Why it works: warm, layered lighting extends use of the yard after dark, creates ambiance for family dinners, and keeps play visible when kids are outdoors. How to apply it: hang weatherproof string bulbs across the seating area, and add mason jar lanterns with LED candles for tabletops and steps. Stake solar lights along pathways for subtle guidance. Make sure cords are out of reach of curious hands and that lights are rated for outdoor use. We string lights between the maple and the shed, and my kids do a little dance under them every evening. For playful, kid-friendly decor ideas that blur indoor comfort with backyard adventure, check out these backyard adventure ideas that inspired our treehouse corner: backyard adventure ideas.

5. A Rustic Pergola with Textiles and Climbing Vines

On rainy afternoons we still find shelter under the pergola, which feels like a second living room. A pergola adds vertical interest and becomes a framework for vines, fabric, and hanging lights. Why it works: it creates a defined outdoor room, offers dappled shade, and supports climbers that soften the structure over time. How to apply it: install a simple timber pergola over a patio or dining area, train vines like clematis or climbing roses up the posts, and drape outdoor curtains or layered textiles for extra privacy. Add cushions and weatherproof rugs to make it cozy for reading or family movie nights when the projector comes out. Our pergola has become the backdrop for birthday photos and quiet Sunday coffees. This solution is an elegant melding of decorating inspiration and practical shelter for family life.

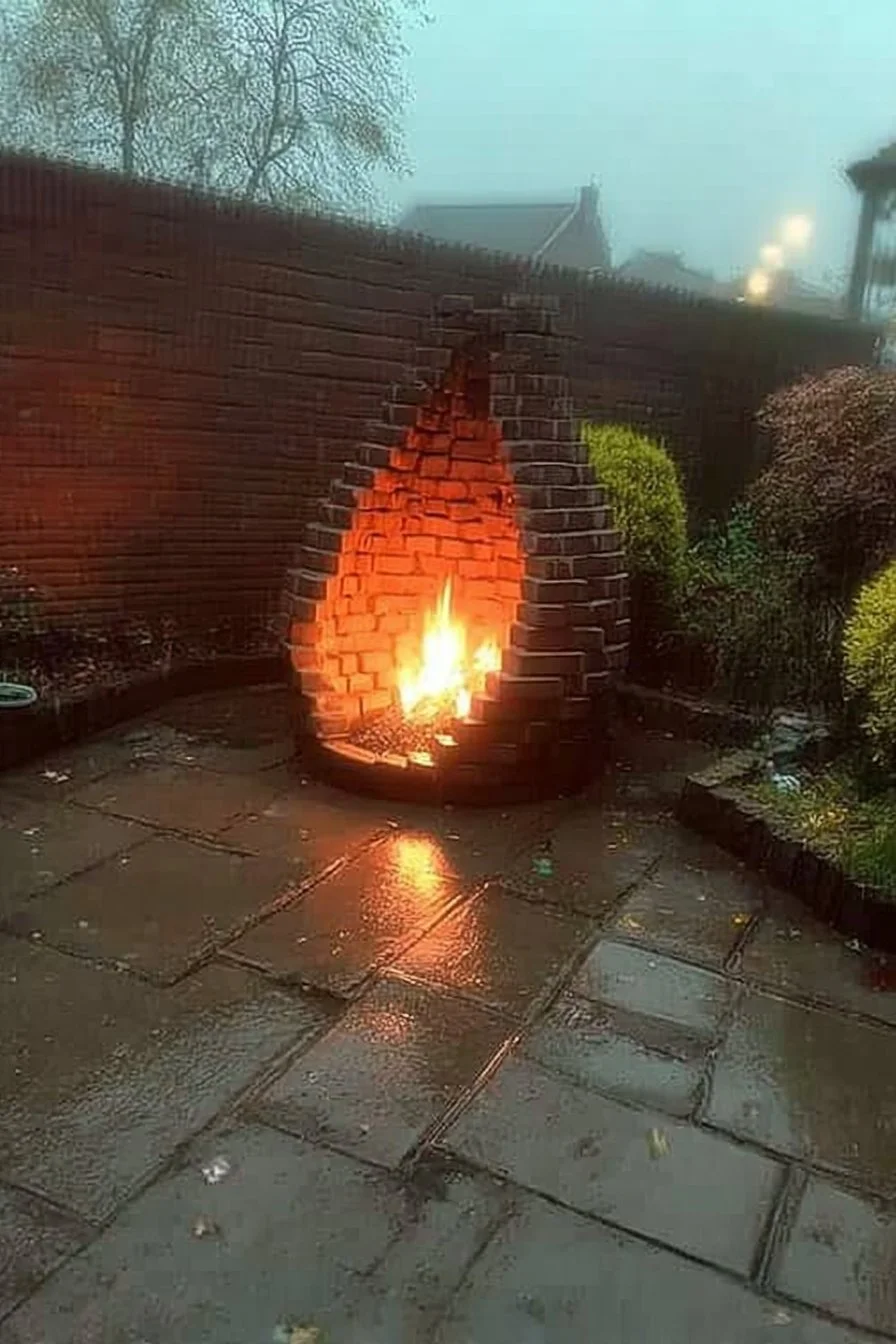
6. DIY Fire Pit and Cozy Seating Nook

We learned the value of a backyard fire the first time we roasted marshmallows and my shy neighbor stayed to chat for an hour. A small, safe fire pit encourages gatherings and storytelling. Why it works: a fire pit offers warmth, a focal point, and a reason to linger outdoors into cooler evenings. How to apply it: choose a pre-made metal pit or build a ring with fire-rated stones on a level, nonflammable surface. Surround it with comfortable, movable seating like benches with cushions, and keep a basket of blankets for chilly nights. Teach kids fire safety and always keep a bucket of water nearby. Our fire pit has been the setting for homework debriefs, s’mores experiments, and neighborhood singalongs. It’s a practical investment in family rituals and a classic touch of rustic charm that enriches evenings outside.

Conclusion

These rustic backyard ideas are about more than looks; they create spaces where families can play, relax, and make new memories while drawing on simple home décor ideas and decorating inspiration. Whether you start with a reclaimed table, a winding path, or a cozy pergola, small thoughtful choices build a comfortable outdoor life that reflects your style and supports everyday moments. For photo inspiration and more designs to spark your next project, browse Fotos de jardines | Diseños de jardines rústicos – Diciembre 2025 … on Houzz: Fotos de jardines | Diseños de jardines rústicos – Diciembre 2025 …. Save a few ideas, try one small project this weekend, and come back to tweak and grow the yard with your family.

Categories
DIY

Boho Bunny Wreath – A Wonderful Thought

Boho Bunny Wreath – A Wonderful Thought

Introduction

I remember the afternoon my daughter and son came home from school and insisted we hang something cheerful on the door. As an American mom in my forties, I love weaving family memories into our home décor, whether it is a pillow stitched by my mother or a small craft my son made in art class. My husband laughed as the kids arranged a little gallery by the entry, and my neighbors stopped by to admire it. Those warm, everyday moments are the kind of inspiration that make interior styling feel personal and alive. In this article I will share approachable decorating tips and creative ideas that help you bring the same cozy, lived-in charm into your home, with easy projects and styling cues that work for real families.

Embrace soft textures for a cozy boho look

One of the easiest ways to introduce boho charm is through texture. Layer woven ribbons, faux fur, macrame cords, and cotton tassels onto a wreath base to create depth. For a kid-friendly touch, use lightweight materials so the wreath hangs securely without risking damage if a child reaches up. Practical tip: start with a grapevine or foam base, then hot-glue or tie on textures in small sections so you can adjust balance as you go. Example: I used a strip of vintage linen from my mother’s sewing box and looped it around the base; my daughter then added felt flowers she made, which gave the wreath a handmade, family-friendly feel. These small, tactile details make the wreath inviting and encourage touch and conversation when guests arrive.

Play with neutral layers and gentle pops of color

Boho decorating often relies on neutral palettes with intentional color accents. For a wreath that blends into most interiors, begin with warm neutrals like cream, tan, and muted sage. Then add a single pop of color, such as a soft terracotta ribbon or a dusty rose bunny ear, so the piece feels curated rather than cluttered. Decorating tip: choose two neutrals and one accent color before you start. This guideline makes it simpler to shop and assemble, and keeps the design cohesive. I once helped a neighbor pick out accent hues that matched her living room throw pillows, and the wreath became a natural extension of her existing décor. This approach works well across entryways, above mantels, or as a subtle focal point on a gallery wall.

Mix natural materials for an authentic, earthy vibe

Incorporating natural elements makes a boho wreath feel grounded and versatile for everyday home décor. Think dried grasses, eucalyptus sprigs, willow branches, and wooden beads. These components add organic shapes and soft scents that enhance the sensory experience of your interior styling. Implementation tip: dry your own small sprigs from the garden or buy pre-dried bundles; they glue easily and last months with minimal shedding. Anecdote: my father used to leave bundles of dried lavender on our kitchen windowsill, and that scent now reminds me of family gatherings. When assembling, tuck natural bits into crevices and secure with floral wire so they sit flush against the base. The result is an artisanal wreath that reads as both modern and timeless.

Create a welcoming entryway with layered styling

A wreath is a great starting point for a welcoming entryway, but layering will elevate the entire space. Pair your boho bunny wreath with a textured runner, a small bench, and a basket of cozy throw blankets for guests to use when they come inside. Styling tip: keep scale in mind. If your wreath is large and fluffy, balance it with a simple doormat and minimalist bench. If it is delicate, add small sculptural pieces or a potted plant for visual interest. I often let my kids place one small seasonal or handmade object on the bench when friends arrive; their personal touches turn a styled vignette into a story. Use hooks or pegs to hang keys and jackets neatly, keeping the area both practical and pretty.

Personalize with family touches and practical decorating tips

The most meaningful décor tells a story, so personalize your wreath with small items that reflect your household. Clip a tiny photo charm, a child’s mini art card, or a charm from a family trip onto the wreath base. Practical ideas: use removable clips so you can switch items out easily for birthdays or school milestones. For safety, avoid small choking hazards if little ones are in the house. I once added a tiny wooden airplane my son painted, which became his favorite part of the entry. Cleaning tip: dust gently with a soft brush or use compressed air on low to keep fibers looking fresh. These personalizations make the wreath not just decorative but sentimental, encouraging family pride in your interior styling.

Styling the wreath for year-round appeal

Although many door wreaths feel seasonal, a boho bunny wreath can be styled for everyday use by focusing on neutral, timeless elements. Keep the base neutral and change just a few accents if you want a fresh look – swap ribbons, reposition a few sprigs, or add a new handmade tag. Decorating tip: store alternate accent pieces in a small box labelled with the wreath size so updates are fast and simple. For renters or those who like to switch things often, use command hooks for mounting and lightweight materials to avoid wall damage. I swap a ribbon after holidays and my husband comments how new it looks, even though the changes are subtle. This approach keeps your home décor feeling dynamic without overwhelming your schedule.

Conclusion

I hope these decorating tips and interior styling ideas inspire you to create a boho bunny wreath that feels both stylish and deeply personal. If you would like a walk-through or more inspiration, check out this resource: Boho Bunny Wreath – A Wonderful Thought. Try one or two small projects this weekend and enjoy how a simple wreath can bring warmth and family stories into your home.

Categories
DIY

Potholder and Hot Pad Set Tutorial

I still remember the rainy afternoon when I first taught my son and daughter how to sew a simple square with a zigzag stitch. We laid out scraps on the kitchen island while my husband brewed coffee and my mother called to ask how the grandchildren were doing. As a mom in my forties who takes pride in the warmth of our home and small traditions passed down from my parents, I love turning useful items into charming décor. With two kids between eight and twelve, projects need to be both safe and satisfying. Whether we are swapping fabric choices with the neighbors or I am showing my sister how to finish a corner, these projects become family stories. Here are practical, stylish ideas to make potholders and hot pads that elevate your kitchen decor while keeping everything cozy and functional.

Choose fabrics that speak to your décor

Picking the right fabric is the first interior styling decision. Think of potholders and hot pads as textile accents that should complement your overall home décor palette. If your kitchen leans toward neutral tones, select fabrics with subtle texture like linen blends or woven cottons in warm beige, gray, or soft blue. For a bolder look, go for printed cottons with graphic shapes or retro florals that echo other patterned elements in the room. Practical tip: use cotton or linen for the outer layers and add a heat-resistant batting or insulating layer inside. When I shop with my daughter, she always picks a playful print and I show her how to balance it with a solid binding. This small exercise teaches kids about color coordination and interior styling, and gives you potholders that look intentional on a hook or shelf.

Mix texture and pattern for visual interest

Layering different textures makes a simple kitchen accessory feel curated. Combine smooth cotton with nubby chambray, seersucker, or even a cotton blend with quilting texture. Patterns can play together too: pair a small-scale gingham with a larger botanical print to avoid visual competition. For practical sewing: cut one fabric for the front, another for the back, and use a sturdy binding fabric to frame the piece. Try quilting simple concentric squares or a grid to add dimension and hold the batting in place. I often let my son pick the quilting pattern and it becomes a tiny artwork for the stove area. This mix of texture and pattern ties the potholder into broader decorating themes like farmhouse chic or modern eclectic, offering a small yet effective decorating tip for cohesive kitchen decor.

Design placement and display as part of styling

Potholders and hot pads do double duty when displayed thoughtfully. Instead of hiding them in a drawer, hang them on hooks, stack them on open shelving, or arrange a trio by the kettle for instant visual warmth. Consider a color story: coordinate three matching or complementary pads on a wooden peg rail, or drape a single bright potholder over a vintage ladder styled against the wall. Practical hack: add a small loop at the corner for easy hanging and to create a consistent display line. I keep one near the stove for use and one displayed by the window; each time a neighbor drops by, they remark on the playful mix of fabrics. This is a simple way to incorporate functional decorating tips into everyday life and make usefulness part of your interior styling.

Add personalized embroidery and small embellishments

Personal touches make handmade hot pads feel like heirlooms. Embroidery, simple appliques, or monograms can transform a basic square into a treasured keepsake. Try small motifs like kitchen utensils, herbs, or a family initial stitched in contrasting thread. If you have kids, let them draw a design you can transfer and stitch together. For subtle style, use tone-on-tone stitching so the texture reads as elevated rather than busy. When I embroidered a tiny sprig for my mother’s birthday, she hung it in her kitchen and told every guest the story of our family sewing days. Practical note: use embroidery stabilizer when stitching on cushioned pieces and secure threads on the inside so they do not catch when you use the pad. These little additions make your pieces conversation starters and deepen the meaning of your home decor choices.

Coordinate sets and swap by seasonless themes

Sets create cohesion. Make two or four matching or complementary potholders and hot pads that tie in with your kitchen’s main textiles like towels and chair cushions. Think in terms of themes rather than seasons: coastal neutrals, vintage florals, modern geometrics, or rustic checks work year-round. For a polished presentation, wrap a set with twine and a kraft tag if you are gifting someone, or arrange them stacked on a countertop tray to serve as a purposeful vignette. My neighbor and I trade sets we make for each other; her bold geometric set brightens my backsplash and my neutral set softens her modern counter. Tip: label the storage drawer with fabric swatch samples so you can reproduce or add to the set later, keeping your decorating inspiration organized.

Practical finishing tips and maintenance

Good finishing makes your potholders both durable and decorative. Use reinforced topstitching around edges and a double-fold binding for strength. Insulating batting and a heat-proof layer protect hands and countertops; test your materials by holding the finished pad over a warm pot before gifting it. For care, wash cotton potholders on a gentle cycle and air dry to preserve shape and color. If a stain happens, spot treat with a mild detergent and a soft brush. Keep a small repair kit with matching threads and an extra fabric scrap for quick fixes. I once repaired a singed corner after my son accidentally held a pot too long, and the tiny patch became a charm in our storytelling. These small maintenance habits will keep your handmade items looking intentional and integrated with your home décor.

Conclusion

I hope these decorating tips and styling ideas inspire you to turn simple potholders and hot pads into meaningful home décor pieces that reflect your personality and family stories. If you want a step-by-step project to follow, check out this detailed Potholder and Hot Pad Set Tutorial on DIY Joy: Potholder and Hot Pad Set Tutorial – DIY Joy. Try a small set this weekend, involve the kids, and enjoy how a practical craft can brighten your kitchen and reinforce the warm, lived-in style of your home.

Categories
DIY

DIY Beaded Corn Fall Craft

I remember sitting at my kitchen table with a mug of chamomile, watching my eight year old son string beads while my ten year old daughter carefully selected colors. As an American mom in my forties, I love passing down small creative rituals that connect us to family stories and to the handmade things my mother taught me. My husband chips in when he can, and Grandpa stops by with old jars of beads he saved from his workshop. Those afternoons of quiet crafting with little chatter from the kids are how I learned to make simple pieces that feel like home. If you like warm, approachable decorating tips that welcome family participation, these beaded corn ideas will give you charming inspiration for interior styling, plus easy projects your kids can help with.

Materials and prep: what to gather for success

Start with basic, affordable supplies so this project fits any budget and home décor plan. You will need pipe cleaners or floral wire, an assortment of seed beads in various sizes, a sturdy base for each ear of corn such as a small styrofoam cone or rolled cardstock, and simple craft glue. For interior styling, pick bead finishes that match your palette: glossy neutrals for modern Scandinavian rooms, matte earth tones for rustic looks, or jewel tones for an eclectic vignette. Practical tip: sort beads into small dishes or muffin tins to keep little hands organized. If your children are helping, pre-thread a few sections or use larger beads to reduce frustration. This prep makes the craft doable and keeps the end result polished for display as home décor.

Beading techniques and color palettes that work with home décor

There are a few easy techniques to create textured, realistic patterns that elevate interior styling. Try stitching beads in rows around a cone or twisting beaded pipe cleaners to mimic kernels. Alternate sizes and finishes to catch light and add depth. For color palettes, imagine the room where you will display the piece: choose complementary tones to tie into pillows or artwork. A neutral living room benefits from warm amber and cream beads, while a bold gallery wall can handle turquoise and brass accents. Anecdote: my daughter mixed a metallic bead with a soft pastel and it became our favorite piece because it contrasted the sofa fabric in a delightful way. Small variations in technique create big visual interest that reads as thoughtful home décor rather than a craft project.

Styling beaded corn in living spaces and vignettes

These beaded ears are versatile accents for mantels, bookshelves, entry tables, or as part of a centerpiece. Group three different sizes at varying heights to create balance. Place them in a shallow bowl with polished stones or on a wooden tray with small candles to add texture. For an entryway, line a narrow shelf with beaded corn leaning against framed family photos for a curated look. Tip: coordinate with natural elements like fresh greenery or dried grasses to make the pieces feel integrated in the room. I once tucked a beaded ear into a decorative pitcher on a side table; neighbors complimented the subtle handmade touch during a casual visit. These styling tips make the beaded corn feel like purposeful interior styling, not just a craft left on a shelf.

Kid-friendly variations and family project tips

Turn this into a repeatable family activity that suits ages and skill levels. For younger kids, use larger pony beads and pipe cleaners so they can thread easily. Older children can try more intricate patterns or mix tiny seed beads for finer detail. Create a simple template or color key for each child to follow, or let them invent their own combination for creative freedom. Make it a weekend ritual: set out a “bead bar” with labeled jars and let the kids make one item while you work on a more complex piece. Practical safety note: supervise small beads around younger siblings and store extras in a sealed container. My son took pride in gifting a beaded ear to Grandma; it became a keepsake and a story we retell when she visits. These family-friendly approaches keep interior decorating collaborative and meaningful.

Display longevity and care to keep pieces looking fresh

Beaded items need a little care to stay beautiful. Avoid placing them in direct sunlight which can fade bead finishes. Dust gently with a soft brush or use a hairdryer on cool, low setting to blow dust away from crevices. If a bead comes loose, have a small repair kit on hand with glue and matching beads so kids can learn simple mending skills. For storage between uses, wrap each ear in tissue and keep in a shallow box to prevent crushing. Consider making a few variations in different color stories so you can rotate them through your home décor when updating pillows or wall art. A small investment in care keeps these handcrafted pieces looking intentional and integrated with your interior styling.

Conclusion

These beaded corn ideas offer approachable decorating tips and DIY inspiration that blend craft with thoughtful interior styling. If you want a step-by-step pattern to try with kids or to adapt for your own color scheme, check out this Beaded Pipe Cleaner Indian Corn tutorial for clear instructions and visuals. It is a useful resource when planning a family crafting session that results in polished home décor pieces you will enjoy displaying. Beaded Pipe Cleaner Indian Corn – One Little Project

Categories
Valentine’s Day

DIY Valentine Wreath

DIY Valentine Wreath Ideas for Timeless Home Décor

I still remember the sound of glue sticks and giggles at my kitchen table when my kids were little. Now, as a mom in my forties with a curious nine-year-old son and an imaginative eleven-year-old daughter, I love turning simple crafting moments into lasting home décor. My husband often teases me for saving every ribbon, and my mom will bring over jars of buttons from her childhood sewing box. Those small bits of family history shape the way I approach decorating: practical, warm, and full of story. When I want quick inspiration, I often revisit old holiday projects or browse a trove of craft ideas like these easy holiday projects and adapt materials for year-round wreaths. Below are approachable decorating tips that blend interior styling with family-friendly DIY charm.

1. Choose neutral materials for year-round appeal

A big trend in home décor is moving away from obvious seasonal cues and toward pieces that complement your interior styling any time of year. Start with a neutral base: grapevine, foam ring, or a simple wire hoop. Add eucalyptus sprigs, preserved olive branches, or dried pampas for texture. These elements look equally fresh on an entryway wall or as a backdrop on a kitchen cabinet door. Practical tip: secure heavier items with floral wire and use hot glue only where needed for longevity. I like keeping a small kit with extra wire, floral tape, and a hot glue gun in the pantry so my daughter and I can patch or refresh a wreath without calling for reinforcements. Neutral color palettes also make it easier to switch decor accents based on the room’s color scheme, which is a smart decorating tip for cohesive interiors.

2. Mix textiles for soft, welcoming texture

Textiles are an easy way to soften a wreath and tie it into your living room or bedroom décor. Think linen bows, cotton pom-poms, wool yarn tassels, and scraps of a favorite checked shirt repurposed into loops. In my house, I let the kids pick fabric scraps when we upcycle old clothing; it becomes a story every time someone notices the pattern. For interior styling, coordinate the textile colors with throw pillows or curtains to create a curated look. Actionable idea: make 3 to 5 small tassels and group them on one side of the wreath to create an intentional focal point. If you want a clean look, choose a single type of textile and vary the size rather than the color. These decorating tips keep the design modern while still feeling handmade.

3. Add personalized family touches

Personalization keeps decor meaningful and helps it blend into your home’s narrative. Try adding tiny family keepsakes like small wooden initials, a miniature frame with a candid photo, or a charm that represents a hobby. For a classic silhouette look, trace a child’s profile or an ancestor’s portrait and cut it from black cardstock to mount on the wreath for a vintage-inspired detail. If you want templates to guide your silhouettes, this silhouette tutorial and templates offers easy patterns you can adapt. My neighbors love seeing the small frames I switch out for birthdays or milestones; it makes a simple ring feel like a family gallery. Practical suggestion: protect photos with a clear craft laminate or mini plastic sleeves so they last without warping from humidity.

4. Embrace minimalist shapes for modern interiors

Minimalist wreaths are a staple in contemporary home décor because they pair well with clean lines and neutral palettes. Use a single material, like a bent metal hoop dressed with one continuous strand of beads or a loop of leather. Keep color to a minimum—one muted tone plus natural green or white—and focus on placement. A minimalist wreath looks striking above a console table with a single lamp or grouped in a trio of different sizes for a gallery effect. I once placed a slim, simple hoop on the inside of a pantry door and it instantly elevated the space without feeling fussy. Styling tip: measure your wall or door first so the wreath feels proportionate; small wreaths can get lost on large walls, while oversized ones overpower smaller spaces.

5. Make multi-functional wreaths for flexible decorating

Design wreaths that can do double duty around the home. A lightweight hoop adorned with removable accents is perfect for swapping looks from a front door to a dining room centerpiece. Consider a wreath that converts into a table centerpiece with a flat base or one that can be opened and laid flat to cradle candles or a small vase. For busy families, storage-friendly wreaths that collapse or hang on a slim hook are game changers. I teach my children to keep a labeled box with seasonal attachments and a list of where each wreath has been used; it saves time and keeps our decor consistent. Practical idea: attach small Velcro tabs to the back of decorative elements so kids can help update the look without tools. These decorating tips help you invest in pieces that support multiple rooms and uses.

Conclusion

If you enjoy crafting and want decorating inspiration that reflects your family and interior style, these ideas make it easy to create wreaths that feel timeless rather than seasonal. Start with neutral materials, add texture with textiles, personalize with family keepsakes, try minimalist shapes, and design for flexibility so your pieces work around the home. For more ideas and visual inspiration, check out this curated list of 30 Best Valentine’s Day Wreath Ideas – DIY Valentine Wreaths 2024. Pick one simple project to try with your kids this weekend and enjoy how a small handmade piece can warm up your whole room.

Categories
Valentine’s Day

DIY Valentines Wreath – Stacy Risenmay

I still remember sitting at my kitchen table with my son and daughter, scissors and glue all over the place, while my husband called from the garage and our neighbor waved hello. As an American mom in my forties, those small crafting moments feel like a thread that ties my childhood to my kids’ days now. My own mother used to make simple wreaths from fabric scraps, and I love passing that on. If you enjoy hands-on home décor projects that bring family together, this friendly guide will walk you through creating a wreath inspired by romantic motifs but styled for everyday interior styling. For a quick idea on silhouette shapes that work brilliantly on wreaths and wall art, take a peek at this tutorial I once used with the kids: silhouette tutorial and templates. These decorating tips will help you make something cozy, long lasting, and full of personality.

Choose a versatile base and shape

Start with the foundation and you are halfway to a timeless piece. Instead of committing to a highly seasonal look, pick a neutral base such as a grapevine, foam, or wire frame that can be restyled. Hearts are classic and elegant as a shape, but you can also use circles, ovals, or layered shapes to echo architectural lines in your home. Actionable tip: wrap a foam wreath with neutral linen ribbon for a sophisticated backdrop, then attach a smaller heart-shaped silhouette of reclaimed wood at the lower third for visual interest. Practical example: when my daughter wanted something less pink, we painted the wooden heart muted terracotta and added dried wheat for texture. For longevity, use pins and removable hot glue dots so you can swap elements without damaging the base. These tricks keep your home décor flexible and easy to refresh.

Layer textures for a cozy, designer look

Layering is where a simple wreath becomes a statement piece for your entryway or living room. Think velvet ribbons, woven trims, faux eucalyptus, and small clusters of preserved flowers. Tip: build from largest to smallest textures — base ribbon, medium-sized foliage, then finishing touches like metallic beads or tiny wooden hearts. A personal touch: my son loved adding tiny wooden buttons he painted; it became his signature on family projects. Practical implementation: arrange textures asymmetrically by clustering foliage on one side and leaving the other side more open for balance. This approach gives interior styling a curated feel without looking overworked. You will also find that mixing matte and slightly glossy finishes creates depth, which photographers and guests both notice.

Pick a color palette that fits your home décor

Color choices determine whether your wreath feels like a seasonal prop or an everyday accent. For home décor that blends with many rooms, choose a base of warm neutrals — warm ivory, soft taupe, or dusky gray — and add one or two accent colors like soft blush, deep burgundy, or a muted teal. Actionable suggestion: use a swatch of paint or fabric pulled from a nearby sofa cushion to ensure harmony. Anecdote: once I matched ribbon to a curtain stripe and the wreath suddenly looked intentional, like part of the room rather than an add-on. For bolder interiors, metallics like brass or pewter provide a touch of polish without screaming holiday. These decorating tips help you integrate the wreath into your overall interior styling plan.

Display and placement ideas that make an impact

Where you hang a wreath changes how it reads in your home. Over a mantel it becomes a focal point, in an entryway it offers welcoming charm, and in a breakfast nook it adds a cozy, conversational detail. Practical tip: use command hooks or decorative ribbon loops to hang the wreath at eye level for the room’s tallest person, usually about 60 to 66 inches from the floor in American homes. Another idea: create a gallery ledge where a small wreath leans against framed art for an easy, swap-friendly vignette. Family angle: involve the kids in choosing placement; my son loves the hallway because he can show friends. These placement tricks allow your wreath to serve as a lasting element of interior styling while offering fresh inspiration for other décor swaps.

Make it modular and kid-friendly for long-term use

Think ahead to storage, swapping, and repurposing so the wreath becomes a project that grows with your family. Use removable accents attached with loops or brooch pins so you can change color or motif without rebuilding the entire piece. Practical step: craft 3 to 5 detachable clusters — a neutral foliage cluster, a fabric heart cluster, a metallic ornament cluster — and store them in labeled boxes. This makes seasonal refreshes or themed updates easy without big time investments. Kid-friendly suggestion: assign small, safe tasks to your 8 to 12 year olds, like threading beads or arranging faux flowers; my daughter handles ribbon bows and feels proud of that role. These strategies keep your wreath practical, inspiring, and integrated into your home décor rotation.

Conclusion

I hope these decorating tips give you confidence to create a wreath that doubles as long-term home décor and family keepsake. For step-by-step inspiration and a full tutorial that sparked some of these ideas, visit DIY Valentines Wreath – Stacy Risenmay. With a few swaps in materials and color, a simple wreath can offer endless interior styling inspiration that feels personal and timeless.

Categories
Valentine’s Day

DIY Galentine’s Day Decorations: Easy Ideas for a Fun Party

I still remember setting up a little surprise for my best friends when I was a teen, sneaking streamers and candles while my parents slept. Now, in my forties with an energetic son and a thoughtful daughter aged nine and eleven, my Galentine gatherings are all about warmth, style, and easy living room magic that my husband and I enjoy as much as the kids when they tag along. I borrow a bit of that neighborhood potluck spirit from my sister and the tea-party touches my mother taught me, blending practical home décor with playful details. Whether I’m rearranging pillows after school carpools or borrowing a vase from my neighbor for a centerpiece, these decorating tips come from real life, not a showroom. If you like kid-friendly styling ideas too, check out this playful inspiration I used for a recent kids corner here.

Create inviting mood lighting with layers

Lighting transforms a room from ordinary to intimate. Start with three layers: overhead, task, and accent. Swap harsh bulbs for warm LED bulbs, and add plug-in sconces or table lamps around seating areas to create pockets of light. Use grouped candles of varying heights on a tray for a relaxed centerpiece; battery-operated candles work well if little hands are nearby. String globe lights across a mantel or along a bookshelf to add a soft halo that doubles as a photo backdrop. Practical decorating tips include a dimmer for the main light and inexpensive lamp shades in neutral fabrics to soften glare. For interior styling, choose bulbs with a warm color temperature and mix metals like brass and matte black for a curated look that still feels homey.

Mix-and-match tableware for effortless charm

You do not need a matching set to impress. Layer plates with a neutral charger, a patterned salad plate, and plain glassware to keep the table approachable. Fold cloth napkins and secure them with a ribbon or a small sprig of greenery for a personal touch. If you want to reuse items, designate a tray for drinks and another for snacks so guests can help themselves without crowding the table. Consider creating a color palette of two to three tones to guide dish and linen choices; this keeps the aesthetic cohesive even with mismatched pieces. These easy decorating tips keep your table ready for anything from a tea and chat to a full dessert spread.

DIY floral garlands and small statement pieces

A full flower wall can be impressive but a simple garland across a mirror or window is just as striking. Use faux blooms mixed with greenery for longevity, or purchase a few stems from the farmers market for fresh flair. I like to weave ribbon or twinkling lights into garlands for nighttime gatherings. For smaller statements, repurpose mason jars or short vases grouped at varying heights down the middle of a console table. Add a personal anecdote: my daughter helped me create a mini bouquet station once; the kids loved arranging little posies and it became part of the decor. These approachable decorating tips bring botanical charm into your interior styling without a florist budget.

Cozy seating zones for conversation and comfort

Arrange sofas and chairs to encourage conversation, not to face a TV. Pull furniture a bit closer and add layers of cushions and throws for touchable texture. Mix textures such as knit throws, velvet pillows, and woven baskets to store extra blankets. If space is tight, bring in floor cushions or poufs that tuck away easily afterward. Lighting and scent also play a role: a small diffuser on a side table and a warm lamp make seating feel intentional. For inspiration on creating a warm, welcoming seating area that borrows seasonal ideas without feeling seasonal, I often reference real-room styling tips like these guides. These interior styling approaches turn any living room into a guest-ready haven.

Personalized place settings and small favors

Personal touches make guests feel loved. Create simple place cards with kraft paper and calligraphy or print names on cardstock and tuck a small favor underneath, such as a single cookie or a mini candle. For a fun twist, pair each name with a short prompt for the night, like favorite memory or current obsession, to spark conversation. Use small bowls or ramekins for accents, and consider themed stickers or washi tape to coordinate. These decorating tips are budget-friendly and easy to assemble with the kids — my son once helped me stamp little tags for a party favor station and felt proud when guests admired his work.

Dessert and drink station styling that works for everyone

Set up a self-serve beverage and dessert station to keep traffic flowing. Use tiered trays for cupcakes and cookies, and a chic beverage dispenser for punch or iced tea. Provide small chalkboard signs that label offerings and call out allergens. Keep utensils and napkins in decorative containers, and place coasters near the drink area to protect surfaces. For a cohesive look, choose glass and metallic accents that echo the rest of your decor, and keep the backdrop simple so food pops visually. Practical tips include pre-portioning treats into pretty containers and using a cooling rack over a tray for hot items to prevent messes.

Conclusion

These simple, stylish Galentine party decor ideas blend home décor trends, interior styling know-how, and practical decorating tips so you can host with confidence and creativity. Try one or mix several ideas to suit your space and budget, and remember the best rooms feel lived-in and loved. For more playful activities and ways to celebrate with friends, see this list of 21 Fun Ways to Celebrate Galentine’s Day with Friends.

Categories
Valentine’s Day

Valentine’s Day Decorations for Home That Wow in 2026

I still remember the winter afternoon my daughter and son made paper hearts at the kitchen table, flour on their noses and my husband laughing in the background. As a mom in my forties with deep roots in our little town, I love how small touches can turn a house into a warm home. My parents taught me to celebrate family with simple style, and my siblings and neighbors are always swapping quick decorating tips. Between school runs for my 12-year-old son and 9-year-old daughter, I look for decorating ideas that are practical, beautiful, and a little playful. What follows are approachable interior styling tips to bring a fresh, inviting feel to your home—ideas that honor family memories yet feel modern and timeless.


Soft Palettes and Layered Textures

Create an inviting room with a soothing color story. Choose a base palette of warm neutrals or dusty pinks and layer on textures like boucle pillows, linen curtains, and a chunky knit throw. This approach builds depth without clutter.

Practical tip: start with a neutral sofa and swap pillows seasonally or for special occasions. I once covered a thrifted chair in a blush slipcover my sister sewed, and it instantly felt like a new centerpiece. Using varied textures adds warmth in living rooms and bedrooms while keeping the overall look cohesive with matching metals or wood tones.


Fresh Florals and Lasting Greenery

Fresh flowers brighten a room and add effortless elegance, but choose varieties that last or use quality faux stems for low maintenance. Opt for garden roses, ranunculus, or olive branches for a natural, cultivated look.

Try clustering small vases along a mantel or creating a single dramatic bouquet for the dining table. For homes with kids, sturdier stems like eucalyptus or hydrangea are ideal. My neighbor taught me to dry a few stems each year and keep them in a shadow box—a simple way to preserve memories and create a timeless keepsake display.


Statement Pillows and Throws

One of the fastest decorating tips is to update soft furnishings. A few statement pillows in rich fabrics like velvet, jacquard, or embroidered linen can refresh a sofa or bed.

Mix patterns like subtle stripes with florals in the same color family for harmony. Throws are practical and decorative; drape one over an armchair or fold at the foot of the bed. For high-traffic families, choose stain-resistant fabrics or washable covers. My kids love building reading forts with oversized cushions, so a durable, fluffy throw doubles as a cozy blanket and playful accessory.


Versatile Lighting for Mood and Function

Good lighting is essential to stylish, livable interiors. Combine ambient, task, and accent lighting to create layers.

A dimmable overhead fixture keeps the room flexible, while table lamps add intimacy for reading. String lights or a cluster of votive candles can soften corners and create a cozy atmosphere. Practical idea: add plug-in sconces near your bed for bedtime stories or homework help. Lighting instantly changes the mood and highlights your best décor choices.


Personalized Gallery Walls and Keepsake Displays

Gallery walls are a wonderful way to showcase family photos, art, and meaningful objects while practicing careful interior styling.

Mix frames of different sizes but keep a consistent mat color or frame finish for cohesion. Include a few non-photo pieces—like a child’s drawing, a pressed leaf, or a vintage find from your parents’ attic. Arrange layouts on the floor first or use paper templates taped to the wall to visualize spacing. I framed a school portrait and a watercolor my son painted, paired with a small brass mirror—the result felt curated and sentimental.


Tablescapes and Small Vignettes

Create focal points around your home with simple tablescapes and vignettes on consoles or mantels. Use a base element, like a tray or runner, then layer in items of varying heights: a candle, a stack of books, a sculptural vase, or a bowl of seasonal fruit.

Vignettes are perfect for trying new looks without committing to a full redesign. When guests visit, I swap a candle and a bowl of oranges for something more neutral to match the rest of my décor. For busy families, choose decorations that are easy to move or store so your everyday life stays functional.


Conclusion

These ideas are meant to inspire approachable, family-friendly home décor and interior styling that looks intentional without being fussy. Try one small change this week—swap a pillow, rearrange lighting, or frame a child’s drawing—and notice how quickly a room feels refreshed.

For more inspiration and a collection of creative decorating tips, check out 37+ Valentine’s Day Decorations For Home That Will Instantly Wow. Happy decorating—may your home always feel welcoming to family, friends, and the small moments that make life beautiful.

Categories
Valentine’s Day

Valentine’s Day Crafts to Make and Sell

I remember a rainy Saturday when my kitchen table doubled as a workshop and my children, ages 9 and 11, painted tiny wooden hearts beside me. As a forty-something American mom who loves family traditions, I learned to turn small moments into marketable crafts while my husband brewed coffee and my parents called to ask what we were making next. Those afternoons taught me that approachable decorating pieces sell because they feel personal and useful. Whether you are selling at a local market or styling your own home, these DIY ideas blend charm, functionality, and cozy home décor inspiration.

Upcycled Fabric Heart Pillows: Cozy Accents That Sell

Start with thrifted sweaters, canvas drop cloths, or torn curtains and turn them into heart-shaped pillows that look intentional, not holiday-only. Trim fabric into a simple heart shape, sew with a visible topstitch, and stuff with polyfill or upcycled batting.

Practical tip: use neutral colors and textured fabrics like linen or chunky knit to match modern interiors. Add a small loop so buyers can hang them on hooks or knobs. Bundle complementary colors for higher perceived value and show styling photos on a simple wood bench to inspire buyers.

Embroidered Hoop Wall Art: Affordable Personalized Pieces

Embroidery hoops make accessible wall art for a range of tastes. Choose neutral linen or cotton and stitch simple motifs: initials, small florals, or heart outlines. Offer custom names or short phrases for an extra fee.

Pro tip: finish the back with felt and twine for hanging. Display sets of three hoops in varied sizes to show how buyers can create a polished vignette. Stick to muted palettes like terracotta, sage, and warm cream to align with current home décor trends.

Decorative Mason Jar Arrangements: Rustic and Versatile

Mason jars are timeless and adapt to trends easily. Paint jars in soft matte shades, wrap with twine or leather, and fill with dried botanicals, faux stems, or scented stick diffusers.

These pieces work as table centerpieces, bathroom organizers, or shelf accents. Offer personalization options like chalkboard labels or add votive candles for ready-to-gift sets. For a modern look, try ombre or metallic-dipped bases, and style them on reclaimed wood trays or floating shelves.

Hand-Painted Trays and Wood Signs: Functional Art

Serving trays and small wood signs combine decorative and practical value. Use unfinished wood blanks, sand smooth, and apply paint or stain. Simple typography or a minimalist heart motif creates items buyers will use in entryways, coffee tables, or as plant stands.

Offer coordinating sizes to let customers layer trays with candles or ceramics. Share styling tips in product photos—like pairing a tray with books and a plant—to give shoppers decorating inspiration.

Scented Soy Melts and Minimalist Candle Displays: Scents That Sell

Hand-poured soy melts and candles feel like luxury decor. Use minimalist containers like matte porcelain, recycled glass, or concrete vessels. Offer subtle fragrances such as linen, cedar, or vanilla.

Bundle candles with branded match tins or small wooden wicks, and demonstrate safe display options. Show how a candle on a saucer with greenery can become a simple, balanced vignette.

Layered Textures with Felt Garlands and Tassel Pillows

Add tactile interest with felt garlands, oversized tassels, and tassel-trim throw pillows. These items are easy to ship and appeal to shoppers focused on cozy interiors.

Styling tip: drape a garland over a bookshelf or headboard, or place a tassel pillow on a sofa. Offer coordinating sets—like a pillow plus a small garland—to encourage multiple purchases. Short personal stories about your own decorating successes make listings more relatable.

Conclusion

Turning crafts into appealing home décor is about selecting materials, colors, and finishes that fit everyday interior styling. Try a few of these DIY projects at craft fairs, online shops, or around your home. Clean, styled photography will help buyers visualize each piece in their own space.

For more inspiration, see The Best Valentine’s Day Crafts to Make & Sell – What Mommy Does. Enjoy creating projects that bring warmth, style, and joy to other homes!

Categories
Valentine’s Day

8 Easy Dollar Tree Valentine DIY Projects for Cozy Home Décor

I still remember the afternoon my son and daughter spread their crafts across the kitchen table while I brewed coffee. As a mom in my forties, I love turning simple, budget-friendly finds into meaningful pieces that make our home feel warm and layered. My husband smiles at the little vignettes the kids and I create, and neighbors often stop by for a quick cup and a decorating tip. These 8 Dollar Tree DIY projects are perfect for adding cozy Valentine touches to your home without spending a fortune.

1. Mini Statement Accents: Trinket Trays and Candle Holders

Transform inexpensive trays, plastic frames, or small wood plaques into chic accents. Paint a Dollar Tree tray in matte white or soft greige, then apply gold leaf or metallic rub to the edges for a hint of luxury. For candle holders, glue small glass votives onto a painted wood slice and add faux moss or white pebbles for texture. Use removable adhesive for easy cleaning, and display with a small stack of books or a bud vase to create a curated nightstand or coffee table vignette.

2. Farmhouse Flair: Mason Jar Makeovers and Rustic Signs

Repurpose mason jars into farmhouse-style containers. Sand lightly, distress edges, wrap with twine, and fill with dried stems, eucalyptus, or faux greenery. For rustic signs, paint Dollar Tree wood plaques, add simple lettering, and stain edges. These pieces work beautifully on shelves or mantels and are perfect for teaching kids basic crafting skills while adding texture to your interior styling.

3. Functional Style: Entryway Catch-Alls and Tray Displays

Create entryway organizers with shallow baskets or decorative boxes lined with fabric scraps or patterned contact paper. Use a painted clipboard as a mail sorter and attach a small cup for pens. Assemble tray displays with a candle, a small plant, and a dish for daily essentials. Keep a consistent color story for entry zones and involve kids in placing items to keep the space tidy and intentional.

4. Wall Art and Gallery Styling: DIY Prints and Collages

Use inexpensive frames and printable art to build a cohesive gallery wall. Mix typography prints, watercolor swatches, and family photos mounted on colored cardstock. For collages, arrange small shelves and floating frames together, balancing negative space and textures. Layering art with a leaning frame on a console adds dimension and shows thoughtful interior styling without spending a lot.

5. Natural Textures and Greenery: Baskets, Faux Plants, and Wreath Basics

Add warmth with woven baskets, faux olive branches, and potted succulents. Paint Dollar Tree baskets or leave natural for texture contrast. For simple wreaths, wrap foam rings with burlap or twine and tuck in faux stems or berries. Faux greenery keeps styling low-maintenance while still adding balance and charm to your spaces.

6. Heart-Themed Table Centerpieces

Arrange shallow trays with small vases, painted wooden hearts, and tea lights for a Valentine’s-themed table centerpiece. Use items you already have, such as mason jars, dried flowers, or pebbles. Coordinate colors with your dining room palette, and keep arrangements low to maintain conversation flow. Kids can help pick stones or tie ribbons for a personal touch.

7. DIY Wall Hanging Banners

Create simple banners using scrapbook paper, fabric scraps, or felt. Cut heart shapes or letters, string them on twine, and hang above mantels, windows, or reading nooks. Swap pieces seasonally or whenever your child brings home a new favorite creation. This adds a playful yet stylish touch to walls without permanent changes.

8. Upcycled Candle and Jar Décor

Turn old jars into charming candle holders or storage pieces. Paint with chalk paint or spray paint, wrap with ribbon or twine, and fill with votives or small decorative items. Group jars of different heights on trays to create a layered look. This simple project adds cozy charm and can be rotated for other holidays or seasons.

Conclusion

These 8 Dollar Tree Valentine DIY projects show how small, budget-friendly touches can transform your home into a warm, inviting space. From gallery walls and table centerpieces to functional organizers and cozy accents, each project combines creativity with practicality. Try one or several this weekend, involve the kids, and enjoy crafting pieces that bring love and style into every corner of your home.