


I still remember the afternoon my kids turned my kitchen table into a makeshift craft studio, flour on one side and a potholder loom on the other. I’m a mom in my forties, proud of the small-town values my parents taught me, and I love sharing hands-on projects with my son and daughter, who are 8 and 11. My husband will bring down a tray of lemonade while the neighbors’ kids stop by to admire our colorful squares. Those afternoons echo memories of my own childhood, sitting with my aunt as she showed me how to finish edges neatly. Finishing a potholder loom is a cozy, satisfying ritual that gives you a usable piece and a touch of handmade charm for your home décor. I’ll walk you through thoughtful, practical finishing techniques that add durability and style while fitting into modern interior styling and decorating tips.
Choose the right finishing edge for style and strength
The edge you pick determines both the look and longevity of your potholder. Popular finishes include whipstitch, overcast stitch, braided fringe, and a neat crochet border. For a kitchen that leans toward farmhouse or cottage-core, a simple whipstitch with matching cotton yarn gives a tidy, homey finish. If your interior styling favors boho or eclectic looks, add a braided fringe on two sides for texture.
Actionable tips:
- Use a needle large enough for your yarn to avoid snagging. I teach my kids the whipstitch first because it’s forgiving and fast.
- Match your border color to a dominant tone in your kitchen to make it feel intentional as part of your home décor palette.
- For strength, stitch through both layers at the edge so the potholder can handle frequent use and washing.
A neat border turns a plain square into a decorative item you won’t be afraid to display on hooks or arrange on open shelving.
Add a practical backing for durability and visual appeal
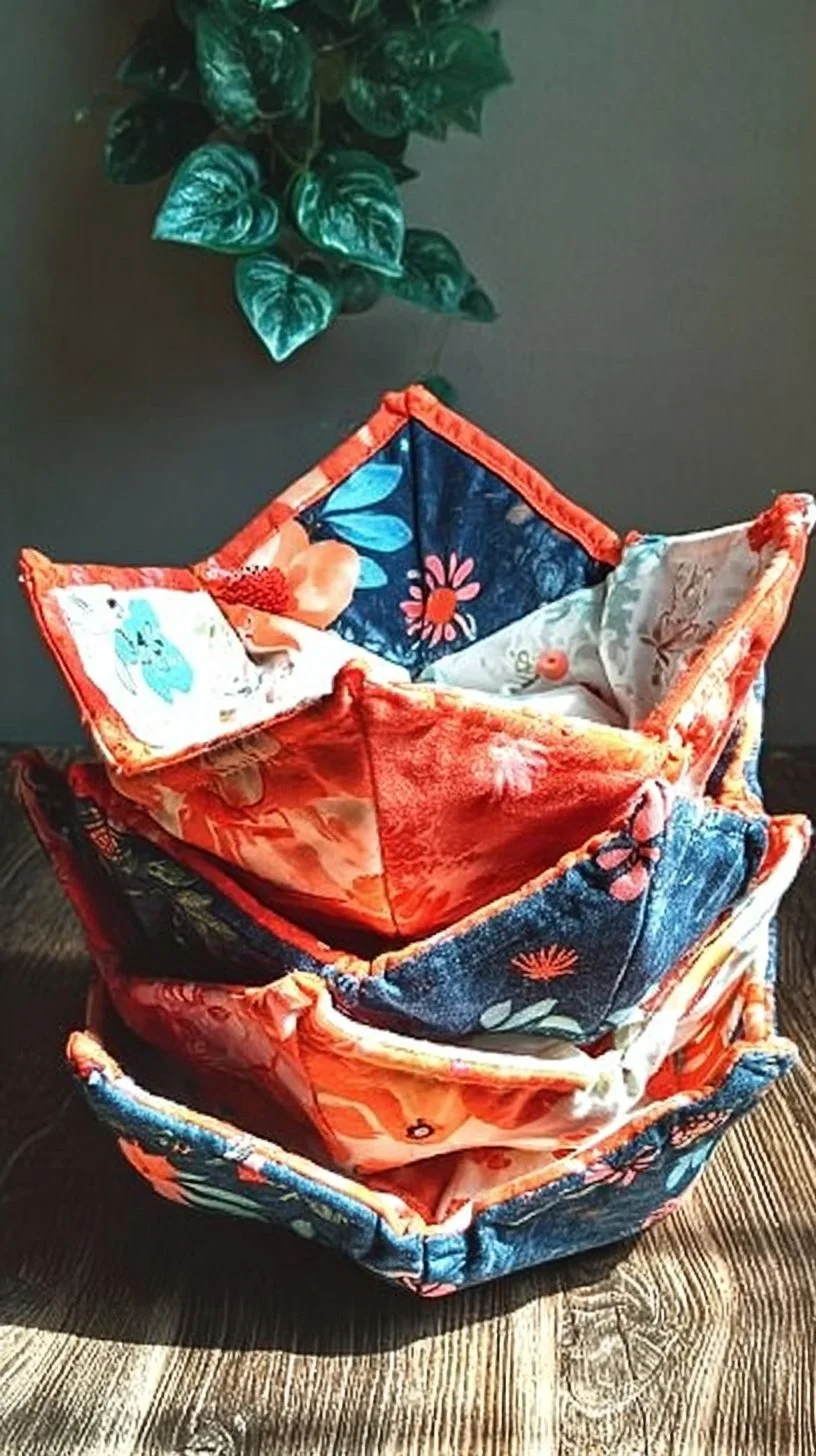
A backing protects the weaving and gives the potholder a polished look. You can hand-sew a cotton fabric backing, use felt for insulation, or quilt a thin layer for extra thickness. Fabric backing also lets you coordinate with placemats, napkins, or curtains for cohesive decorating tips across your kitchen.
Practical steps:
- Cut the backing slightly smaller than the woven square to avoid corners peeking out.
- Use a short, tight stitch to secure the fabric to the weaving; this prevents bunching after washing.
- If you want more heat resistance, add a layer of cotton batting or sew in a small square of insulated fabric inside.
I often let my daughter pick scraps from my sewing box to create playful, personalized combinations. The backing not only improves function but also ties your potholder into your overall interior styling.
Create a hanging loop or tab that complements your decor
A small loop turns a potholder into both a tool and a display piece. Think of it as a dual-purpose finishing touch that makes your potholder accessible and part of the room’s look. Choose a loop made from matching yarn, leather cord, or a small ribbon that echoes the room’s aesthetic.
How to do it:
- Secure the loop into the edge when you finish the border so it is anchored to multiple stitches.
- Reinforce the attachment by stitching through the loop base several times, or add a small backing patch for extra strength.
- Position the loop in a corner for a traditional look, or centered on one side for a modern display.
I hang a set of three coordinated potholders on a slim wall peg near my stove — they’re practical and create a colorful vignette that fits my home décor inspiration.
Block, trim, and wash for a professional finish
Blocking and gentle washing make a handmade potholder look like it came from a boutique. After finishing the edges, trim stray yarn ends close to the fabric but not so close you risk unraveling. Blocking evens the shape and helps the border sit flat.
Steps to follow:
- Lightly dampen the potholder and pin it gently to a flat towel to shape it, letting it air-dry fully.
- Trim loops or uneven yarn with sharp scissors, keeping the cut clean.
- Wash gently by hand or on a delicate cycle in a mesh bag; reshape while damp to maintain the edges.
These finishing touches create a polished item that stays attractive through use. I always show my kids how blocking smooths out their projects — it’s a satisfying bit of magic for little makers.
Style potholders into everyday home décor and inspiration
Think beyond utility and let potholders add charm to shelves, hooks, and tablescapes. They work as small placemats under hot dishes, layered coasters for a casual coffee station, or framed as textile art on a gallery wall that highlights craft and texture. Match them to your kitchen’s color story, or use them as little pops of pattern against neutral countertops.
Practical styling ideas:
- Group several in a row on a peg rail for a curated, artisanal look.
- Rotate color families to refresh visual interest without a full redecorating effort.
- Use sets to echo other textiles such as tea towels or chair cushions for cohesive interior styling.
When friends drop by, these small handmade touches often spark conversations about technique and tradition. For a home that blends function and design, potholders are a delightful way to weave personal craft into everyday decorating tips.
Conclusion
Finishing a potholder loom well gives you a useful piece and a tiny canvas to express your home décor style. If you want a clear, hands-on tutorial with photos and step-by-step finishing methods, check out The Best Way to Finish Handwoven Potholders – Big Green Chair. Try a few different edges, backings, and display ideas until you find combinations that fit your kitchen and interior styling. With a little patience and practice, you’ll have durable, attractive potholders that add warmth and inspiration to your home.
0 Comments