
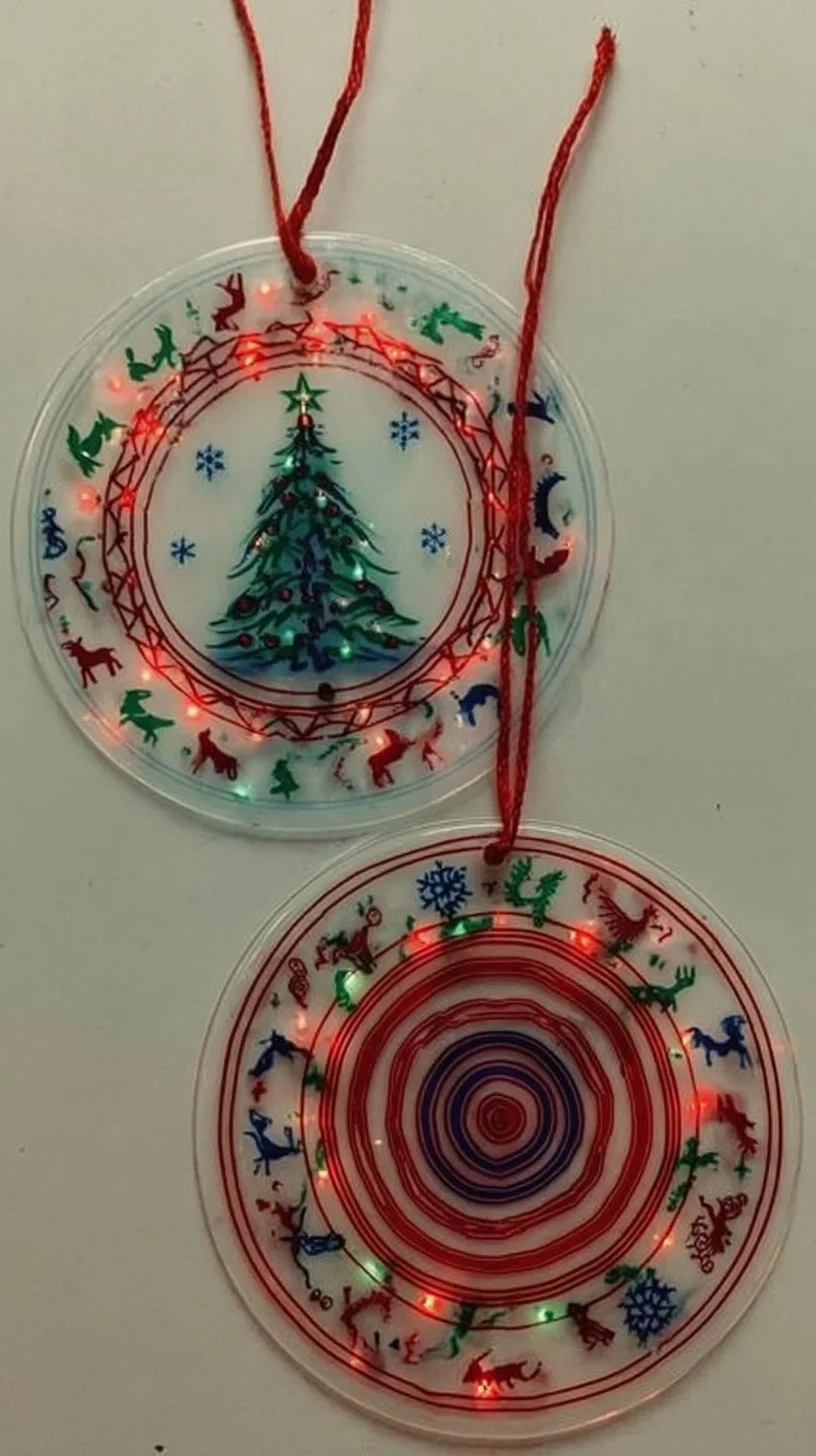


Here’s How You Make Those Viral Plastic Cup Ornaments
I remember the late afternoon light in our kitchen, when my two kids were sprawled across the table, markers and glue in little piles, and I was trying to carve out a quiet creative hour between pizza practice and homework. As an American mom in my forties, raised by parents who loved weekend craft fairs, I find joy in turning ordinary things into something special. My son, who is ten, and my daughter, who is nine, love making projects that end up on display, not shoved in a drawer. My husband cheers us on, and sometimes our neighbor drops by with a cup of coffee and a compliment. Those simple, joyful sessions inspired me to try plastic cup ornaments for our home décor. They are budget-friendly, kid-approved, and surprisingly chic when styled right.
Why plastic cup ornaments are a fresh home décor trend
Plastic cup ornaments are part of a tiny revolution in accessible interior styling. People are looking for inexpensive, sustainable ways to refresh a room without buying mass-produced objects. These ornaments take disposable cups and transform them into sculptural accents that add personality to shelves, mantels, and window nooks. They fit perfectly into current home décor trends that value upcycling and handmade details. Use them as grouped vignettes, hanging mobiles, or shelf-sized sculptures. Practical tip: keep a small bin for clear and colored cups so you can mix transparencies. Example: I grouped three translucent ornaments on a bookshelf next to my favorite coffee table book; the light caught them and suddenly a plain shelf looked curated. This is the kind of decorating tip that reads expensive but costs next to nothing.
Materials and the basic technique anyone can follow
You do not need fancy supplies to start. Basic materials include clear or lightly tinted plastic cups, scissors, a hole punch or heated needle for hanging holes, acrylic paints or permanent markers, glue for embellishments, and twine or ribbon for hanging or display. Start by deciding on a shape: cut petal shapes to create a floral orb, or stack rim-to-rim to build layered spheres. A practical tip: warm the scissors under hot water before cutting the plastic for smoother edges. Safety note: supervise kids and handle hot tools yourself. Anecdote: my daughter loved choosing the color palette, while my son got obsessed with counting the number of petals for symmetry. For durability, coat painted areas with a matte clear sealer so the finish withstands handling and dust. This is a simple DIY that gives immediate decorating inspiration.
Color, texture, and finishing touches for professional results
Color and texture will elevate these ornaments from craft to design. Choose a cohesive palette that matches your room’s tones: soft neutrals for a Scandinavian look, jewel tones for a boho edge, or metallics for a modern vibe. Try sanding cup rims lightly to create frosted edges, or use alcohol ink to achieve marbled effects. Tip: use a sponge brush for translucent washes of paint so light still passes through. For texture, glue thin strips of lace, yarn, or even natural fibers like jute to the outer edges. Example: I painted a set of cups in a warm sage and applied a gold leaf highlight to the rim; they became the focal point on my mantel. These finishing touches are the decorating tips that make upcycled items look intentional and styled.
Styling ideas for everyday rooms and unexpected places
Think beyond the tree. Plastic cup ornaments work in the entryway above a console, clustered in a pendant-style mobile over a reading chair, or grouped on a coffee table tray as a sculptural set. Try hanging a small trio at varying heights in a narrow hallway to add vertical interest. For kitchen styling, use them as lightweight hanging planters for air plants. Practical tip: use removable adhesive hooks for temporary displays so walls stay damage-free. Personal example: I hung a set in front of our kitchen window; when I stew tomato sauce for dinner the warm light through the ornaments looks like tiny stained glass accents. These are easy decorating tips for everyday inspiration that refresh a room without a full redesign.
Kid-friendly variations and how to turn this into a family project
This craft is perfect for a casual family afternoon. Set up stations: one for cutting, one for painting, and one for assembling. Encourage children to experiment with stickers, glitter, and washi tape rather than tiny beads that can be choking hazards. Tip: pre-cut shapes for younger children so they can focus on decorating. Make it a learning moment by measuring cup rims, counting petals, or exploring color mixing. Anecdote: my son loves symmetry and insisted each ornament have an even number of petals, while my daughter preferred glitter-heavy designs. At the end, take photos of each creation and pin them to a family inspiration board. These personalized ornaments become little keepsakes that tell a story on your shelves.
Mixing with other décor and care for lasting display
Combine plastic cup ornaments with candles, ceramics, and books to create layered vignettes. Use varying heights and textures to build contrast. Tip: place a small felt pad under ornaments that sit on wood surfaces to avoid scratches. For hanging displays, choose clear fishing line for an invisible effect or braided twine for a more rustic look. Cleaning is easy: dust with a soft cloth and avoid harsh chemicals that may dull painted finishes. Storage tip: nest ornaments with tissue paper between them to prevent scratching. Example: after a weekend of crafting we stored extras in a labeled bin in a closet; the next time I redecorated, pulling them out felt like discovering new ornaments all over again.
Conclusion
I hope these decorating tips inspire you to try plastic cup ornaments as a creative addition to your home décor. They are a fun, budget-friendly way to bring handmade charm into everyday spaces, and they make excellent family projects that result in meaningful, display-ready pieces. If you need a cozy break while crafting, I often take a little baking pause and follow this recipe for a sweet treat: Here’s How To Make The World’s Greatest Chocolate Chip Cookies. Try one idea today and let your interior styling tell a story that is uniquely yours.
0 Comments